Blog Barista: Sam Nadarajan | February 11, 2020 | Developer Tools | Brew time: 7 min
Welcome back to the Jira 101 series. If you’ve been following along, then you should now have a basic understanding of Jira’s core concepts and terminology, know how to navigate the issue detail view, and perform robust searches on issues within Jira. In today’s post, we will take a closer look at one of the core concepts that we briefly touched on in Part 1—boards.
Remember that boards represent an access point into issues for your project. Boards are available for Jira Software and they can be configured to include one or more Jira projects. All boards come with a screen that displays vertical columns for moving issues back and forth, depending on the configuration.
Note: The figures illustrated in this post are from Jira Server 8.5. Your interface may appear slightly different depending on your organization’s Jira configuration.
Board Layouts
All boards have two different layouts: a backlog layout and a board layout.
Backlog View Layout
The backlog layout serves as your staging area for moving issues into sprints or into a “ready for development” status. Planning and refinement activities will occur within this view. Here’s an example of what you will see:
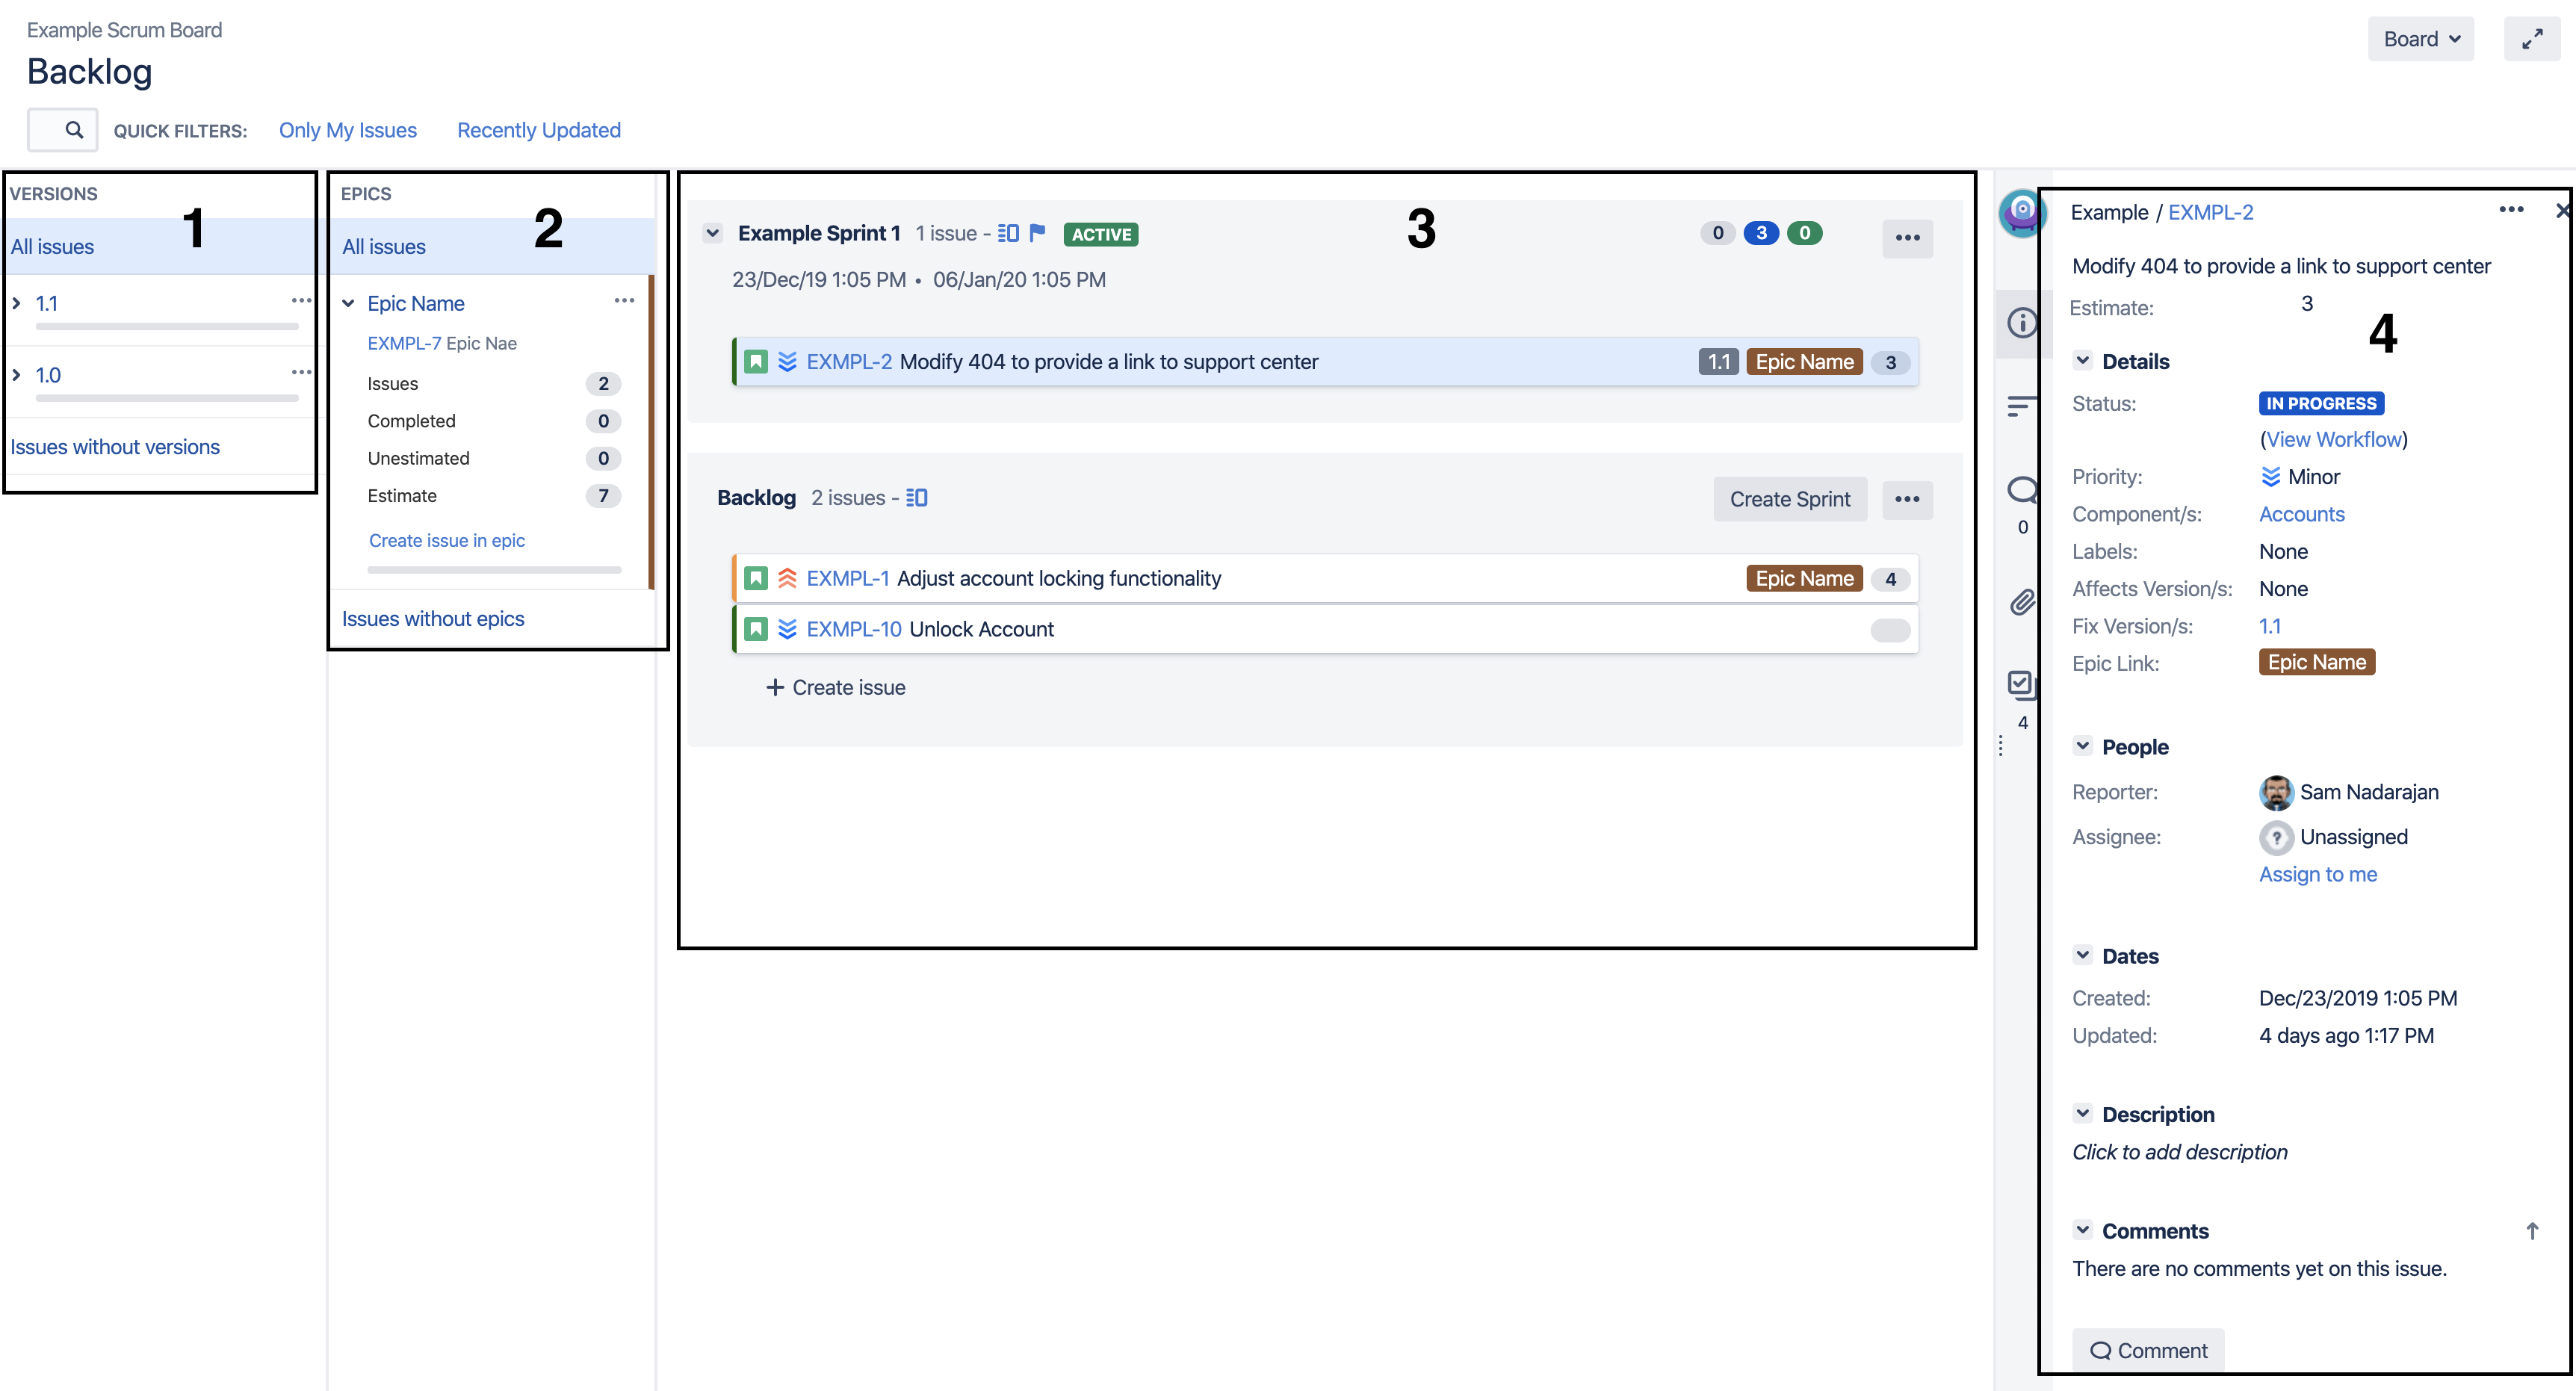
The illustration above shows a backlog view for a Jira board with a versions panel (1), an epics panel (2), the backlog section (3), and an issue detail preview (4).
There are a number of different items that can be configured by your board administrator to make the backlog view more manageable and efficient for your team. Illustrated below is an example of some configurations that can be implemented in the backlog view:
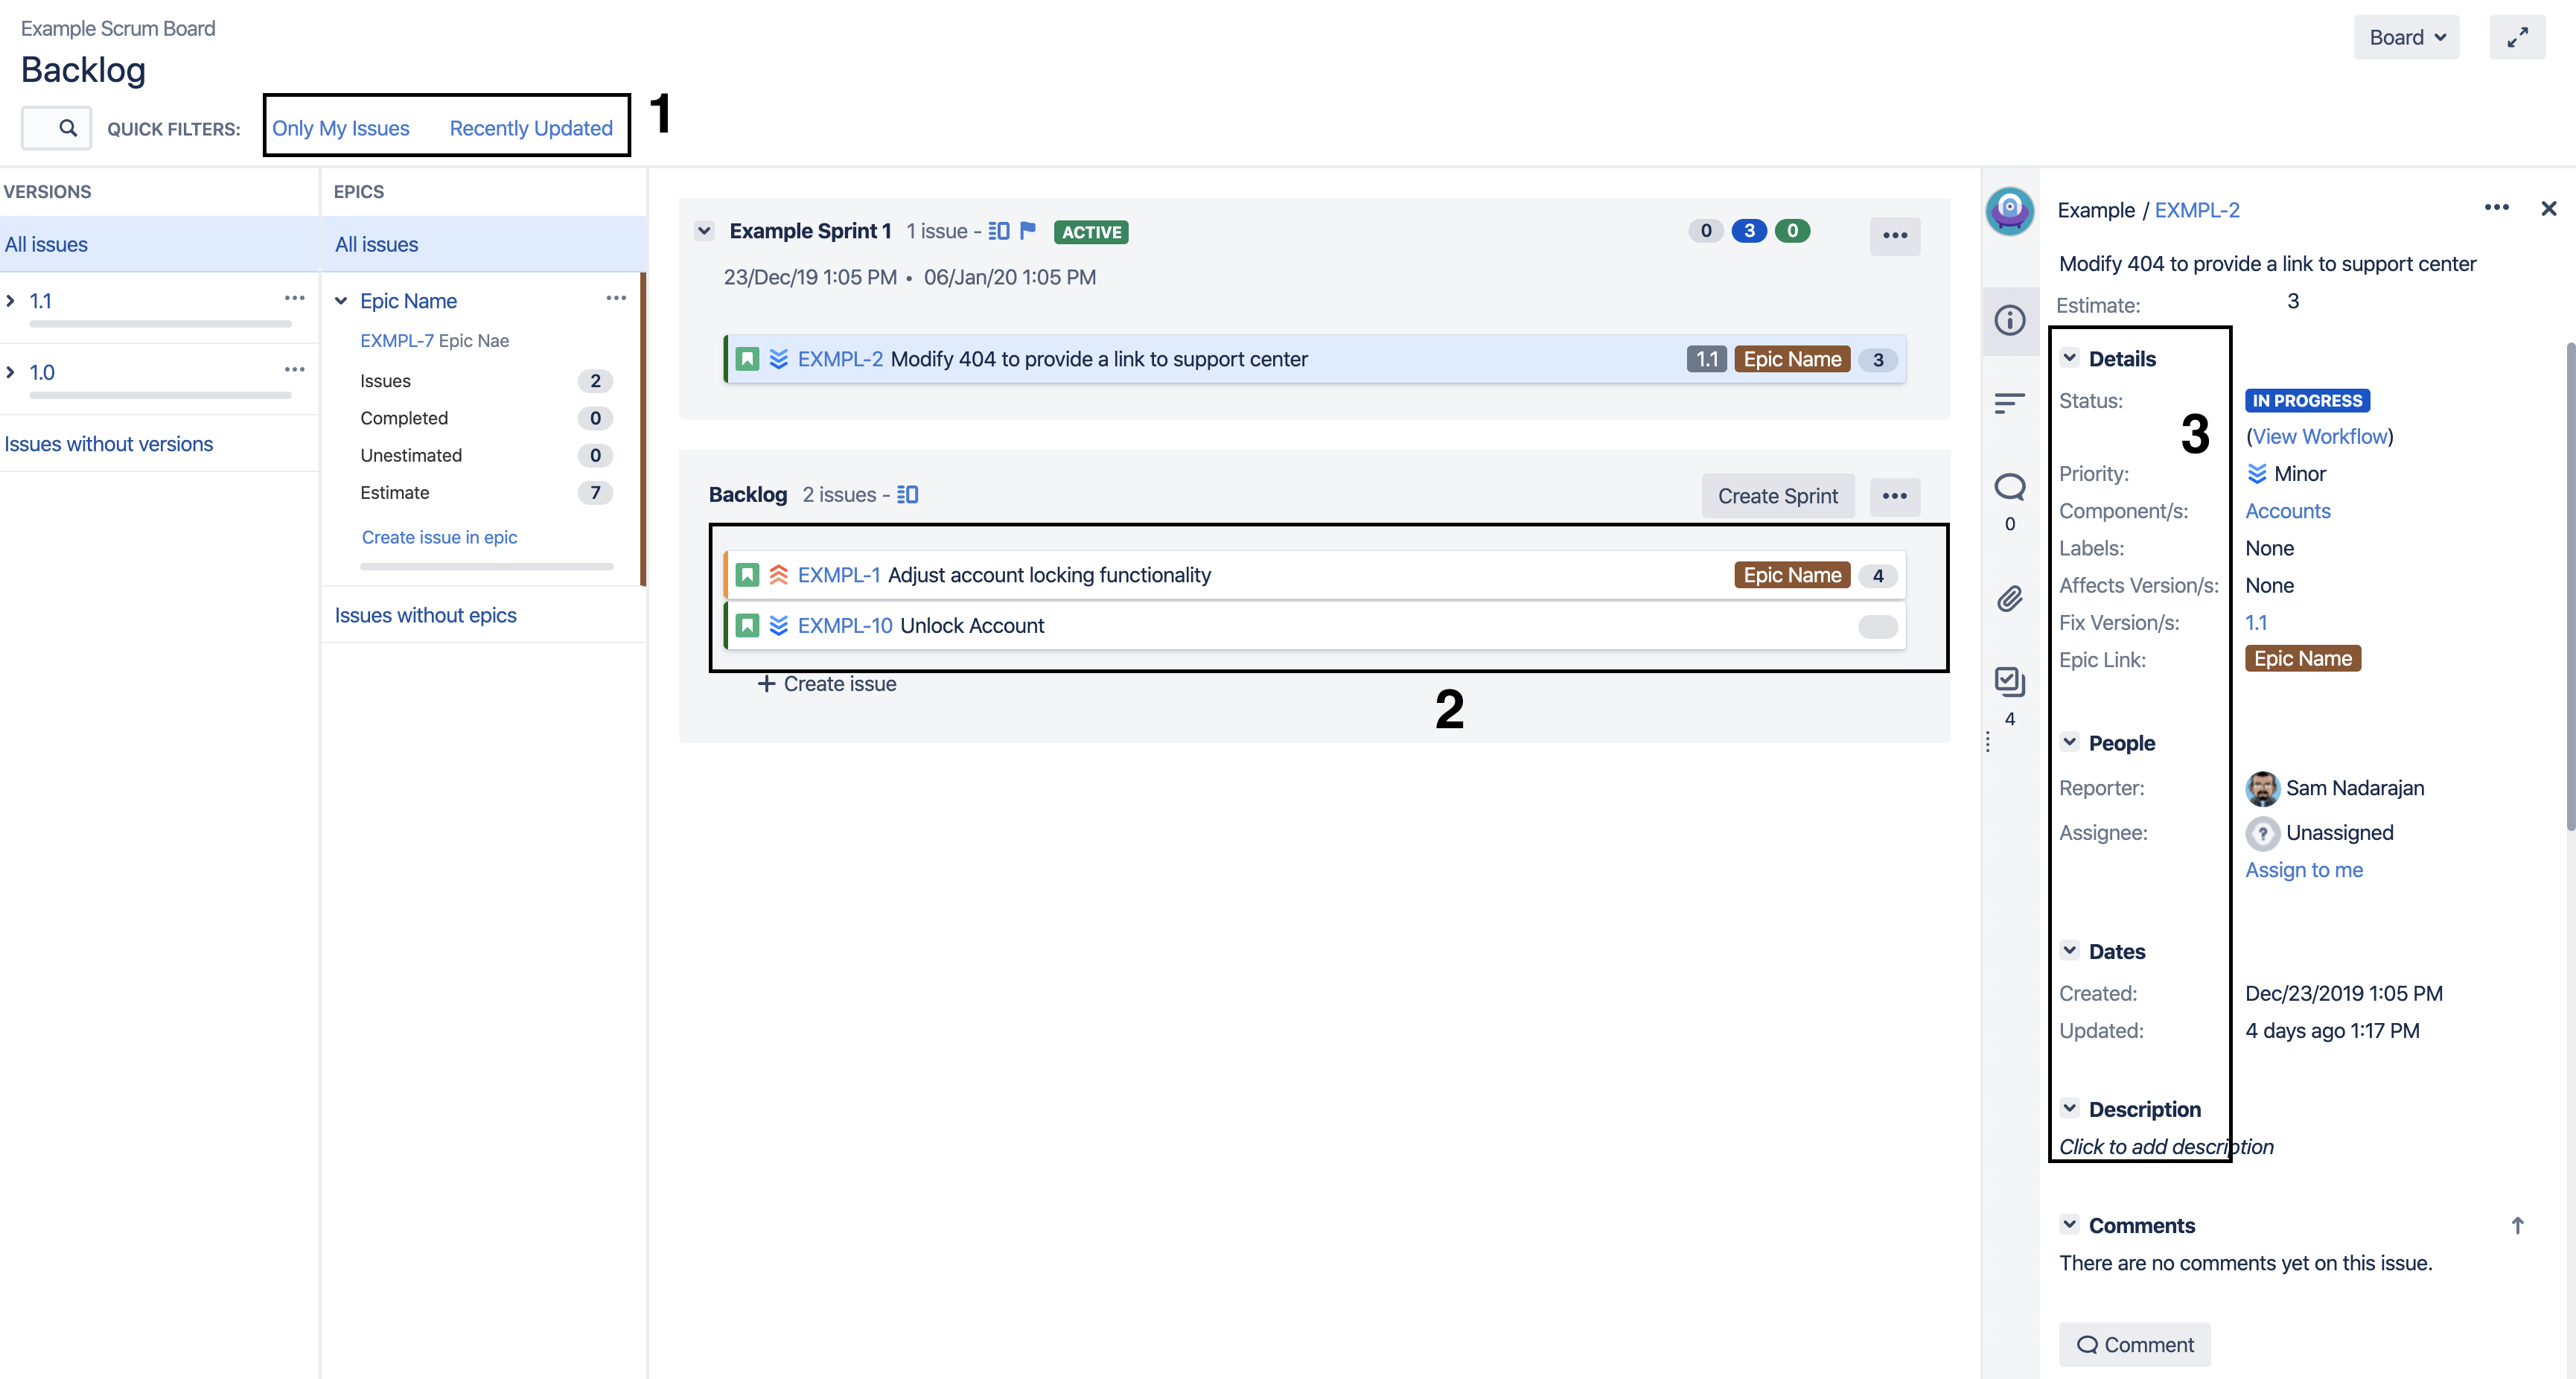
Here are some adjustments that can be made:
- Quick Filters (1): Clicking on one or more of these will limit the number of issues that will appear in the backlog. These quick filters can be useful for especially large backlogs.
- Additional Fields (2): If your team needs more information than the issue type, priority, issue key, summary, version, and epic, then up to three additional fields can be added to the issue view. Keep in mind that this will expand the individual issue’s height in your backlog, and potentially make it harder for your team to identify additional information.
- Issue Detail Fields (3): The issue preview panel on the right side of the screen can be configured to show certain fields in a certain order. Modify this list as needed to enhance your team’s refinement process.
Board View Layout
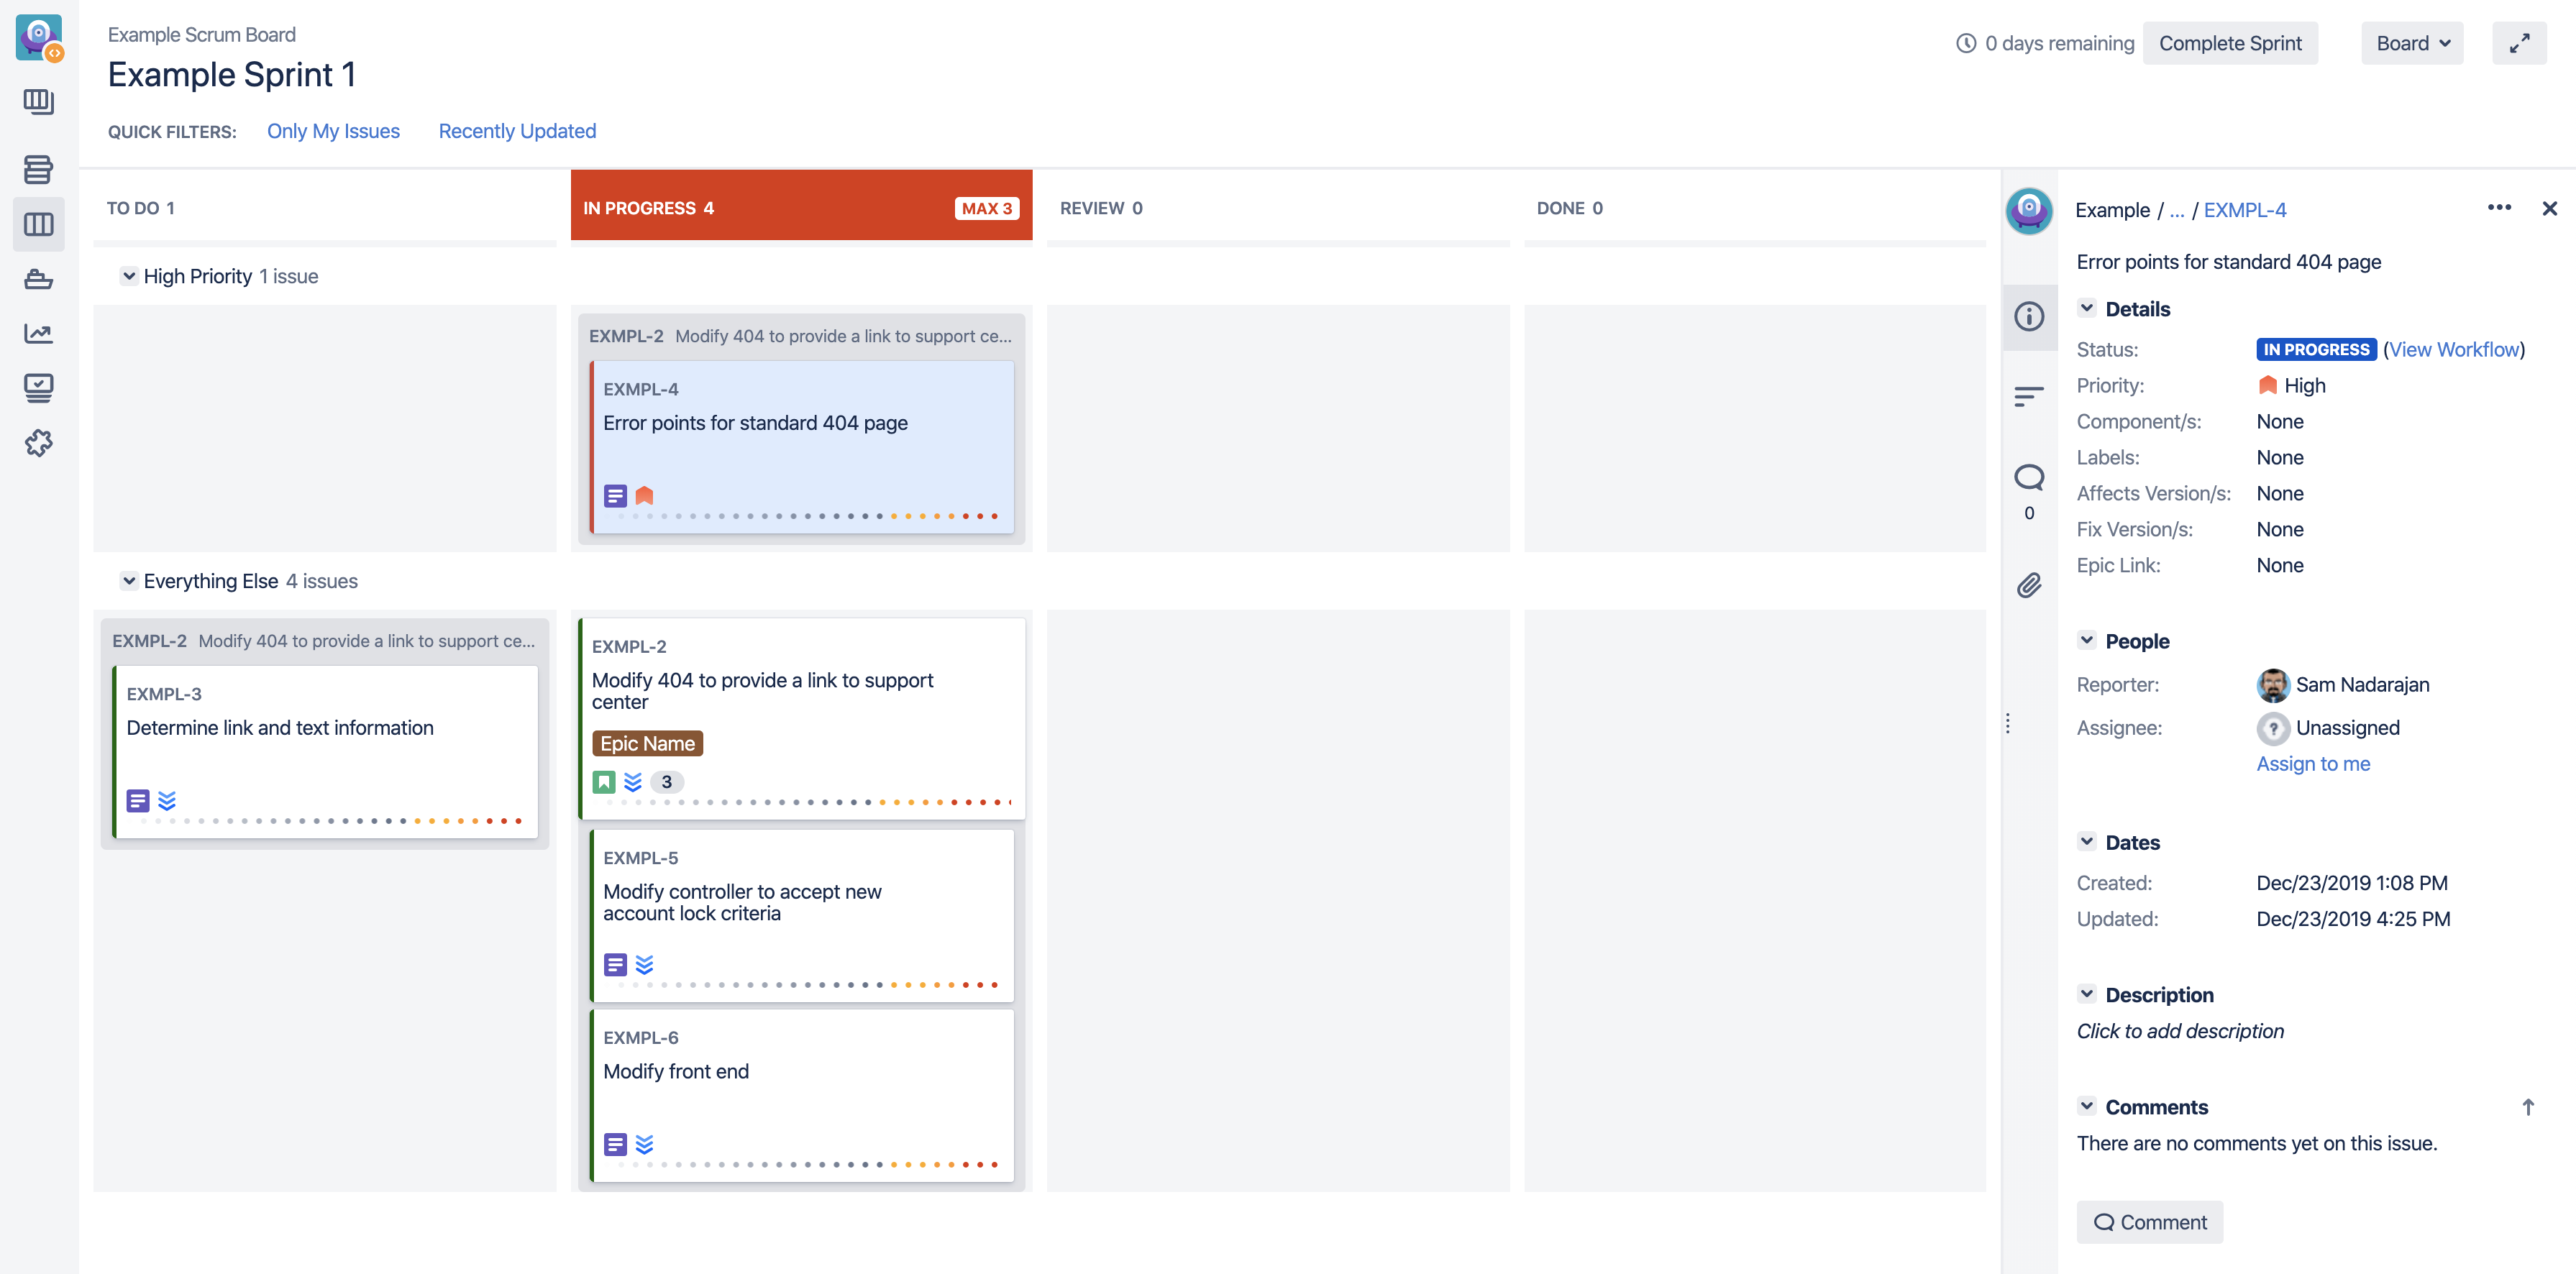
The board layout is where your active work will occur. Boards contain columns that you can move issues across, along with an issue detail preview on the right side of the screen. Here is an example board view:
As with the backlog view, there are certain elements that can be configured by your board administrator to make the board view more functional for your team. Here is an illustration that indicates some of the main configurations that can be made:
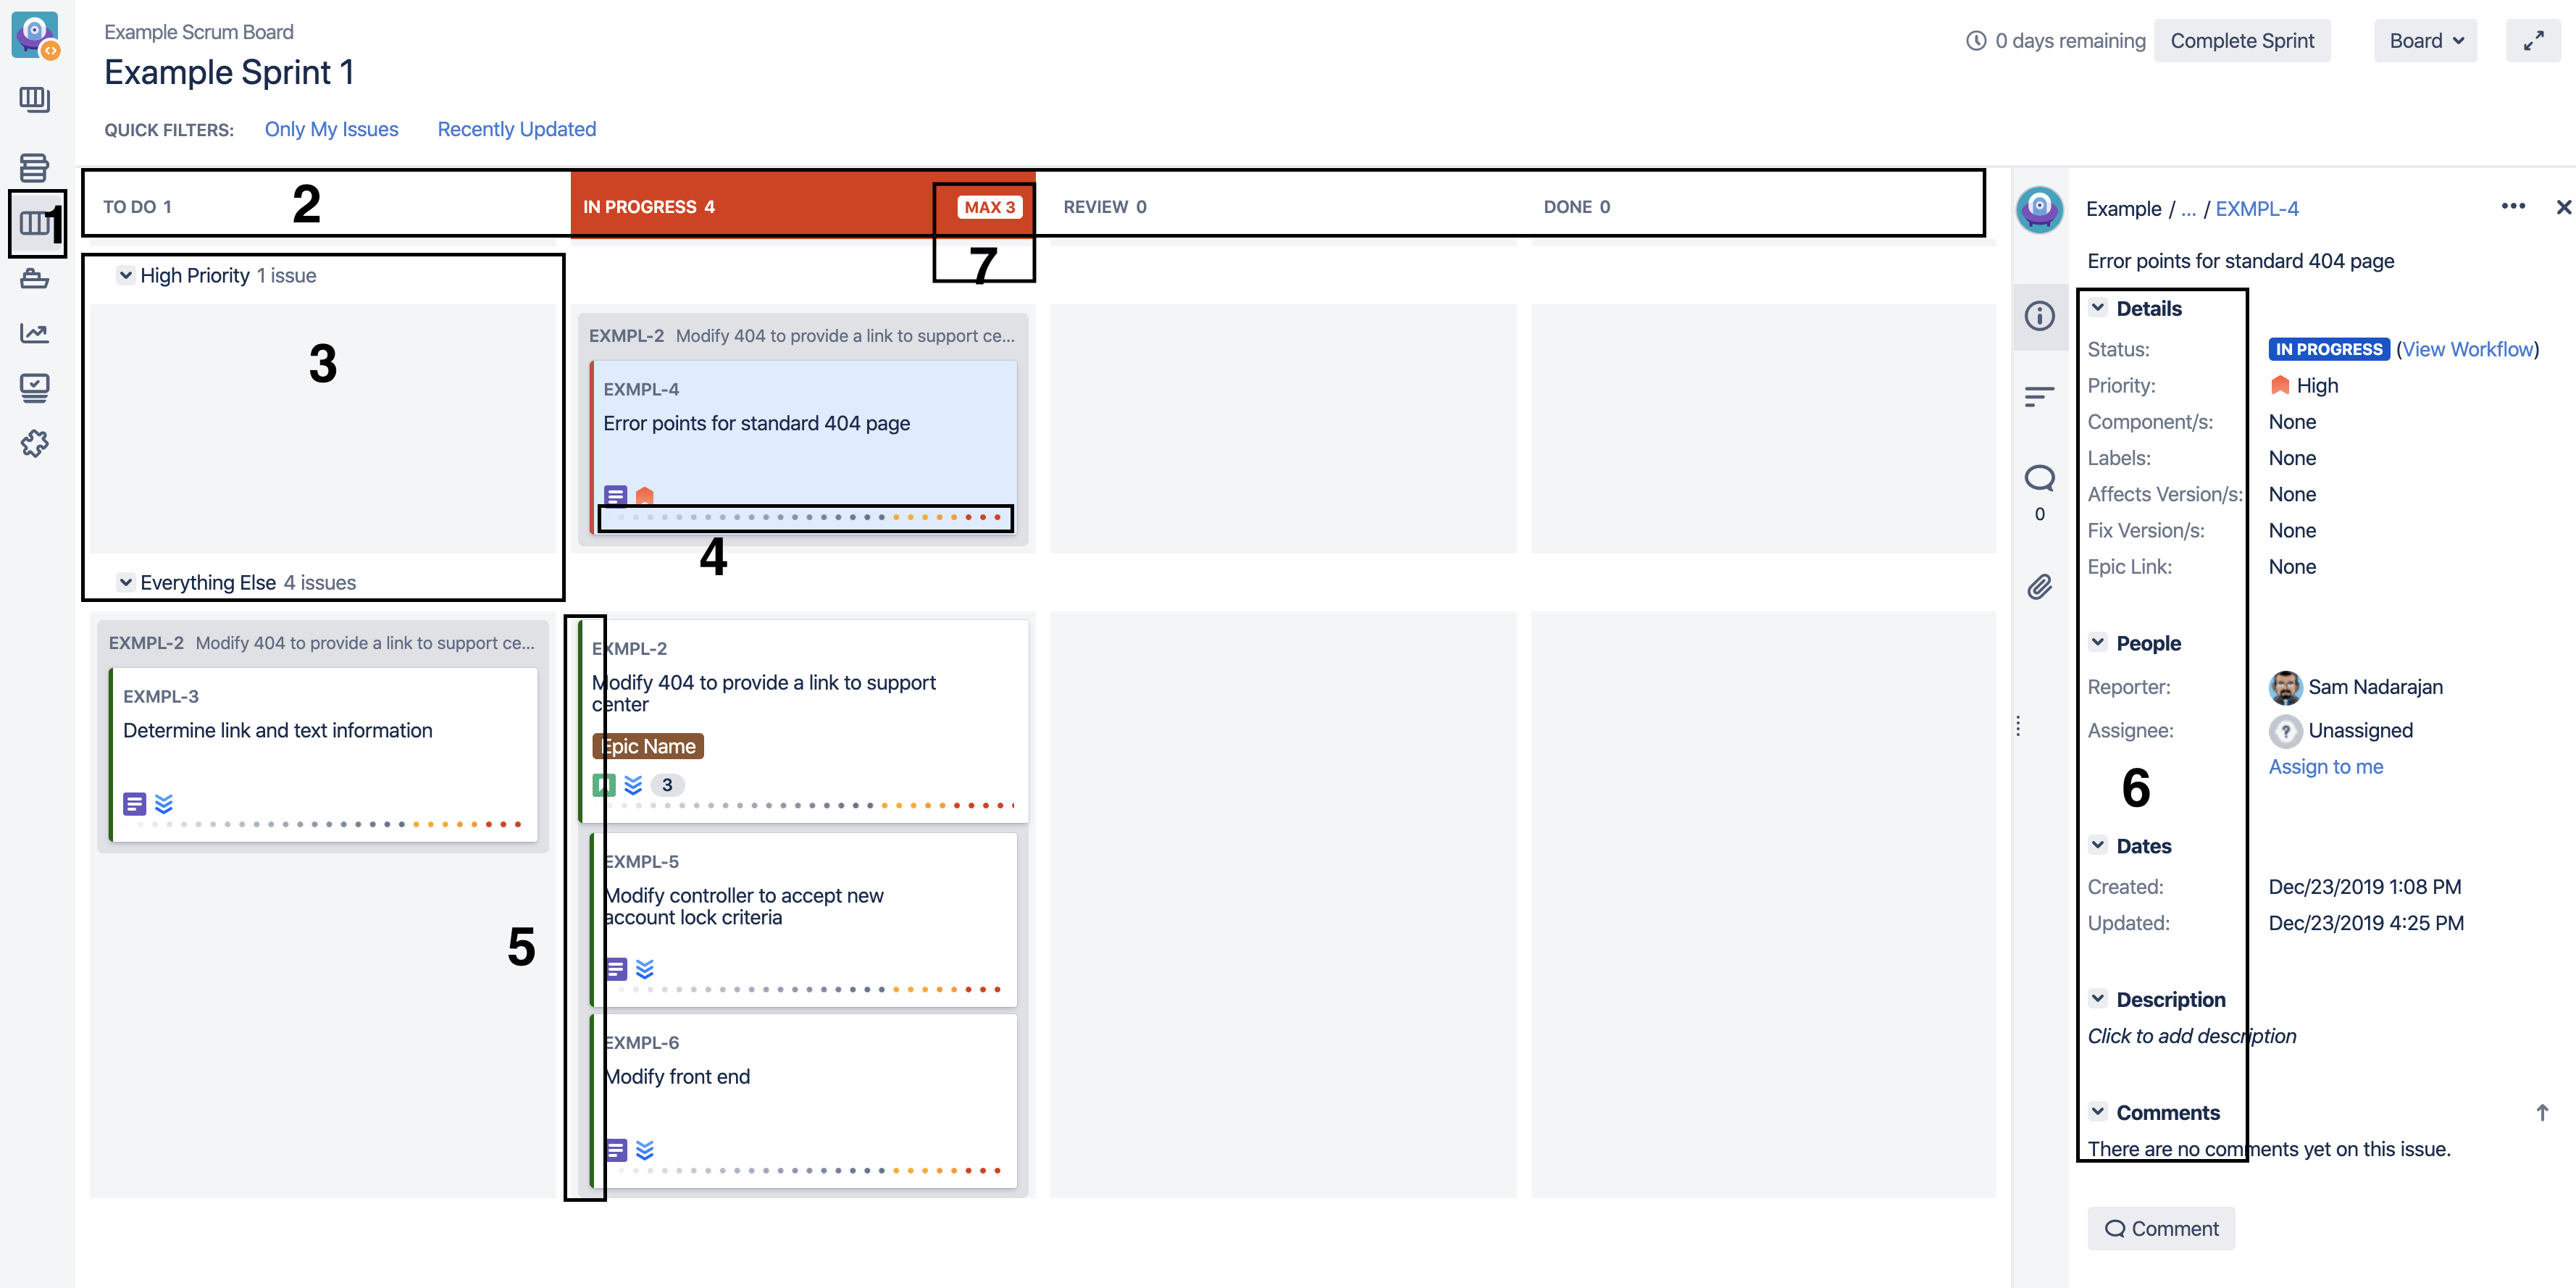
Access to the board is available as an option on the left side of the screen (1). Additional board view configurations include:
- Columns can be added, removed, renamed, or reordered to reflect your team’s processes (2). Generally speaking, you should be able to move issues across the board towards a complete state.
- Swimlanes (3) can group issues together and break up issues in a horizontal fashion.
- Days in Column (4) can be used to indicate how long an issue has remained in a column.
- Card Colors (5) can visually indicate types of issues based on team criteria.
- Issue Detail Fields (6) can be configured separate from the issue detail fields in the backlog view.
- Max limits for certain columns can be configured to ensure continuous flow.
Using Boards
Whether you adopt a Scrum or Kanban model for your team’s development, Jira boards offer great flexibility to accommodate your business needs. You will always have a backlog view for Scrum boards, creating and pushing work into sprints that you can set up ahead of time. For Kanban boards, you can choose to have a separate backlog view or let the backlog represent the leftmost column on a board.
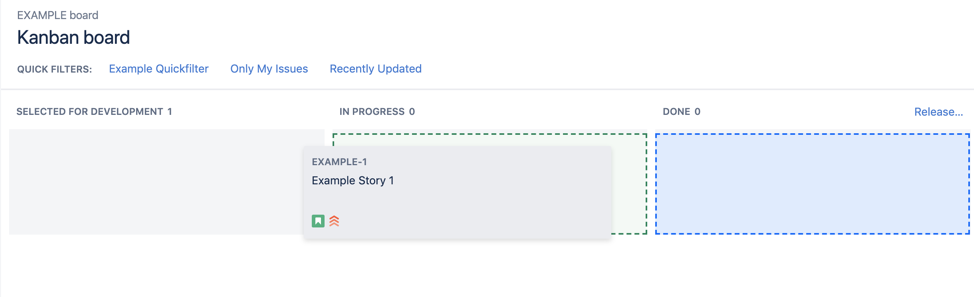
Boards allow you to easily identify the different statuses an issue may go through before completion. Typically, each column will map to a status, and your workflow will dictate which status an issue can transition to. On the board, if you begin to drag an issue from a column, other columns will highlight to indicate where you are allowed to move issues:
Types of Boards
If you created a Jira Software project, you may have specified a Scrum or Kanban project to be created. However, this only means that your project will have certain configurations that favor Scrum or Kanban frameworks. For example, when you create a Scrum project, your screens will have certain Scrum information already configured, such as story points. While the project creation will set up Scrum data fields, they will not set up the Scrum process for you. You can only do this through boards.
There are two types of boards in Jira: Scrum and Kanban. Both board types are available for Jira Software and, when created, will provide additional artifacts depending on the process you want to follow.
Scrum Boards
When setting up a Scrum board, you will have the ability to manage sprints. Users with the right permissions can create sprints from the backlog view and close them on the board view. As issues are pulled from the backlog into a sprint, a dedicated “Sprints” field will automatically be populated for all of the sprints that the issue belonged to.
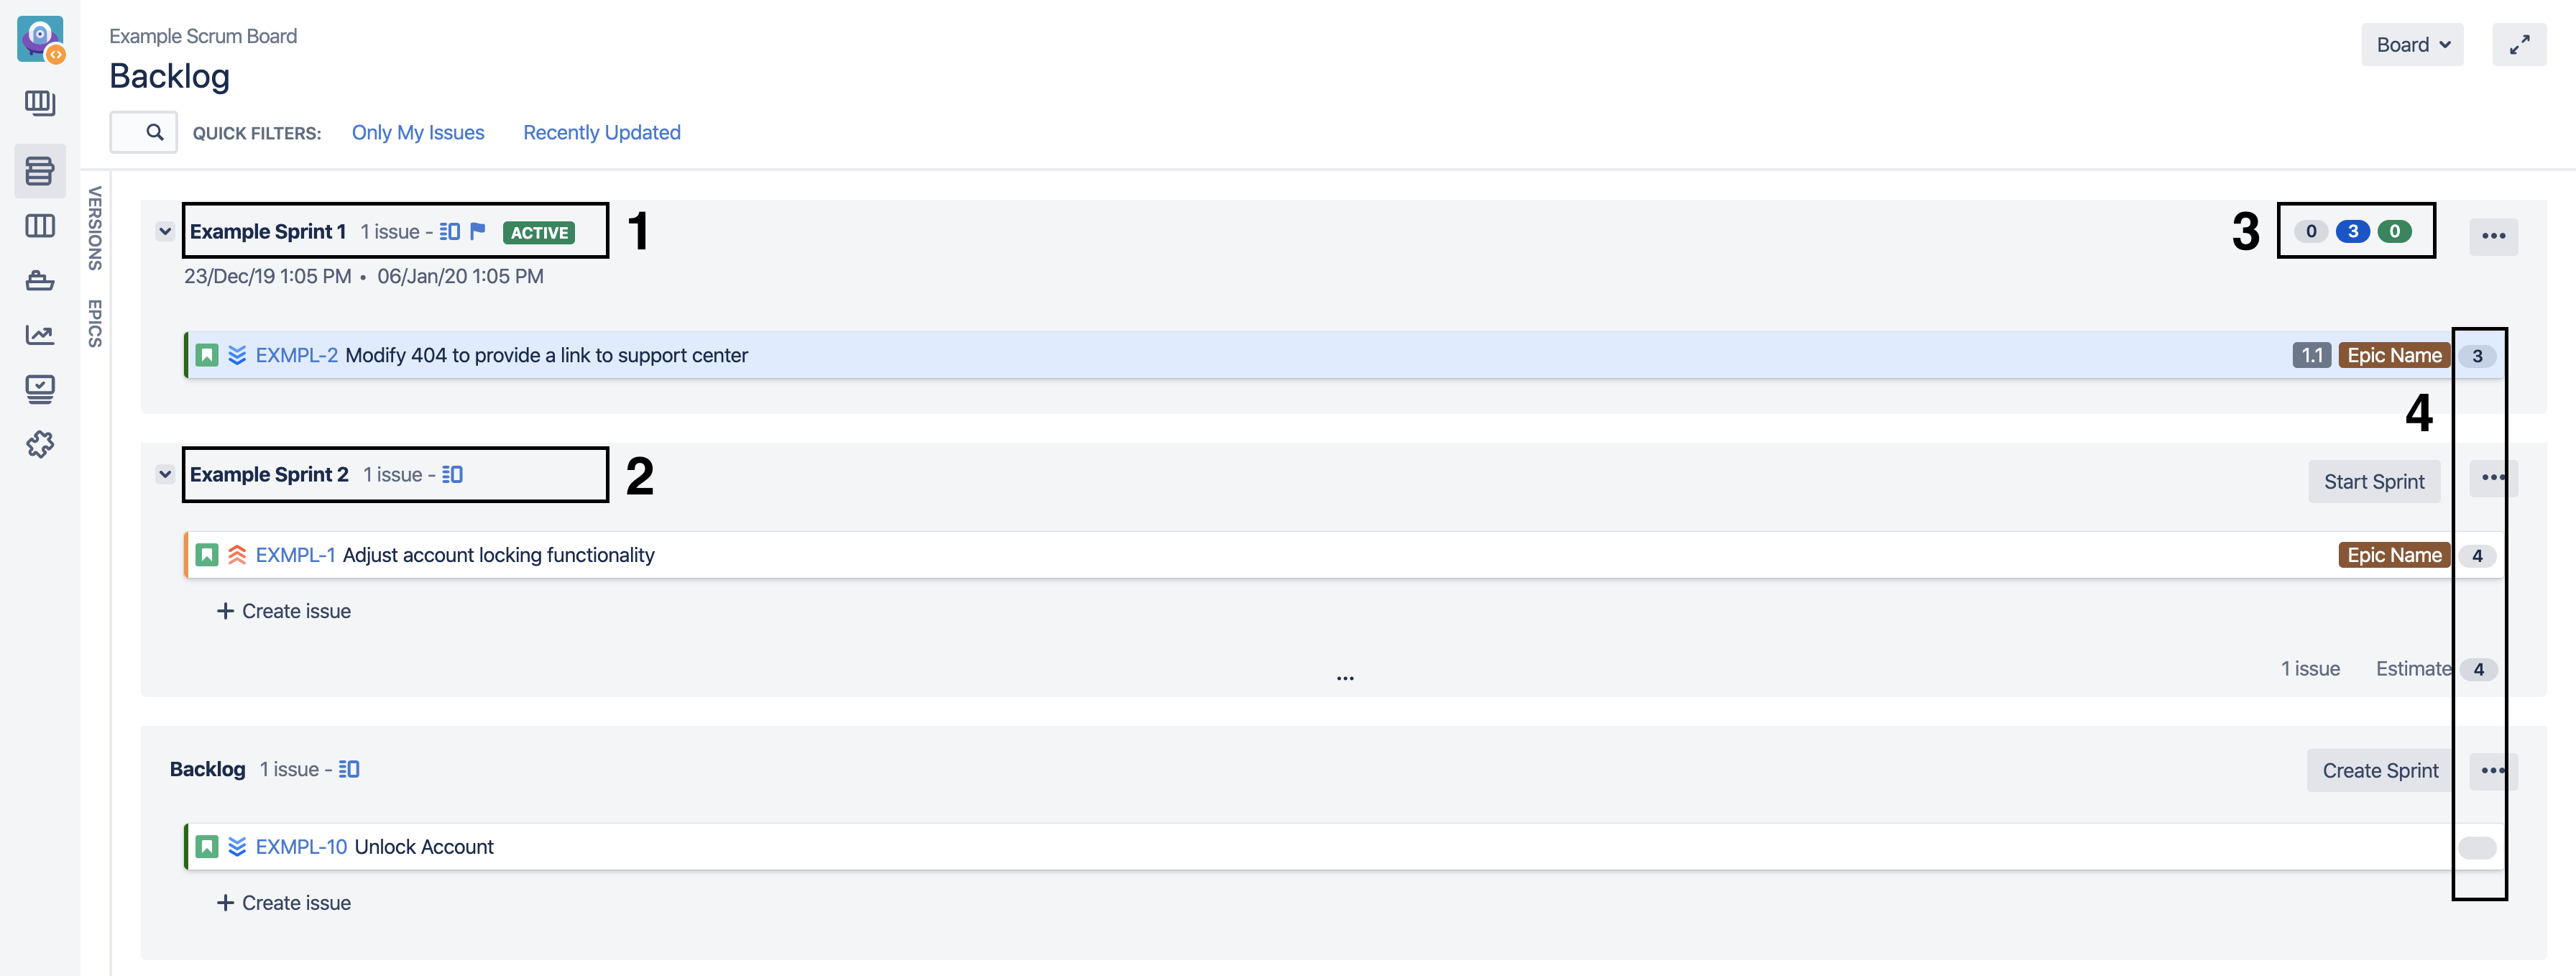
The following figure illustrates the additional artifacts that will appear for a Scrum board in the backlog view, such as sprint management for active (1) and inactive (2) sprints, story point progress for active sprints (3), and estimates (4):
Scrum boards also provide additional agile reports which can be accessed by clicking on the report icon on the left navigation (1).
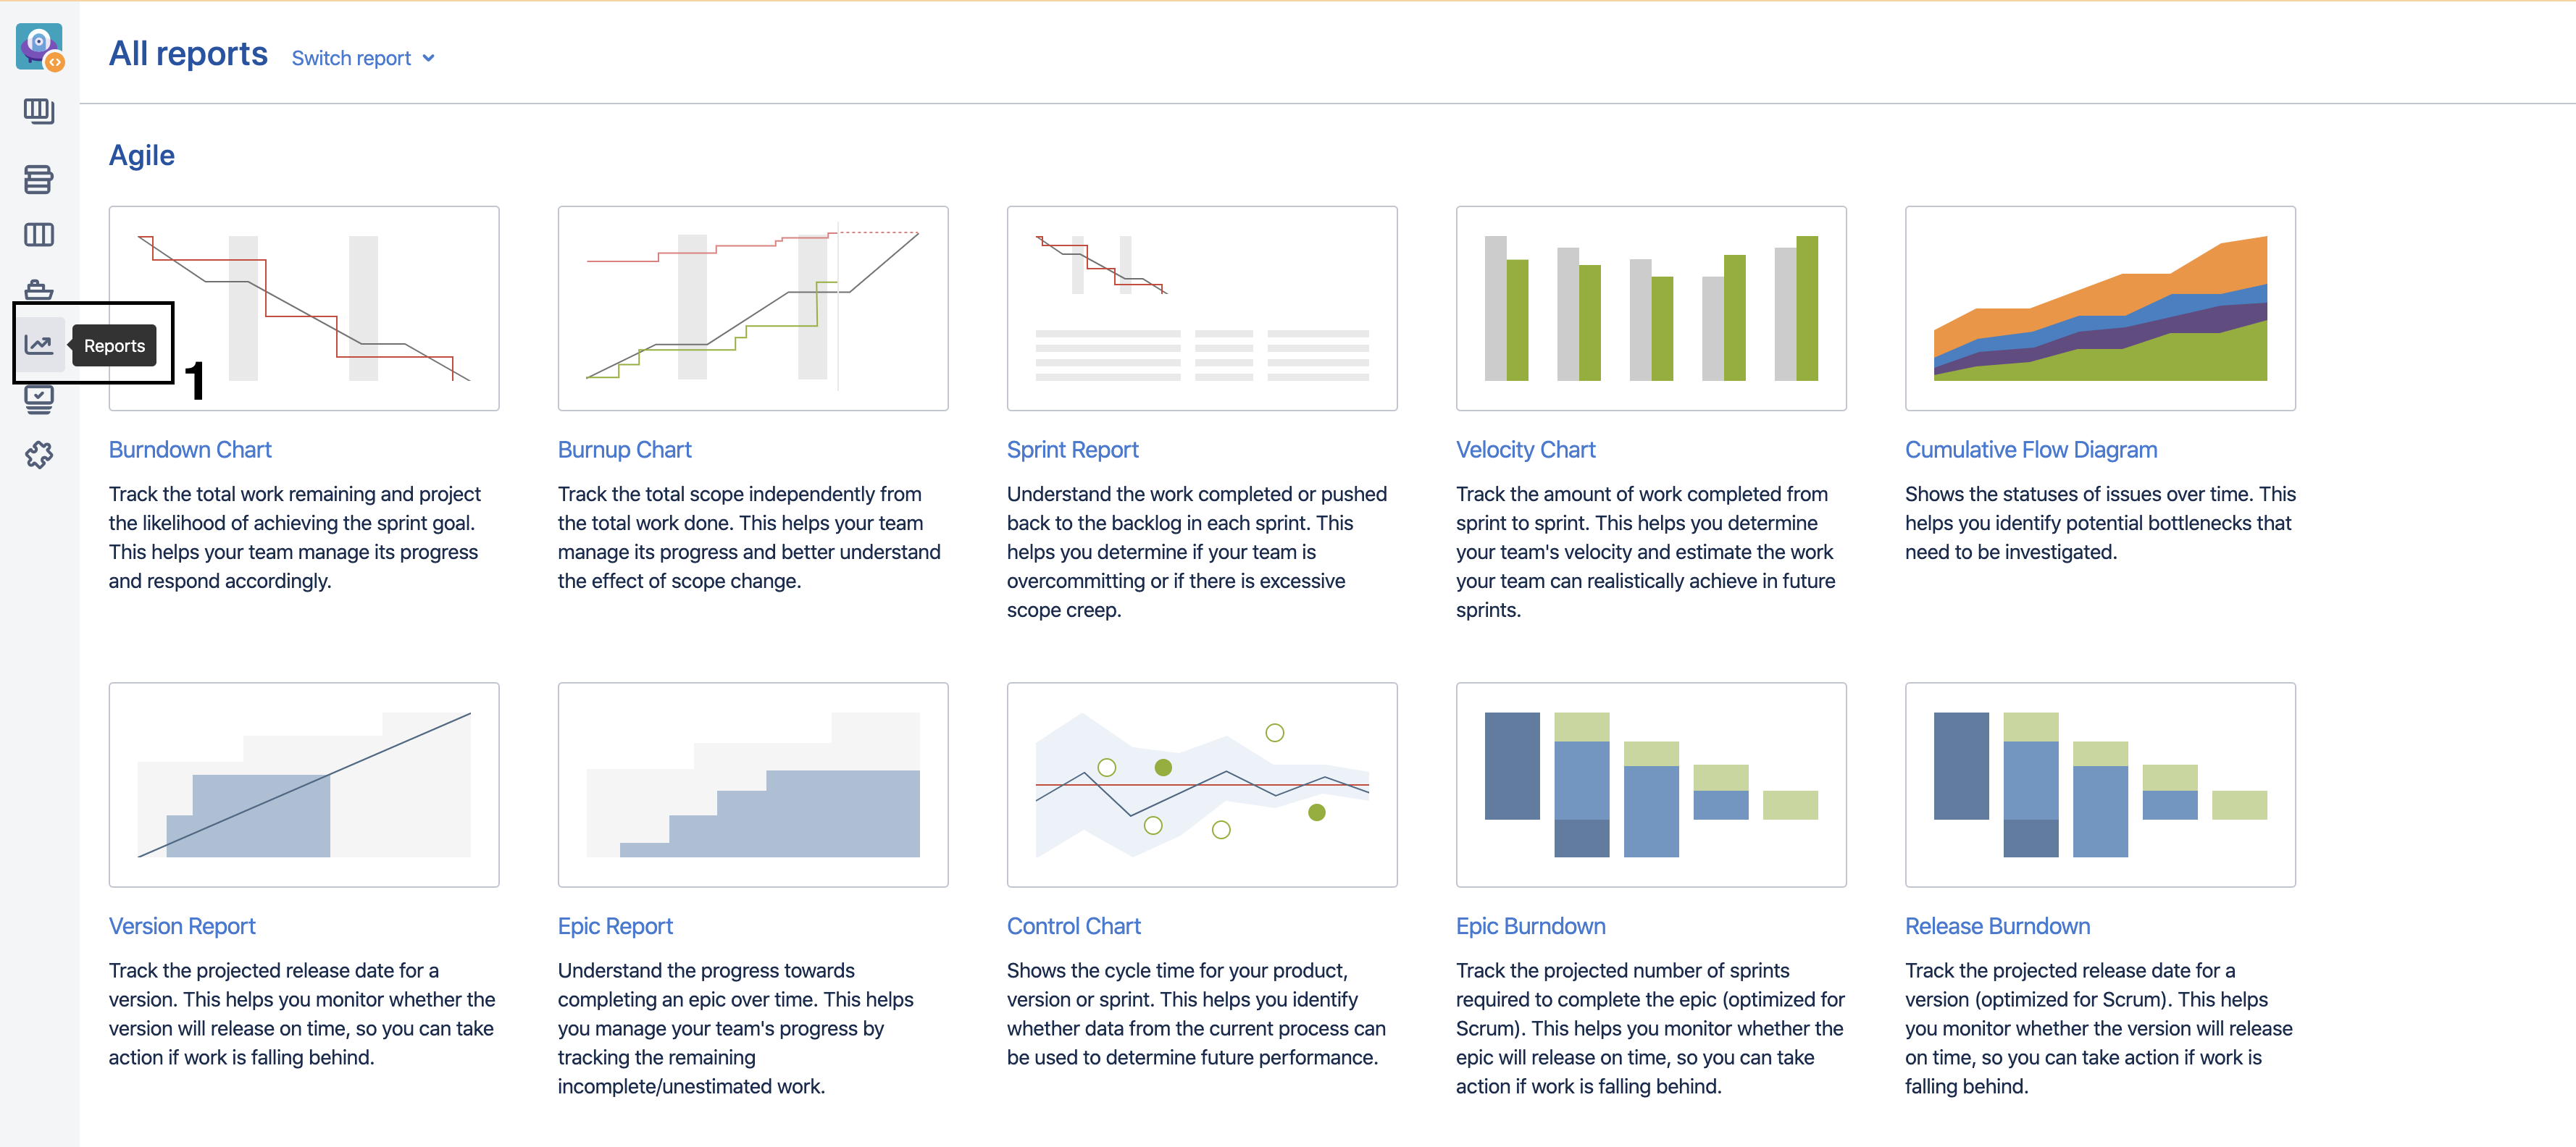
As you can see, a variety of reports are available for Scrum boards, including burndown charts, velocity charts, and epic reports.
When using Scrum boards, you can complete the current sprint by clicking on the appropriate link. All issues in the rightmost column will be marked as completed, and the sprint field for those issues will automatically be populated. Any work that did not get completed as part of the sprint can be carried over to the next sprint or sent back into the backlog.
Kanban Boards
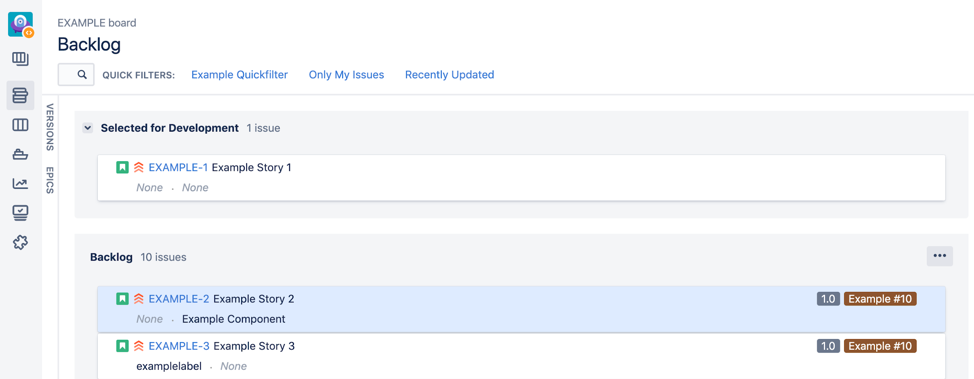
When setting up a Kanban board, you will not have the concept of story points or sprints. Instead, the artifacts that come with the Kanban board are releases and fewer agile reports. In the illustration below, you can see that the Scrum artifacts are missing.
There are fewer standard reports for Kanban in Jira:
For Kanban boards, teams may choose to follow a cadence of releasing all tickets in the rightmost column after a certain number of days, or they may choose to release once a certain number of issues are marked as done.
Get on Board
Boards are highly functional interfaces in Jira for managing and viewing active work. They can be displayed and referenced in daily standups, used by individuals to work on issues, and show the status of work in real-time between members. The backlog view makes planning activities easier, and the reports provided with Scrum and Kanban help managers assess the health of the project. Being aware of a Scrum or Kanban board’s purpose and functionality will help you and your team manage your project more efficiently.
In the next post, we’ll take a closer look at the Jira Service Management. Make sure you check out the rest of the Jira 101 series:
Other recent posts:

Kunz, Leigh and Associates (KL&A) Announces the Retirement of KL&A Co-Founder John Leigh
OKEMOS, MI, April 11, 2023 – Kunz, Leigh and Associates (KL&A) announces the recent retirement of KL&A Co-Founder John Leigh as of March 31, 2023. Mr. Leigh began his career as a developer working on large mainframe systems before moving…

Team Building in a Remote Environment
Blog Barista: Dana Graham | June 15th, 2022 | Culture | Brew time: 5 min
Let me start by saying I don’t care for the term “work family.” I have a family I love, and they have absolutely nothing to do with my career. I want my work life to be its own entity. I like boundaries (and the George Costanza Worlds Theory). Certainly, I want to enjoy and trust my coworkers, and I want to feel supported and cared for…
0 Comments