Blog Barista: Sam Nadarajan | January 15, 2020 | Developer Tools | Brew time: 8 min
Welcome back to the Jira 101 series. In Part 2, we walked you through the various sections that make up the issue detail view as well as the different actions you can perform from that screen. In today’s post, we’ll dive into how you go about searching for issues within Jira, how to use Jira Query Language (JQL) to perform more efficient searches, and how to use filters to automate the searches that you perform often.
Note: All visual examples illustrate the old interface found in Jira Server 8.5. They do not reflect the new Jira Experience that Atlassian uses for its cloud products.
Searching for Issues
You can access currently active issues using concepts like dashboards and boards, but how do you find older issues or issues outside of your board or project?
There are two primary ways to search for issues: quick searching and using the search screen.
Quick Searching
A global search box exists on the top right side of the Jira navigation bar and persists no matter which page you navigate to within Jira.

This is primarily useful for doing a basic search for issues. The most common ways to use this search box is to type in a specific issue number (project key + ####):
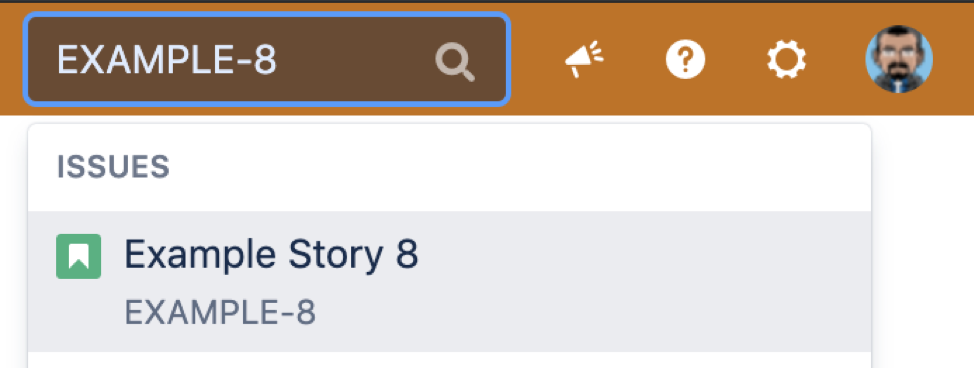
Or by searching for text:
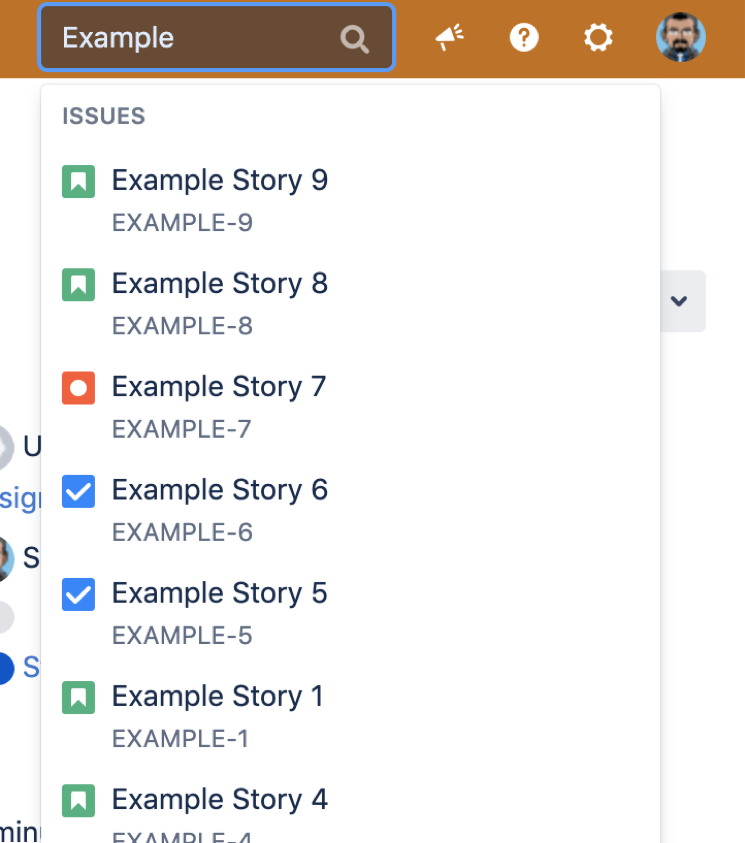
Search Screen
When simple searches will not suffice, all licensed Jira users have the ability to search for issues on one or more criteria. To access this Search screen, click Issues on the Jira navigation bar and then click Search for issues from the dropdown:
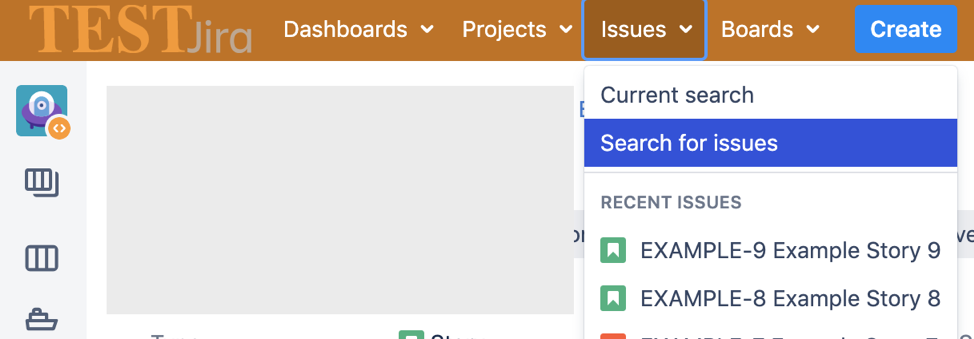
Any previously searched issues can be accessed by clicking Current Search to avoid reconfiguring your search if you are moving back and forth between specific issues and search results. Once clicked, you will be taken to the Search screen:
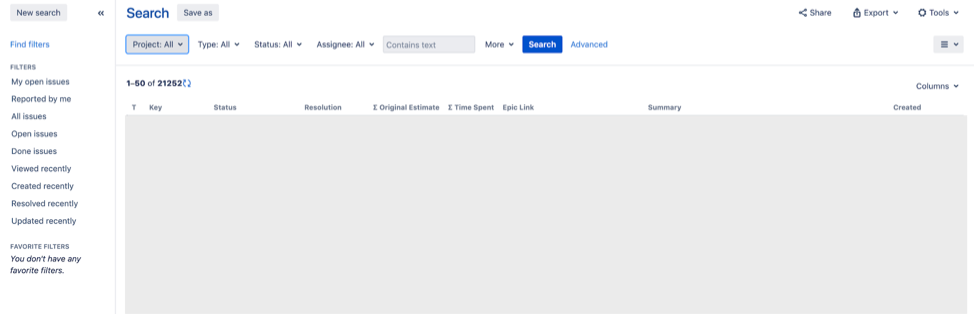
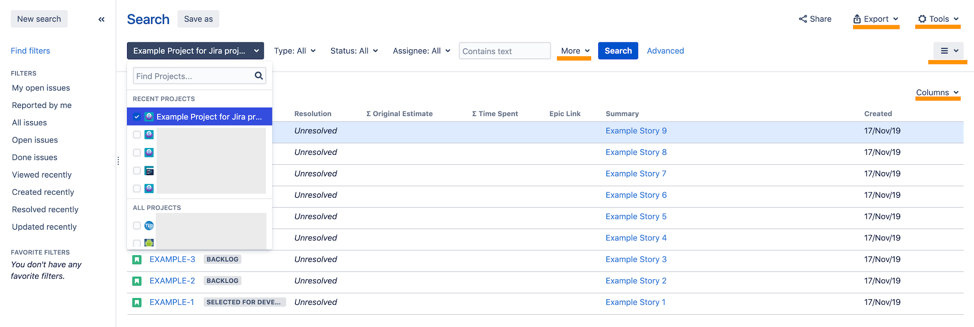
Standard Jira filters will appear on the left-hand side of the screen. These cannot be modified. Beneath these standard filters you will see filters you have favorited (more on this below). Search criteria will appear at the top, with results listed below and additional functionality to the right.
Within the Search screen, you can:
- Specify additional search criteria
- Specify the fields that should display in search results
- Export search results
- Bulk modify search results
- Change the result view
Specify Additional Search Criteria
You can choose fields and specific values to search by using the dropdown interface. If you want to search on additional fields that are not currently displayed, select the More dropdown. Once you select a specific field from this dropdown you can select specific values and select Search.
Specify the Fields that Should Display in the Search Results
The default fields displayed in the search results may not be relevant for the different searches you execute. If you want to see the values for additional fields, select the Columns dropdown above the results on the right side. Then, select the fields you would like to see.
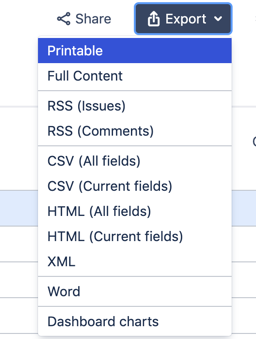
Export Search Results
Export your search results to a number of different formats for additional data manipulation and visualization.
Bulk Modify Search Results
Instead of modifying the values in fields one issue at a time, you can execute a search containing all the issues that need modification and apply a bulk change to them. Selecting the Tools dropdown allows you to change the value of a particular field for all issues or take other actions, such as moving the issues to different projects or deleting them. Jira will guide you through a multi-step wizard when making bulk changes.
Change the Result View
If you prefer your search results to display more information than what is provided in the results List View option, then select the hamburger icon in the top right corner and select Detail View:
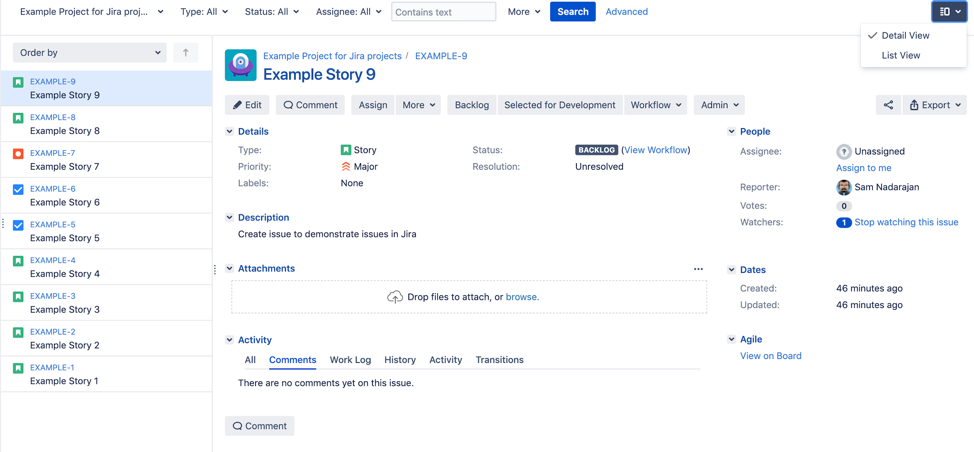
The detail view allows you to easily work on issues from your Search screen instead of clicking into an issue, making a change, and navigating back and forth.
Jira Query Language (JQL)
The Jira Query Language (JQL) is an easy to use query language that drives issue discovery in Jira. If you have a background in Structured Query Language (SQL), then you will find JQL intuitive to understand and adopt.
Within the Jira interface, you can use JQL by clicking on the Advanced link on the Search screen:

The search criteria section will simplify to a smart, free-form text field:
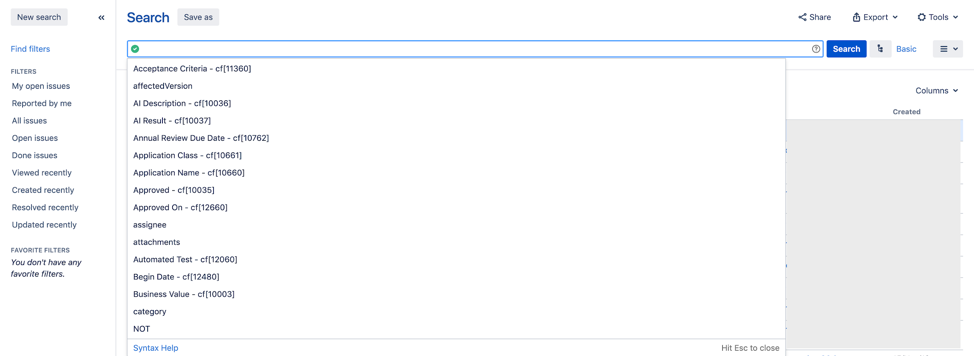
Within the text field, you can write your criteria for issues in the text box, similar to writing the “WHERE” clause in a SQL. Jira makes this easy to use with typeahead results listed below that change as you continue typing. For example, here’s a query that I will write in JQL using the Advanced view to search for all issues within the EXAMPLE project:


Notice that the typeahead results will change based on what part of the criteria needs to be defined. There are generally three parts to each criterion: field name, comparison operator, and value(s). If you want to specify multiple criteria within the same query, join each condition with an “AND” or an “OR”.
As you continue learning JQL, a helpful tip would be to specify your criteria in the Basic view (with the dropdowns), and then switch to the Advanced view. The criteria you specify in the Basic view will show you what the JQL query looks like when you switch. This approach can easily help if you are trying to write advanced or nuanced criteria, such as comparing dates. The bottom of the typeahead results window will always have a link to syntax help.
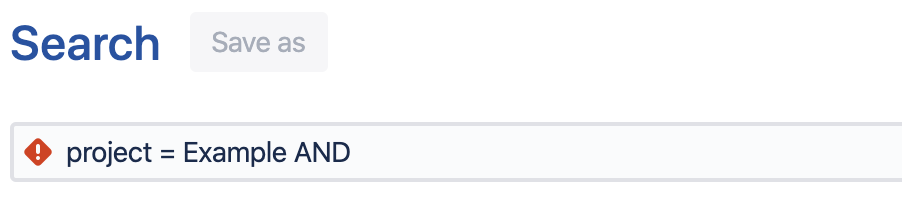
When your query is valid, you’ll see a small green checkbox indicator to the left of the criteria. If the query is not valid, the indicator will change to a small red exclamation mark.

Saving Searches into Filters
Instead of specifying the same search multiple times, searches can be saved as filters for additional use. Once you finish specifying your criteria, select the Save As link as illustrated:

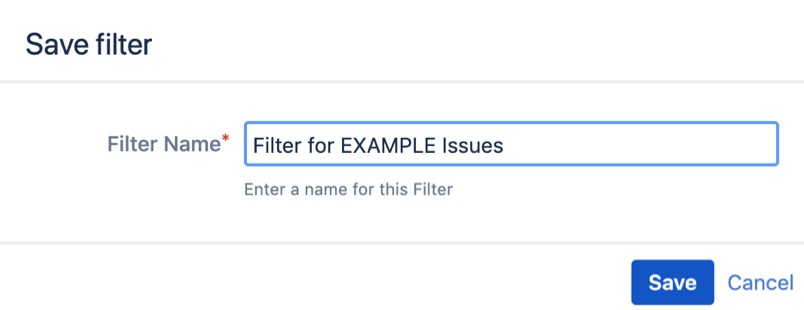
You must specify a name for the filter:
Once you specify a name, you will return to the Search screen. Here, you will have additional options, such as viewing details (Click the Details link) or making the filter a personal favorite (Click the star icon):

If you need to modify the filter at any point in the future, simply add to the criteria, click Search, and then select Save as illustrated below:

Favorite Filters
By default, filters you create and save will automatically be marked as your favorite. Favorites will appear below the default issue filters on the Search screen that we mentioned earlier.
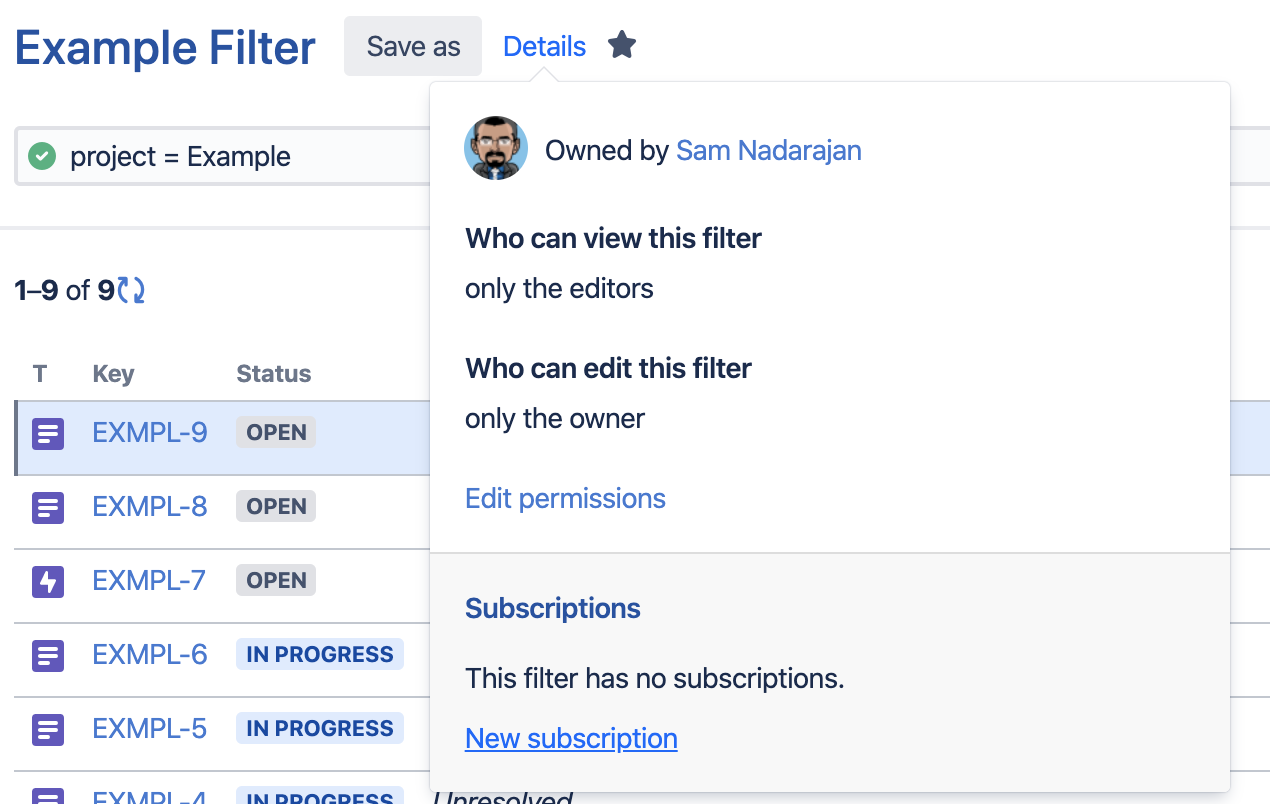
Details
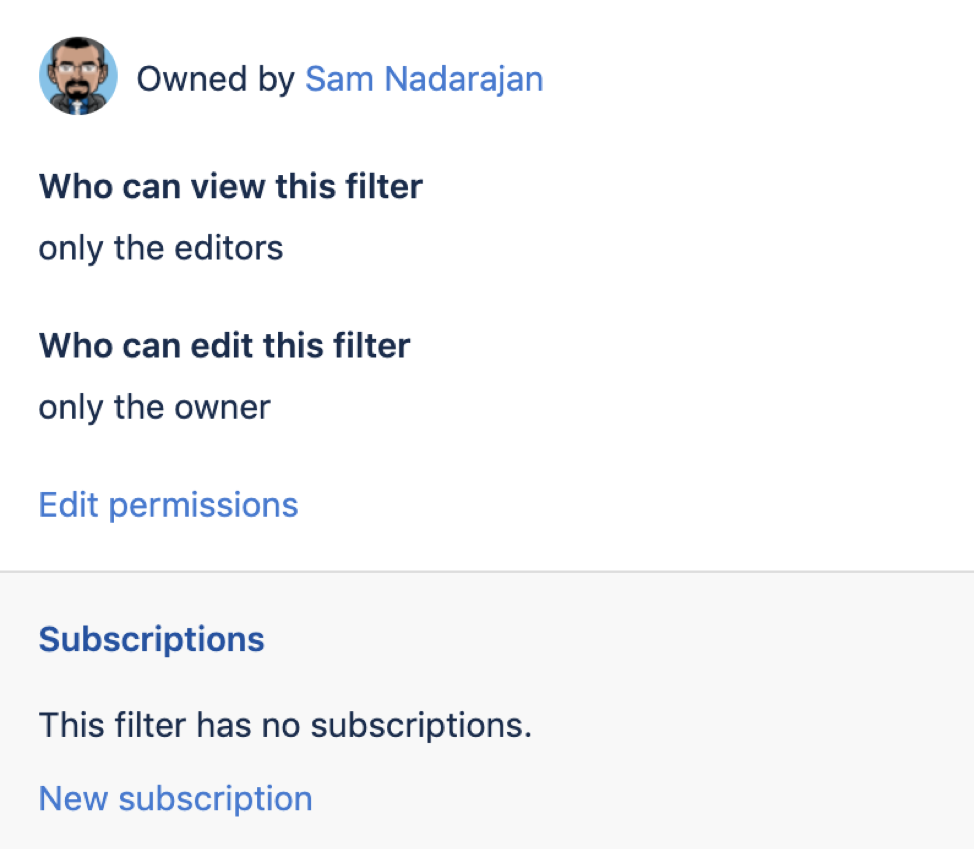
The Details functionality for a filter will allow you to set up permissions and/or subscriptions:
Permissions
Permissions allow you to share filters with other users or groups, preventing potential redundancies in searches. When you select Edit permissions, you will be directed to the following screen:
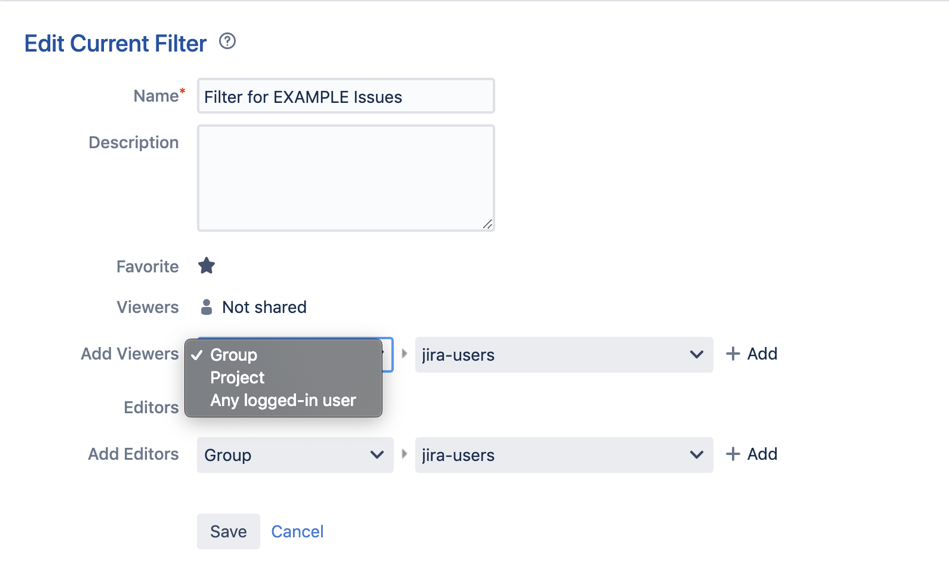
Here you can modify the name, add a description for better clarity, and set up access controls for the filter. You can specify who can view the filter at the group, project, or application access level. This will give recipients read-only access to the filter, they will not be able to modify the filter.
Additionally, you can specify who can make modifications to the filter under the Editors section.
Note that if you are sharing the filter with a group, the only groups that will appear in the dropdown are groups that you are a member of. If you want to share the filter with people in another group, you must be a member of that group.
Subscriptions
Subscriptions allow you to send out the filter results on a user-defined schedule. To manage subscriptions, have your filter prepopulated on the Search screen and select Details > New Subscription, as illustrated here:
Once you decide to add a New Subscription, you will be directed to the following screen:
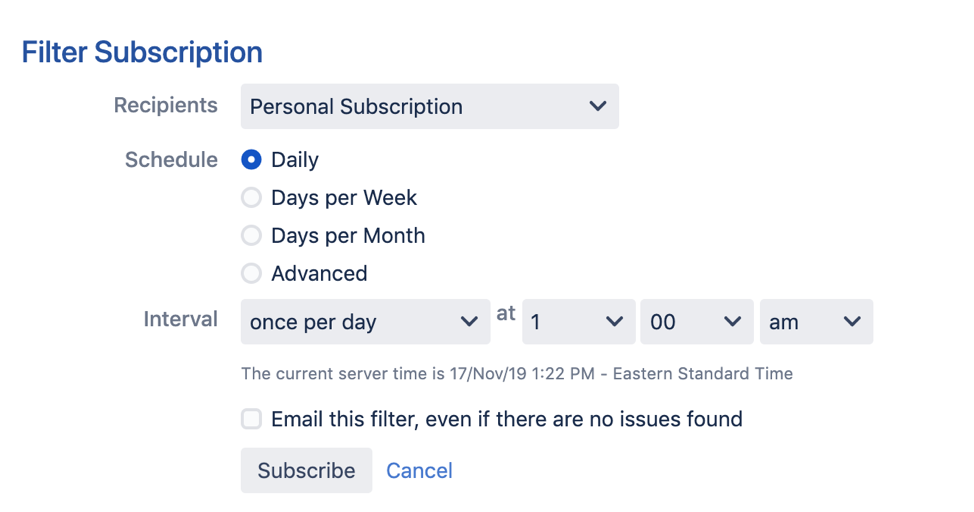
Under recipients, you can choose to send the results of the filter to yourself, or to any Jira user group. You do not have to be a part of the Jira group to specify them as a recipient here.
Below recipients, select a frequency for sending out the filter results. This automates the process of sharing results and you can modify it at any time.
Some Applications of Saved Filters
Understanding and harnessing the power of saved filters will make your experience with Jira more efficient. Here are some examples:
Automated Reports
If your boss asks for a report identifying critical priority issues that have not been closed on a weekly basis, automate this process using a filter so they receive it right in their inbox! Make sure you have their permission before you set up this automation.
Dashboard Gadgets
Feed results from filters when you are configuring a dashboard to highlight certain information in an easy to view format that puts important information front and center.
Additional Data Visualization
Need to produce additional charts or graphs not available in your organization’s Jira instance? Export the filter results to a CSV, open it in Excel, and synthesize the information into a more reportable format.
Leave No Issue Unturned
Filters are a powerful way to search for issues by configuring once and sharing automatically. With Jira’s powerful search engine, no issue is inaccessible to the average Jira user. You will find yourself with a little extra free time if you can utilize the power of Jira filters to address some of your daily duties.
In the next post, we’ll take a close look at the purpose and functionality of boards.
Make sure you check back in to catch the rest of the Jira 101 series:
Other recent posts:

Kunz, Leigh and Associates (KL&A) Announces the Retirement of KL&A Co-Founder John Leigh
OKEMOS, MI, April 11, 2023 – Kunz, Leigh and Associates (KL&A) announces the recent retirement of KL&A Co-Founder John Leigh as of March 31, 2023. Mr. Leigh began his career as a developer working on large mainframe systems before moving…

Team Building in a Remote Environment
Blog Barista: Dana Graham | June 15th, 2022 | Culture | Brew time: 5 min
Let me start by saying I don’t care for the term “work family.” I have a family I love, and they have absolutely nothing to do with my career. I want my work life to be its own entity. I like boundaries (and the George Costanza Worlds Theory). Certainly, I want to enjoy and trust my coworkers, and I want to feel supported and cared for…
0 Comments