Blog Barista: Jessica Davis | October 2, 2019 | Productivity | Brew time: 9 min
My job as a proposal manager requires me to use Microsoft Word every day, so perhaps that’s why it’s not surprising that I’ve become very familiar with all of Word’s functionality. What is surprising, however, is the number of people I have come in contact with that are simply unaware of most of Word’s robust capabilities and helpful features. So, I’ve decided to write a blog series of instructional posts about Word’s more advanced features in the hopes that these nuggets of information can help you become more efficient, less frustrated, or both.
Using the functionality discussed in this series will not only help you improve team efficiency, but it will create consistency across documents developed by multiple people. For example, say you want all project managers in your company to produce charters and project management plans that meet specific content and branding standards, or you want all the specification documents created by your engineers to look and feel the same. Well, you can build a series of templates with pre-configured headings and styles to make their jobs as effortless as possible.
Consistency will help to ensure quality content across your organization. This is important because some of your staff will be great writers who will create comprehensive documents in which information is organized logically, while others won’t know where to begin. Having a structure for a specific type of document will guide them through the content development process so they are sure to include all the relevant information. Also, consistency conveys professionalism. Wildly different looking documents from the same organization communicates a lack of cohesiveness and a lack of attention to detail, and no one wants that.
By the end of the entire series, you’ll be able to use Word like a pro by knowing how to:
- Use Word’s editing and navigation features
- Create and access templates
- Create paragraph and character styles
- Build numbered styles
- Create and manage custom properties
- Use building blocks
This series provides instructional content that reflects Microsoft Word (version 2016) being used on a PC. Though instructions may differ slightly in other versions of Word or on other operating systems, the concepts are still useful. The intent here is not only to show you how to use particular Word features, but more importantly, why those features are valuable to you.
As you begin trying the ideas discussed throughout this series, you may find a need to see editing symbols, the ruler, and the navigation pane. So, let’s spend the rest of part 1 walking through how to show, hide, and use these features.
Show/Hide Editing Symbols
Being able to see editing symbols can help you troubleshoot odd behavior in Word. For example, if content is breaking across pages in an unexpected way, you can turn on editing symbols to see if there is a page break, an empty paragraph mark, or a paragraph that is set to keep-with-next that is causing the page to break in an undesirable way.
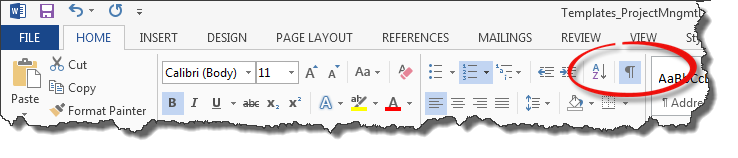
To turn on or off editing symbols, click the HOME ribbon and the button that looks like a paragraph symbol.
As a result, a variety of editing symbols will appear throughout your document including:
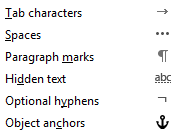
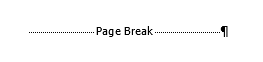
Other symbols include keep-with-next indicators (black squares that appear to the left of text), page breaks, and section breaks.
The following illustration shows some of these editing symbols.
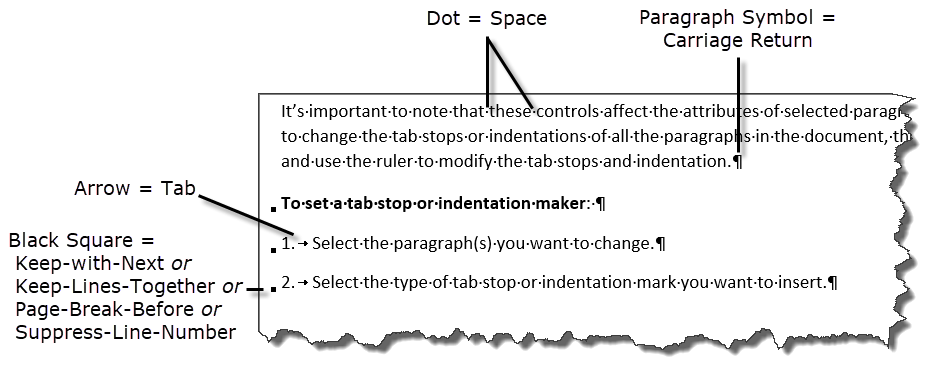

Having these editing symbols visible when working in your document can help you troubleshoot odd formatting behavior and spacing inconsistencies. For example, being able to see which items are set to keep-with-next (which will be discussed more in a later post) can help you determine why a page is breaking in an unexpected way, and being able to see empty paragraphs can help resolve inconsistent spacing between paragraphs.
Show, Hide, and Use the Ruler (Tab Stops & Indentation)
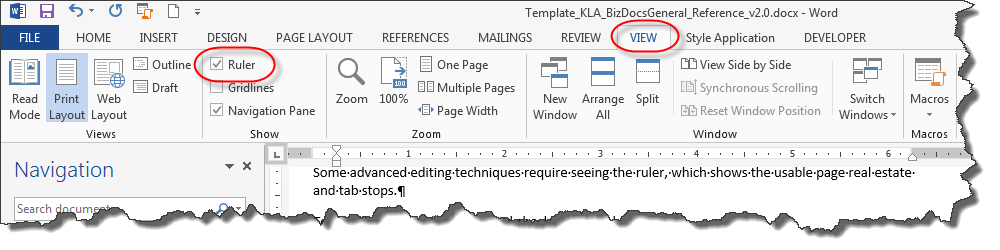
Some advanced editing techniques require seeing the ruler, which shows the usable page real estate, tab stops, and paragraph indentation attributes.
To show the ruler, click the VIEW ribbon and check the Ruler box.
Now let’s take a look at each ruler element.
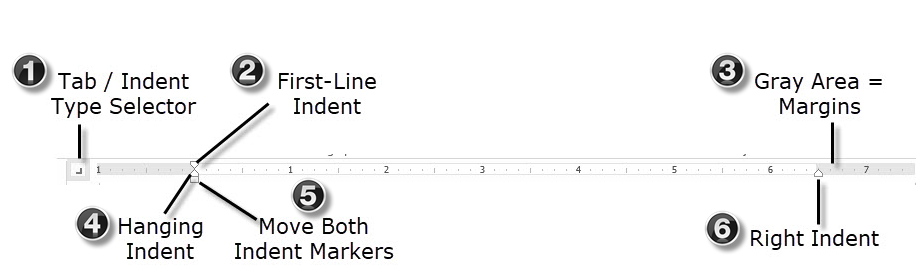
1. The button on the left of the ruler is for cycling through the various types of tab stops and indentation markers and making a selection. Word offers left, right, center, decimal, and bar tab stops, as well as first-line, hanging, and right-hand indentation. For more information about what each of these mean, refer to this article.
2. The downward-facing triangle denotes first-line indent.
3. The gray areas on the ruler indicate margins.
4. The upward-facing triangle on the left denotes hanging indent, or the position of the second and subsequent lines of the paragraph.
5. The square allows you to move both indentation markers at the same time, so their relative position stays the same.
6. The upward-facing triangle on the right denote the right indent.
It’s important to note that these controls affect the attributes of selected paragraphs only. If you want to change the tab stops or indentations of all the paragraphs in the document, then select all (Ctrl+A) and use the ruler to modify the tab stops and indentation.
To set a tab stop or indentation maker:
1. Select the paragraph(s) you want to change.
2. Select the type of tab stop or indentation mark you want to insert.
3. Click the ruler at the applicable location.
To move a tab stop or indentation marker, click and drag.
To remove a tab stop or indentation marker, click and drag the indicator up and off the ruler.
Putting it All Together
To help make sense of all this, let’s walk through a real-life scenario. Let’s say you need to create a page footer with your company logo on the left, document number in the middle, and page number on the right. Instead of trying to manually manipulate the footer using a series of spaces, you can adjust the ruler’s attributes to ensure you have proportional spacing between each element. To do this, you would simply:
1. Double click the bottom of the page to place your cursor in the page footer.
2. Using the ruler, ensure both the first-line and hanging indent markers are vertically aligned and at the edge of the gray area on the left. This tells Word to begin the footer text at the left margin.
3. Place a center tab stop as follows:
a. Click the tab-stop selector button until the center tab stop icon (![]() ) is selected.
) is selected.
b. Click the center of the white area on the ruler.
4. Place a right tab stop as follows:
a. Click the tab-stop selector button until the right tab stop icon (![]() ) is selected.
) is selected.
b. Click the right edge of the white area on the ruler. Your ruler should now look like this:
5. With your cursor at the left side of your footer, insert your logo (via Insert Picture) and press the Tab key. The cursor will then move to the middle of the footer area where you inserted the center tab stop.
6. Type your document number and press the Tab key. The cursor will then move to the right of the footer area.
7. Insert the Page field (Insert > Page Number > Current Position).
Exit out of your footer and ta-da! You now have a perfectly formatted footer.
View and Use the Navigation Pane
Word offers a navigation pane feature that:
- Makes locating a particular section much easier than scrolling through the document;
- Shows heading hierarchy so that you can easily spot incorrectly marked headings;
- Allows you to select, print, or delete a specific topic;
- Allows you to drag a topic and its contents to another location in the document;
- Allows you to quickly promote or demote a heading; and
- Provides a search feature.
To view the Navigation pane, press Ctrl+F. The pane is displayed on the left side of your Word window.
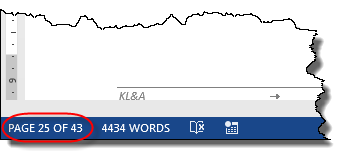
Alternatively, you can click Page X of Y shown in the lower left corner of your Word window.
While you may be aware of the navigation pane, you may not know about all the features it offers. Let’s take a look at some of the cool stuff you can do with the navigation pane.
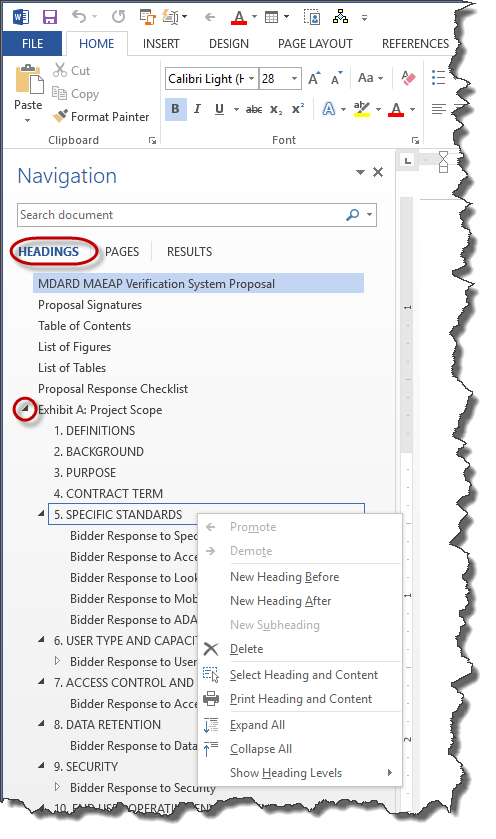
Click HEADINGS at the top of the pane to see a hierarchical view of the headings in your document.
- Use the arrow symbol next to a heading to expand or collapse the sub-headings for that section.
- Click on a heading to jump to that location within your document.
- Click and drag a heading to move the entire section to a new location within your document.
- Right-click on any of your headings to perform a variety of actions, including:
- Promoting or demoting heading levels;
- Adding new headings or subheadings;
- Deleting a heading and all its content;
- Selecting a heading and its contents;
- Expanding or collapsing all the sub-headings; and
- Setting the level of headings displayed in your navigation pane.
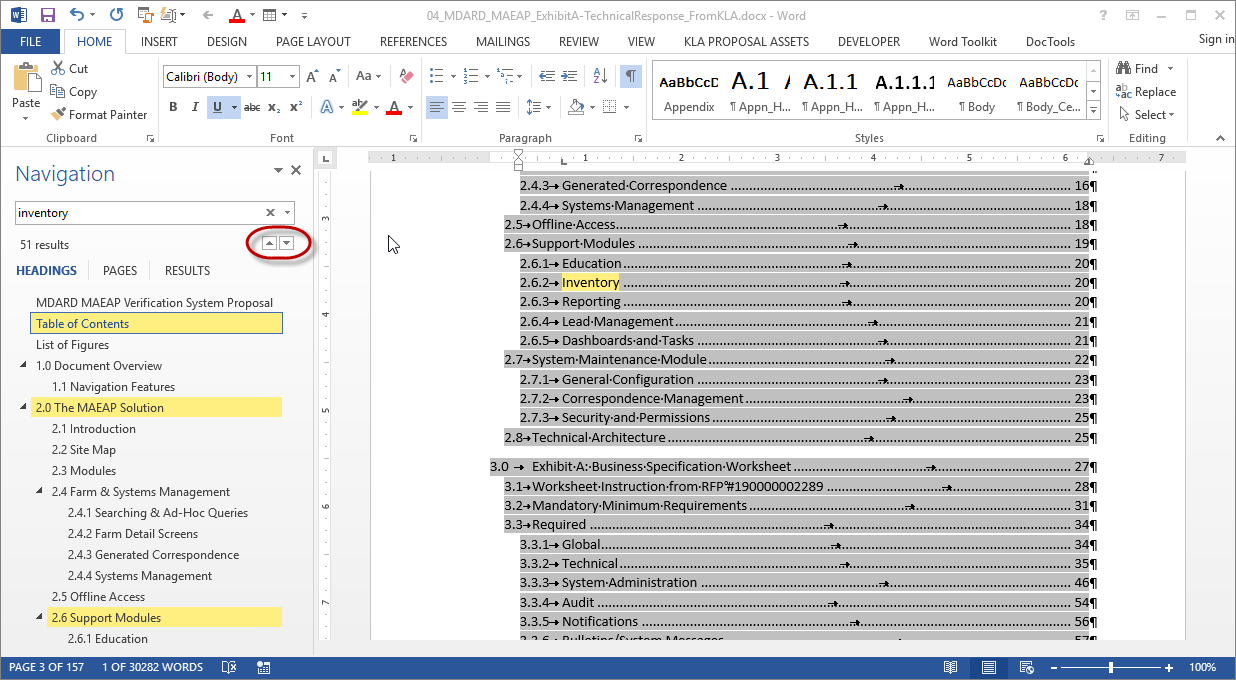
You can also use the navigation pane to quickly search your document for a specific keyword or phrase. Simply enter whatever you’re looking for in the field at the top of the pane. Word highlights all the headings that contain your search phrase. You can use the up and down arrow buttons that are just below the search field to traverse through the found instances of your phrase.
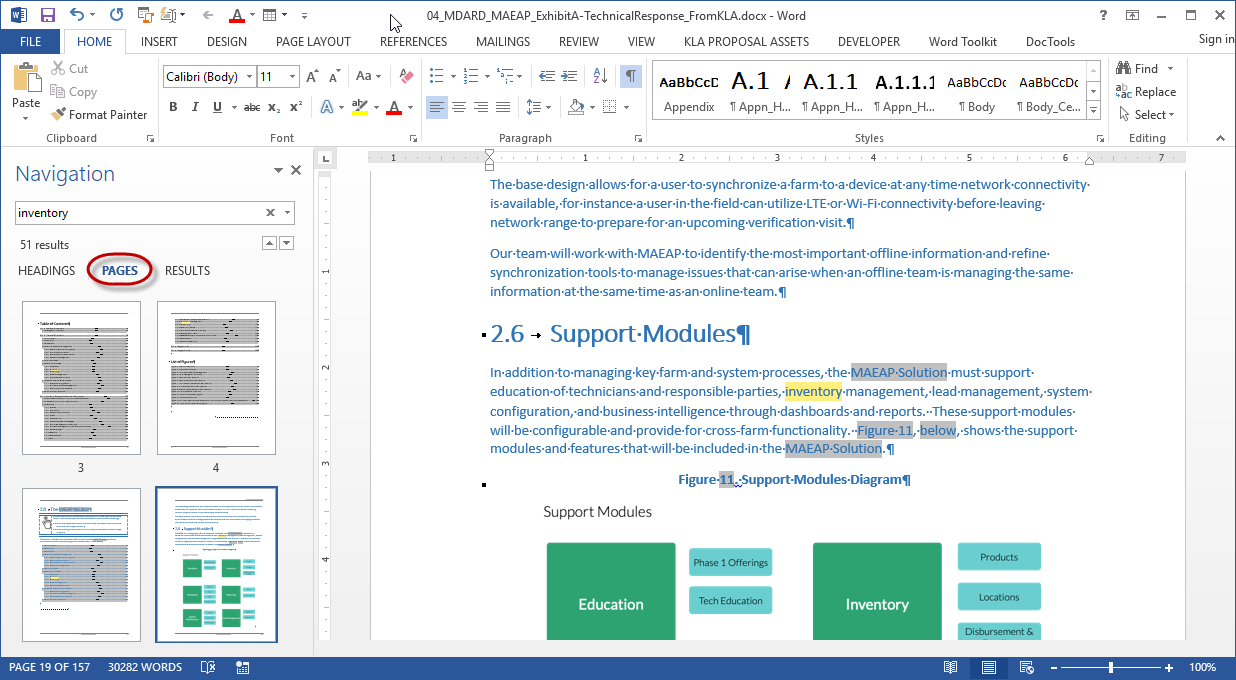
You can also click on PAGES to see your search results in context on thumbnail images of your document’s pages. This can help you to easily find the applicable instance.
Please note that if the search field is empty, the PAGES option shows all pages in your document.
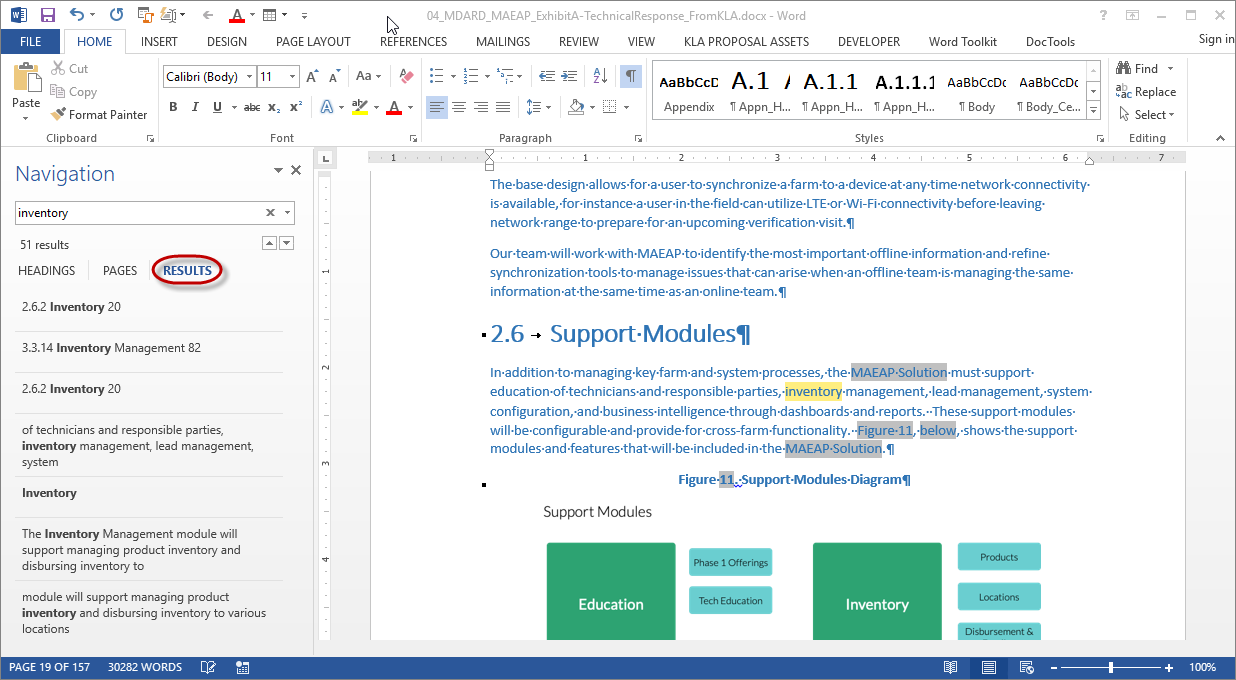
The RESULTS option is another way to quickly determine which instance is the one you are seeking. It shows snippets of the text surrounding your search phrase. You can click on any of the results to jump to the corresponding location in your document.
Getting the Basics Down
You now know how to view and use the editing symbols, ruler, and navigation pane. Pretty easy right? In the next post, we’ll look at how you can create and access templates.
Make sure you check back in to catch the rest of the Harnessing the Power of Microsoft Word series:
2 Comments
Other recent posts:

Kunz, Leigh and Associates (KL&A) Announces the Retirement of KL&A Co-Founder John Leigh
OKEMOS, MI, April 11, 2023 – Kunz, Leigh and Associates (KL&A) announces the recent retirement of KL&A Co-Founder John Leigh as of March 31, 2023. Mr. Leigh began his career as a developer working on large mainframe systems before moving…

Team Building in a Remote Environment
Blog Barista: Dana Graham | June 15th, 2022 | Culture | Brew time: 5 min
Let me start by saying I don’t care for the term “work family.” I have a family I love, and they have absolutely nothing to do with my career. I want my work life to be its own entity. I like boundaries (and the George Costanza Worlds Theory). Certainly, I want to enjoy and trust my coworkers, and I want to feel supported and cared for…
Great intro and tips! Thanks!
Thank you. Hoping this content will help people.
The second and third posts in the series have been published and there are more coming soon.