Blog Barista: Sam Nadarajan | March 18, 2020 | Developer Tools | Brew time: 9 min
Welcome to the 201 Jira series! In Part 2, we walked you through everything you can do as a Jira Board Administrator when you’re tasked with configuring a particular board for your team. In today’s post, we’ll dive into what you can do as a Jira Project Administrator!
As a project manager appointed over a new project at your company, your Jira administrator has made you a project administrator for a newly created Jira project. In the midst of forming your team, assembling the project charter, and understanding the scope and requirements of your project, you may find little time to understand the setup of your Jira project. Yet, despite competing demands, you do not want to risk being clueless on a central artifact that your project will be managed through. Aside from the other articles in the Jira series, this post will help you understand what you can view and do as a Jira Project Administrator. This understanding will help keep your project running smoothly and make you look even better as a project manager.
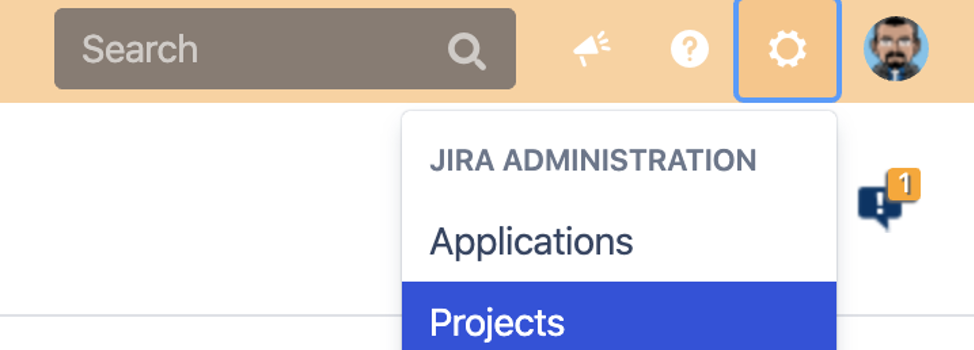
To access your project’s administration page, simply click on the gear icon in the top right and select “Projects.”
Then, click on the particular project you want to manage, and you will see a summary of your project and its configurations.

Note: All screenshots are sourced from Jira Software v8.5.1. Your organization’s configuration may differ based on your version and Jira type (whether it’s Jira Cloud or not).
Information You Can View
As a project administrator, you can view (but not modify) certain information that is available for your project. Understanding what is available will prove useful if you need to work with your Jira administrator to address potential needs for your project.
Note: A scheme represents a package of configurations that are assigned to Jira projects.
Here are the different types of information available for viewing within your project:
- Issue Types: Your Jira project will have a subset of all issue types in the organization available for your Jira project. If the Issue type scheme is only used by your Jira project, it will be simpler for your Jira administrator to modify the issue types available as they will not affect any other project.
- Priorities: The different levels of priorities available for your project are packaged in a priority scheme. If your Jira project needs the list modified to better fit your project, the priority scheme will need to be adjusted.
- Fields: All fields available for your project can be viewed on the project administration page. Note that all fields available in your organization will be listed here, but that doesn’t mean they will be available for your project unless they are included in one of your project’s screens. If you need to add additional fields to your project, view this list before consulting with Jira administrator to determine if a field in the organization already exists to suit your objectives.
- Permissions: Certain functionality in Jira can be restricted to different types of users. You can view the permissions configured for your project to determine who can and cannot execute certain actions.
- Notifications: Similar to permissions, certain events in Jira will trigger notifications for different groups of people. You can view who will be notified in the notification scheme applied to your project.
- Issue Security Levels: Your project may require certain issues within a Jira project to be restricted to certain people. In order to address those requirements, Jira uses security levels.
Configurations You Can Adjust
As a Jira project administrator, you have limited control over certain modifications, which will be discussed here:
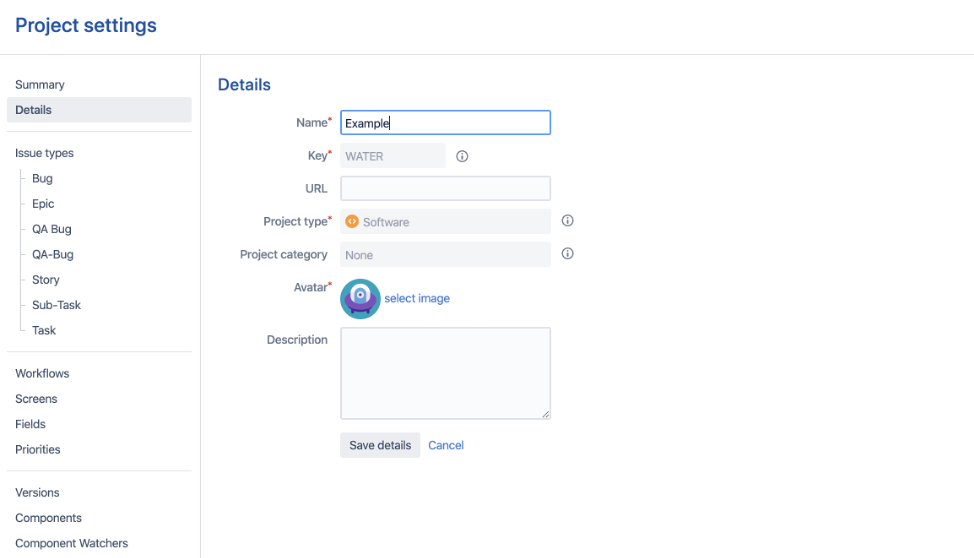
General Details
You can change the name, URL, icon, and description of your Jira project as illustrated here:
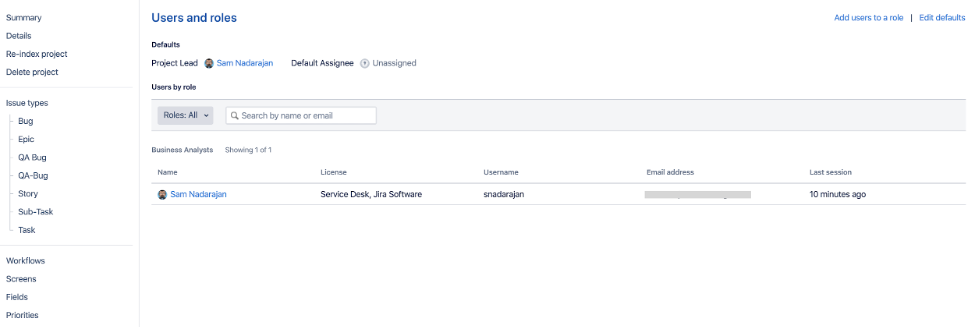
Manage Project Roles
Jira administrators can configure the different project roles available for the organization, but it is up to each project administrator to determine the users for those roles in a particular Jira project. For example, your Jira administrator may create a project role called “Business Analyst.” This role is now available for any Jira project to use. A project administrator may assign Jira users to the Business Analyst role, as illustrated below:
Different Jira projects may have different people serve the same project roles. As a result, your Jira project can reflect your organizational hierarchy to an extent. Business analysts on different projects within your organization can be assigned to the same role for the different projects. Depending on the project roles available for your organization, you can add/remove users to different roles in your Jira project as project staffing changes. For example, you can add Jira users to project roles such as business users, business analysts, developers, and management.
At a glance, adding users to project roles seems trivial, however, other parts of your Jira configuration may depend on project roles for certain functionality. For example, your Jira administrators may choose to create a general permission scheme that is based on project roles. This permission scheme can be applied to multiple Jira projects. Here is a partial example of a permission scheme based on project roles:
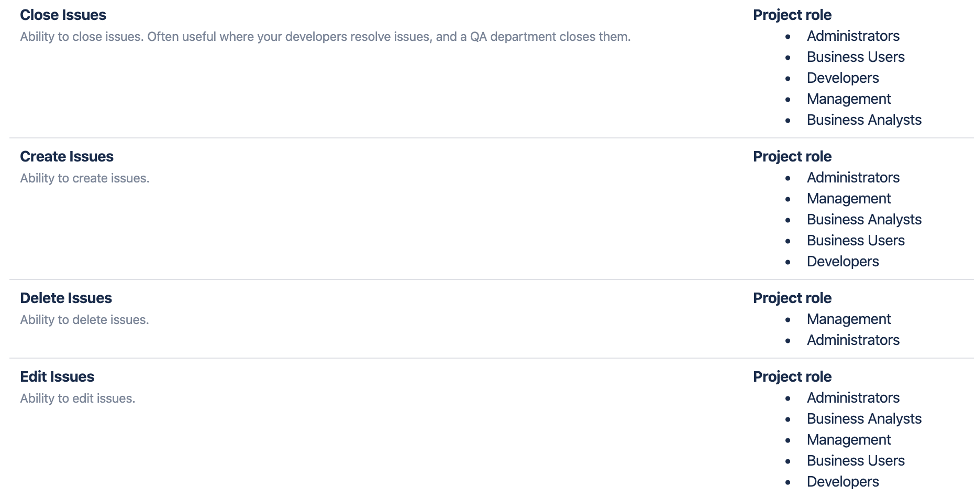
Within your Jira project, the users assigned to specific roles will have the ability to execute certain actions in Jira.
In addition, the workflows included in your project may have transitions that are restricted to certain project roles. For example, a rule in your Jira workflow may only allow users in the Business User project role to transition issues to an “Approved” status. Knowing what Jira configurations are driven by which project roles will give you a clear understanding of the importance of setting up these roles for your project.
Modify Workflows Used in Your Project
Project administrators can modify workflows for their Jira project if their project is the only one using that workflow. Statuses and transitions can be added to the workflow as illustrated below:
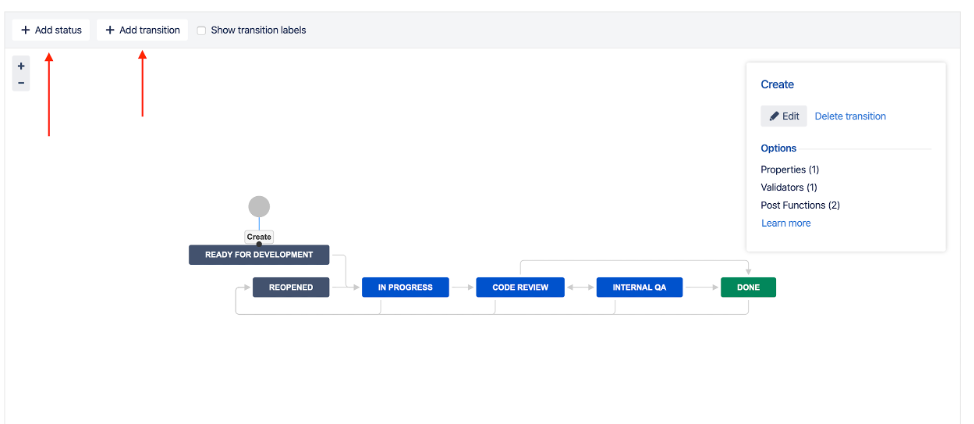
You can pick from a list of statuses available in your organization and draw arrows between statuses to indicate transitions.
If the workflow used by your project is used by other projects, you do not have the ability to modify the workflow. You will see a message as pictured:

Additionally, advanced features of workflows are also not available for configuration at the project administrator level. You will need to go through a Jira administrator for that configuration. In referencing an earlier example of limiting the transition to an approved status to Business Users, a Jira administrator would have to configure the transition to limit it to a project role. You may find that these limitations are few and far between, however, when they do arise, be sure to consult your Jira administrator for assistance.
Note: Workflows can be cloned and used for different projects to avoid sharing workflows, while allowing project administrators to modify them.
Modify Fields Available on Screens
Screens represent a collection of fields available for Jira issues in your project and can be configured for three different stages: creating an issue, viewing an issue, and editing an issue. Similar to workflows, project administrators can add or remove fields from a screen within a screen scheme if it is only used by one Jira project. If the screen scheme is used by multiple projects, the screen is read-only, and you will see a message similar to the following:

If your project is the only one using these screens, you can add additional fields, remove existing fields, or change the order of how fields appear:
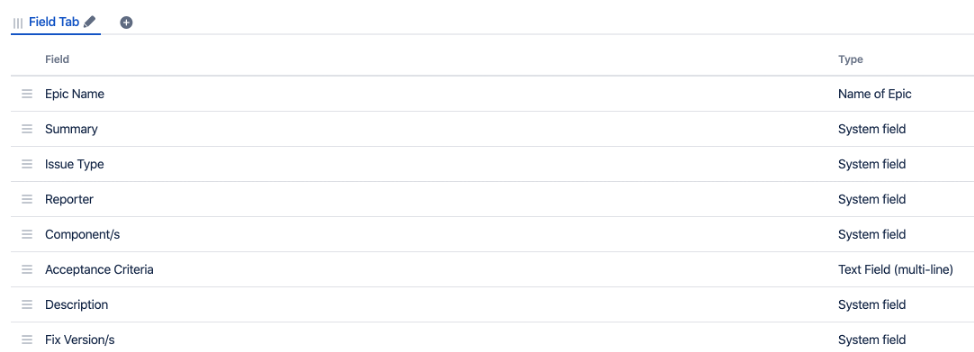
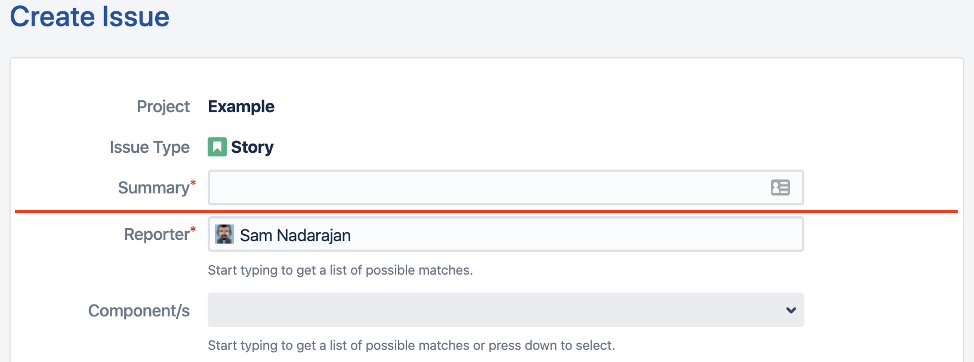
Note: When reordering fields, the order will only apply to the create issue and edit issue stages. Issue layouts for viewing an issue are standard. Fields on a screen in Jira for the create/edit issue stages are full width, meaning that each field will take up the entire row:
To avoid a lengthy scroll, you can group fields under different tabs. This may help organize a lengthy list of fields into understandable and more manageable units.
Manage Versions for Your Project
As a project administrator, you have the ability to manage versions for your project by selecting the Versions option on your Project Settings page, using the left side menu in Project Settings:
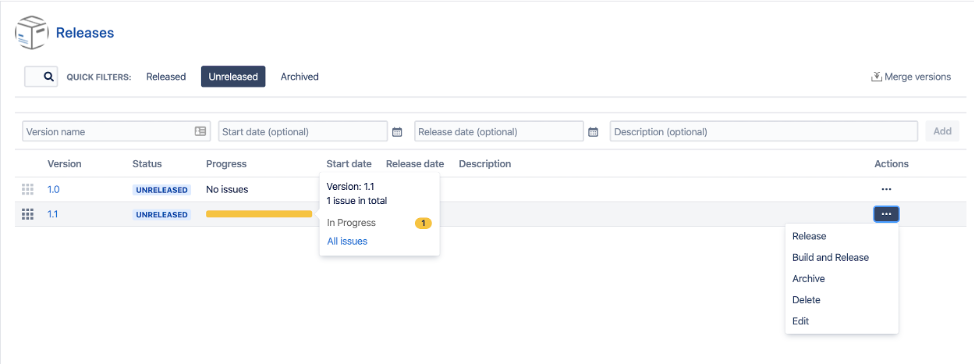
Only project administrators can manage versions. You can create versions, merge versions, and release versions. The “Build and Release” option for versions can serve as an automatic trigger if you have any continuous deployment/build tools integrated with Jira – clicking on this option can trigger a build and deploy cycle for issues associated with that version.
The progress bar for each version shows how many issues are in the to do stage, in progress stage, and done stage. Hovering over the progress bar will provide additional details for the issues associated with that release.
Manage Components & Watchers
Components represent subsections (or submodules) of a Jira project. Like versions, these can be managed by project administrators to provide an additional level of organization to your Jira project.
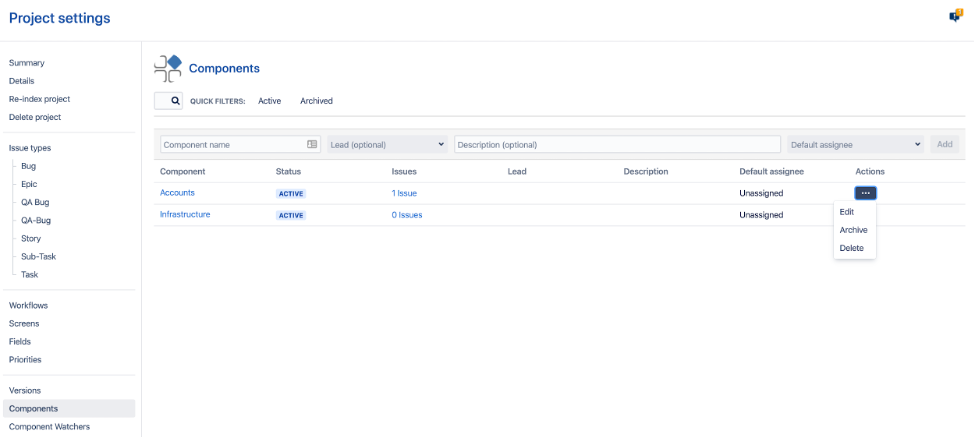
On the Components Management screen, you can add or remove components as needed. Components have additional functionality that mimics a project: you can assign a lead to a component, as well as a default assignee.
Additionally, you have the ability to set watchers for each of your components to keep individuals or groups notified of any updates. Watchers will only receive notifications for events configured in your notification scheme.
Keep Your Project Running Smoothly
Project administrators can view information and make modifications to their Jira projects to increase their usefulness to their team. Understanding how Jira projects work and how they can be managed will prove beneficial to everyone involved. As a project administrator, you can work with your Jira administrator to configure parts of Jira that are beyond your control. As your project changes through staffing and/or growth, you will have the power to address those changes as they occur instead of waiting.
In the next post, we’ll walk you through everything you need to know about Jira workflows.
Make sure to check back in the following weeks for the rest of the Jira 201 series:
Other recent posts:

Kunz, Leigh and Associates (KL&A) Announces the Retirement of KL&A Co-Founder John Leigh
OKEMOS, MI, April 11, 2023 – Kunz, Leigh and Associates (KL&A) announces the recent retirement of KL&A Co-Founder John Leigh as of March 31, 2023. Mr. Leigh began his career as a developer working on large mainframe systems before moving…

Team Building in a Remote Environment
Blog Barista: Dana Graham | June 15th, 2022 | Culture | Brew time: 5 min
Let me start by saying I don’t care for the term “work family.” I have a family I love, and they have absolutely nothing to do with my career. I want my work life to be its own entity. I like boundaries (and the George Costanza Worlds Theory). Certainly, I want to enjoy and trust my coworkers, and I want to feel supported and cared for…
0 Comments