Blog Barista: Michael O’Keefe | Feb 20, 2019 | Web Development | Brew time: 9 min
It’s here! It’s here! Welcome back friends, you have arrived at the last part of the Firebase Series. Today we’ll be building out the user profile page to allow a user to view, edit and delete reviews as well as upload a profile picture.
We will create another Cloud Function to analyze the images that a user uploads using the Google Cloud Vision API. If the image is flagged as explicit or violent, you will have to download the image to the virtual server and use the ImageMagick command line tool to blur it, re-upload it and then lock the user’s account. I will walk you through how to update your Security rules to disallow any locked user from altering data. The finish line is close.
Brief Review
In Part 5, you set up Cloud Functions to add a user document to Firestore and send a welcome email when a user signs in for the first time. We used cloud functions to aggregate and sync reviews between breweries and users and to accept an HTTP request to increment the number of views a brewery has when someone visits a brewery. So, give yourself a pat on the back! If you are just joining us, go ahead and clone this repository from GitHub and checkout the storage branch. You will have to follow Part 1 to get your environment set up and connect to Firebase using your credentials and Part 4 to get hosting set up, but the code will be at the same place where we left off in Part 5. If you have already completed the previous parts there is no need to checkout any other branch.Enabling Cloud Storage
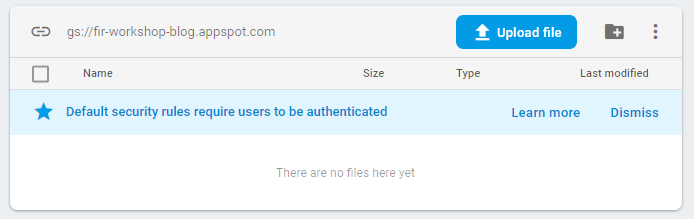
To enable storage for your project, go to the Firebase console for your project and select Storage from the side menu. Click Get Started to get a prompt about security rules. Storage rules work the same as Firestore rules so we will just use the default rules (user must be authenticated for all requests) for this tutorial.
Saving Profile Images
In src/app/user-profile/user-profile.component.ts, set up the userRef and reviewsRef as we have done in the BreweryComponent.The saveUser Function
The UI is all set up for us to pick a file and save it, we just need to implement the saveUser function to properly upload the image to Cloud Storage. If a user selects a file to upload, we will put that file into storage under the path of users/userId/filepath (filepath just being the name of the file from wherever you are uploading it from. This will return a Firebase UploadTask which we can then use to register and observe state changes of the upload. As we have seen before, observers accept three callback functions: next, error and completed. Every event pushed to this observer will pass information about the upload state including how many bytes are transferred via an UploadTaskSnapshot object. We can use that object to calculate the progress in the next callback. Using the completed callback, we can then use save the uploaded images file name to the user and reset the upload form.
Saving and Deleting Reviews
Lastly, we need to implement saving and deleting reviews. This will be done, again, almost exactly as in the BreweryComponent, but referencing the user review collection instead of the brewery review collection.If you run the application now, you should be able to upload a profile image and edit and delete the reviews that you have made.
Enabling Billing to Use the Cloud Vision API
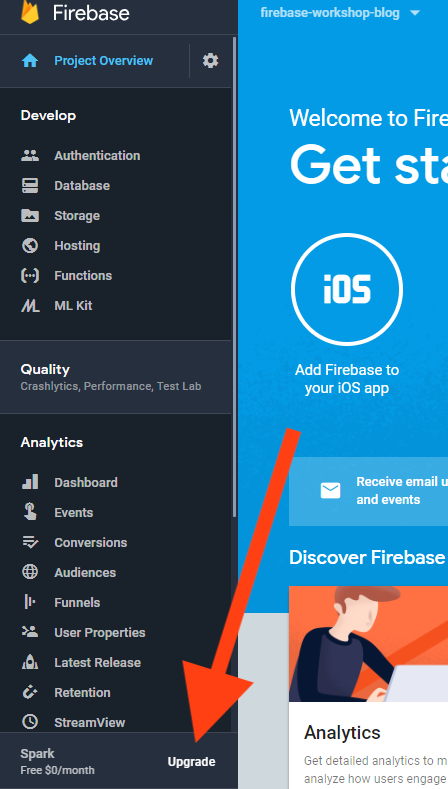
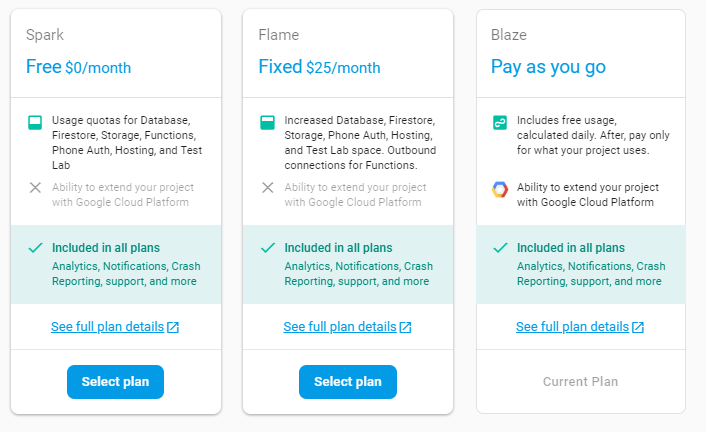
The last part of this tutorial does require that you enable billing on your project since we will be making external API calls. You are not required to do this, but you cannot use the Cloud Vision API without enabling billing. To enable billing, go to your project’s Firebase Console and click Upgrade on the bottom of the left side menu bar. I highly suggest selecting Pay as you go (the Blaze plan). With this plan you will not be charged until you surpass the limits of the free tier (Spark plan). This tutorial will not exceed that limit so even though you have to enter payment info, you can still use the services for free. Feel free to downgrade back to Spark at any time.
Automated Image Moderation
Now that users can upload images, let’s implement a little bit of automated moderation based on one of the most powerful Machine Learning image APIs open to the public. In functions/storage-functions.js we will be implementing two functions: moderateUserProfileImage and blurIamge.The moderateUserProfileImage Function
The moderateUserProfileImage function is exported and passed to the storage object’s onFinalize event trigger in functions/index.js. This will be called in response to any successful upload to Cloud Storage and passed a Storage object.
First, we will extract the userId from the object name and fetch the user document. When that resolves we check if they are already locked. If the user is already locked, then we have already moderated this image. If the user is not locked, we run safeSearchDetection on the file using the NodeJS Module for the Cloud Vision API which we have imported as visionClient.
When the detection resolves, we will have results that will include safe search annotations. If these annotations include adult or violence we will pass the image and user document to the blurImage function to moderate the image and lock the user.
The blurImage Function
In the blurIamge function, we first download the file onto our function server instance into a temporary local file. We need to download the file locally (on the function server instance) un order blur the image using ImageMagick. Once this is completed, we will re-upload the file to Cloud Storage, then set locked to true on the user document. Lastly, we want to delete our temporary image file so we do not clutter our function instance.
Restricting Locked Users
Now that we have implemented user locking and image blurring, we want to restrict what locked users can do. Open up the firestore.rules file. In all of the places that we have defined create, update and delete rules, we want to add a check to make sure that the user is not locked. In the firestore.rules file, add the following rule.Again, it would be a lot nicer if we could create a function for this. At the time this was written, we had trouble getting functions to work with GET requests. If you’re able to get it working though be sure to let us know in the comments!
Testing it out
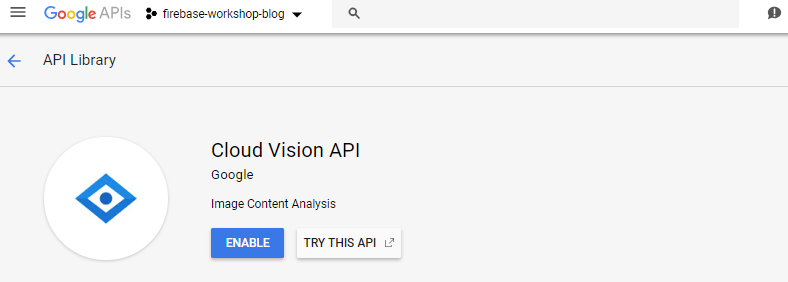
Run firebase deploy to push the new function and updated rules. While you wait go find an image to test with! My favorite is any picture of a zombie. When you have your image and the deploy is complete, head over to your app and upload the image to your user profile. At first the image will appear, which is expected. The function will take a little bit to run. Unfortunately, if we wait awhile nothing will happen…. Let’s check out the logs! In the Firebase project console’s Functions Logs tab, you should have an error that looks like this:
We need to enable Cloud Vision in order to use it. Luckily Google has our back, follow the link from the error and enable Cloud Vision.
Head on back to the app and refresh. Let’s try uploading the same image again. If you get the same error, we would suggest giving it a few minutes before trying again. If you get an error that looks like this:

Then, you did not set up billing yet. If you want to test this out please go back and follow the steps in the Enabling Billing to Use the Cloud Vision API section of this post.
If you have enabled Cloud Vision and set up billing, the image should blur within about 10 seconds. For me it is usually about 2-5 seconds, but it could be a little longer depending on your internet connection. Now, if you edit one of your reviews and try to save it you should get a console error.
You are locked down!
Congrats! You now have a fully functioning, publicly accessible web application built on Firebase and supported by Google Cloud Functions, Storage and Vision API. You definitely deserve a drink after that build ;).
Firebase is a framework that has many great benefits for developers at any stage in their experience and ability. Chris, Jason and I had a great time creating this series for the workshop during the Beer City conference last year. Thank you for following along! Feel free to post any questions or comments below. Also, if you got creative and put your own twist on the application, our team would love to know about it! The repository is public so fork away!
Other recent posts:

Kunz, Leigh and Associates (KL&A) Announces the Retirement of KL&A Co-Founder John Leigh
OKEMOS, MI, April 11, 2023 – Kunz, Leigh and Associates (KL&A) announces the recent retirement of KL&A Co-Founder John Leigh as of March 31, 2023. Mr. Leigh began his career as a developer working on large mainframe systems before moving…

Team Building in a Remote Environment
Blog Barista: Dana Graham | June 15th, 2022 | Culture | Brew time: 5 min
Let me start by saying I don’t care for the term “work family.” I have a family I love, and they have absolutely nothing to do with my career. I want my work life to be its own entity. I like boundaries (and the George Costanza Worlds Theory). Certainly, I want to enjoy and trust my coworkers, and I want to feel supported and cared for…
0 Comments