Blog Barista: Michael O’Keefe | Jan 30, 2019 | Web Development | Brew time: 9 min
In June of last year (2018), myself and a couple of my colleagues—Chris Dahm and Jason Kusnier—had the privilege of leading a day-long workshop as part of Beer City Code’s annual conference. It was a great opportunity to network with other developers from all stages and walks of life. The conference was very affordable, so regardless of your experience I highly recommend that you check out the conference in 2019.
Our workshop, Building Applications Using Firebase, was a huge hit with those that participated, so I’ve decided to adapt the workshop into a blog series. To make things easier to follow, I’ve broken up the workshop into six parts.
The application that we’ll build during this tutorial will be a brewery review app (the conference was held in Grand Rapids, Michigan, which is also known as Beer City, so it was fitting for the audience). The application will utilize the Angular framework and the Firebase JavaScript SDK.
If you are new to Angular, have no fear. While some JavaScript background, and knowledge of NoSQL data modeling is recommended, I will provide you with everything else you’ll need in order to build the app.
By the end of the entire series, you will have:
- An understanding of what Firebase is and what services it has to offer
- Learned how to securely authenticate users with a myriad of providers including Google (using OAuth2), email and password, and anonymously with very little setup
- Modeled data as document-based NoSQL using Cloud Firestore and learned why this can be useful as an alternative to relational data modeling
- Leveraged Google Cloud hosting, functions, and storage to host an app on Google’s extensive CDN base
- Built a serverless backend that scales with an application’s needs
- Hosted and analyzed a user’s assets using machine learning
If you are an Angular pro, you may wonder why I am not always following “best practices,” or why am I using the plain JavaScript SDK for Firebase instead of an Observable based alternative. The reason is that I want to make this as accessible as possible. This tutorial isn’t so much about how to create a perfect Angular application, but rather about learning Firebase. All of the Observable based alternatives are either built on top of the JavaScript SDK or following the same patterns anyway.
What is Firebase?
In a nutshell, Firebase is a cloud-based Backend as a Service (BaaS) platform that can integrate with Google Cloud Platform (GCP) products. It is billed as a “comprehensive mobile development platform,” but it integrates any cloud-connected software across all platforms to form a seamless user experience with minimal setup needed from the developer(s). For more information, check out the Firebase website.
I will not be covering all of the services offered by Firebase, as many of them are specific for mobile applications. If you are interested in mobile app development, then I encourage you to read about them and follow the Firebase YouTube channel to learn more.
Alright, now that you know a little bit about Firebase, we will spend the rest of Part 1 configuring our development environment, cloning down the starter app code, and setting up authentication.
Setting Up the Project Locally
You can find all of the code for this tutorial series at this GitHub repository.
The first step will be to install Node. It is recommended that you use the LTS version, however newer versions should work no problem. As I am following along, I am using node v10.6.0 though (10.15.1 is the current LTS).
Next, open up a terminal window (or command prompt for windows) and type npm install -g firebase-tools. NPM stands for Node Package Manager and was installed with Node. You’ll be using it to install the Firebase CLI tools globally so you can interact with your Firebase project locally. This will be important later on when we deploy our application. Check out the available documentation for more information.
Once the Firebase tools are installed, run npm install -g @angular/cli to install the Angular command line tools. You will be using this to build and run your application. You do not need to know anything more about this for the rest of this tutorial, but if you’d like to learn more you can check out the documentation.
If you do not have Git installed, please install it. Any Git client that you are comfortable with will work. I personally really like GitKraken which is cross platform and free for open source and non-commercial use, plus they have a cute little Kraken for a logo.
Let’s go ahead and clone the repository. The default branch will be the incomplete version of the application; a basic skeleton will be present, including method stubs and the UI (it is not our goal to teach you how to build a UI in Angular). The Master branch will contain the completed application code that you can reference at any time if you get stuck.
Next, open the project in your favorite code editor/IDE. I recommend Visual Studio Code, or WebStorm, but, you can use whatever you are most comfortable with.
From the root app directory, run npm install to install the application and development dependencies.
When this is completed, install dependencies needed to develop Cloud Functions code with:
cd functions
npm install
This will be important in Part 5 of this tutorial when we enhance the application with Cloud Functions.
At this point, run:
cd ../
ng serve
in your terminal to start a local development server and host your app through http://localhost:4200/. This server supports hot swapping, and when you save a file in your project, the server will automatically reload the changed parts for you.
I recommend that you use a modern browser for developing this app. Google Chrome and Mozilla Firefox both work great for developing modern Angular applications. Other browsers do work as well, but I recommend these ones.
For your convenience here are all of the commands for this section together:
Setting Up the Project in the Firebase Console
Now that your environment is set up, you will need to set up a Firebase project and connect your application to it.
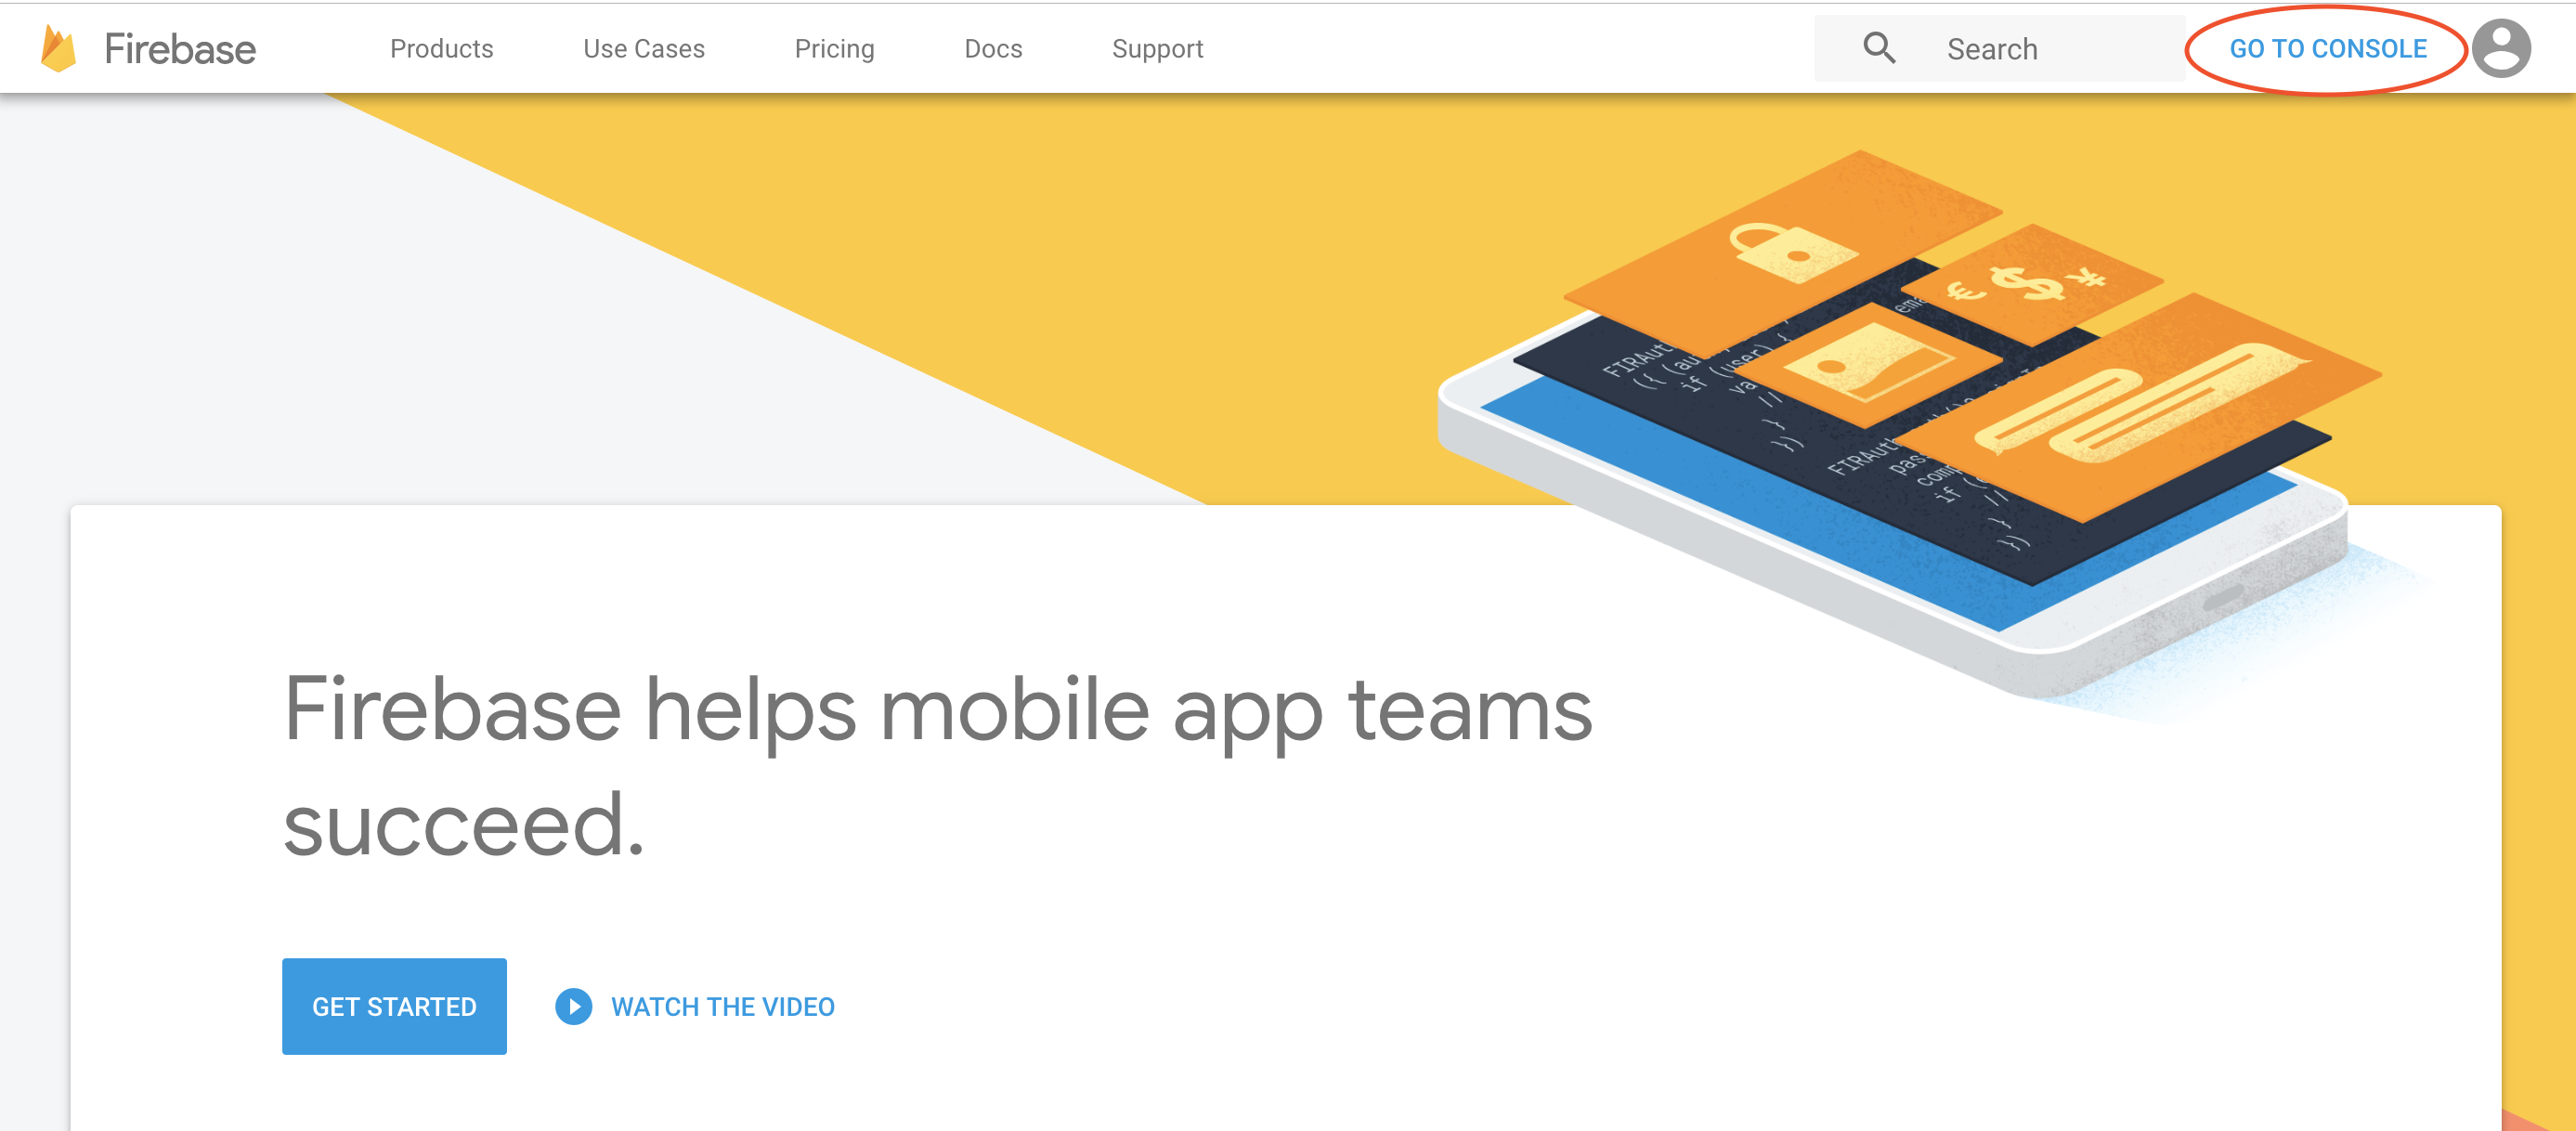
Navigate to the Firebase website and click on “GO TO CONSOLE” in the top right of the toolbar. If you do not see this button, you will have to sign in first.
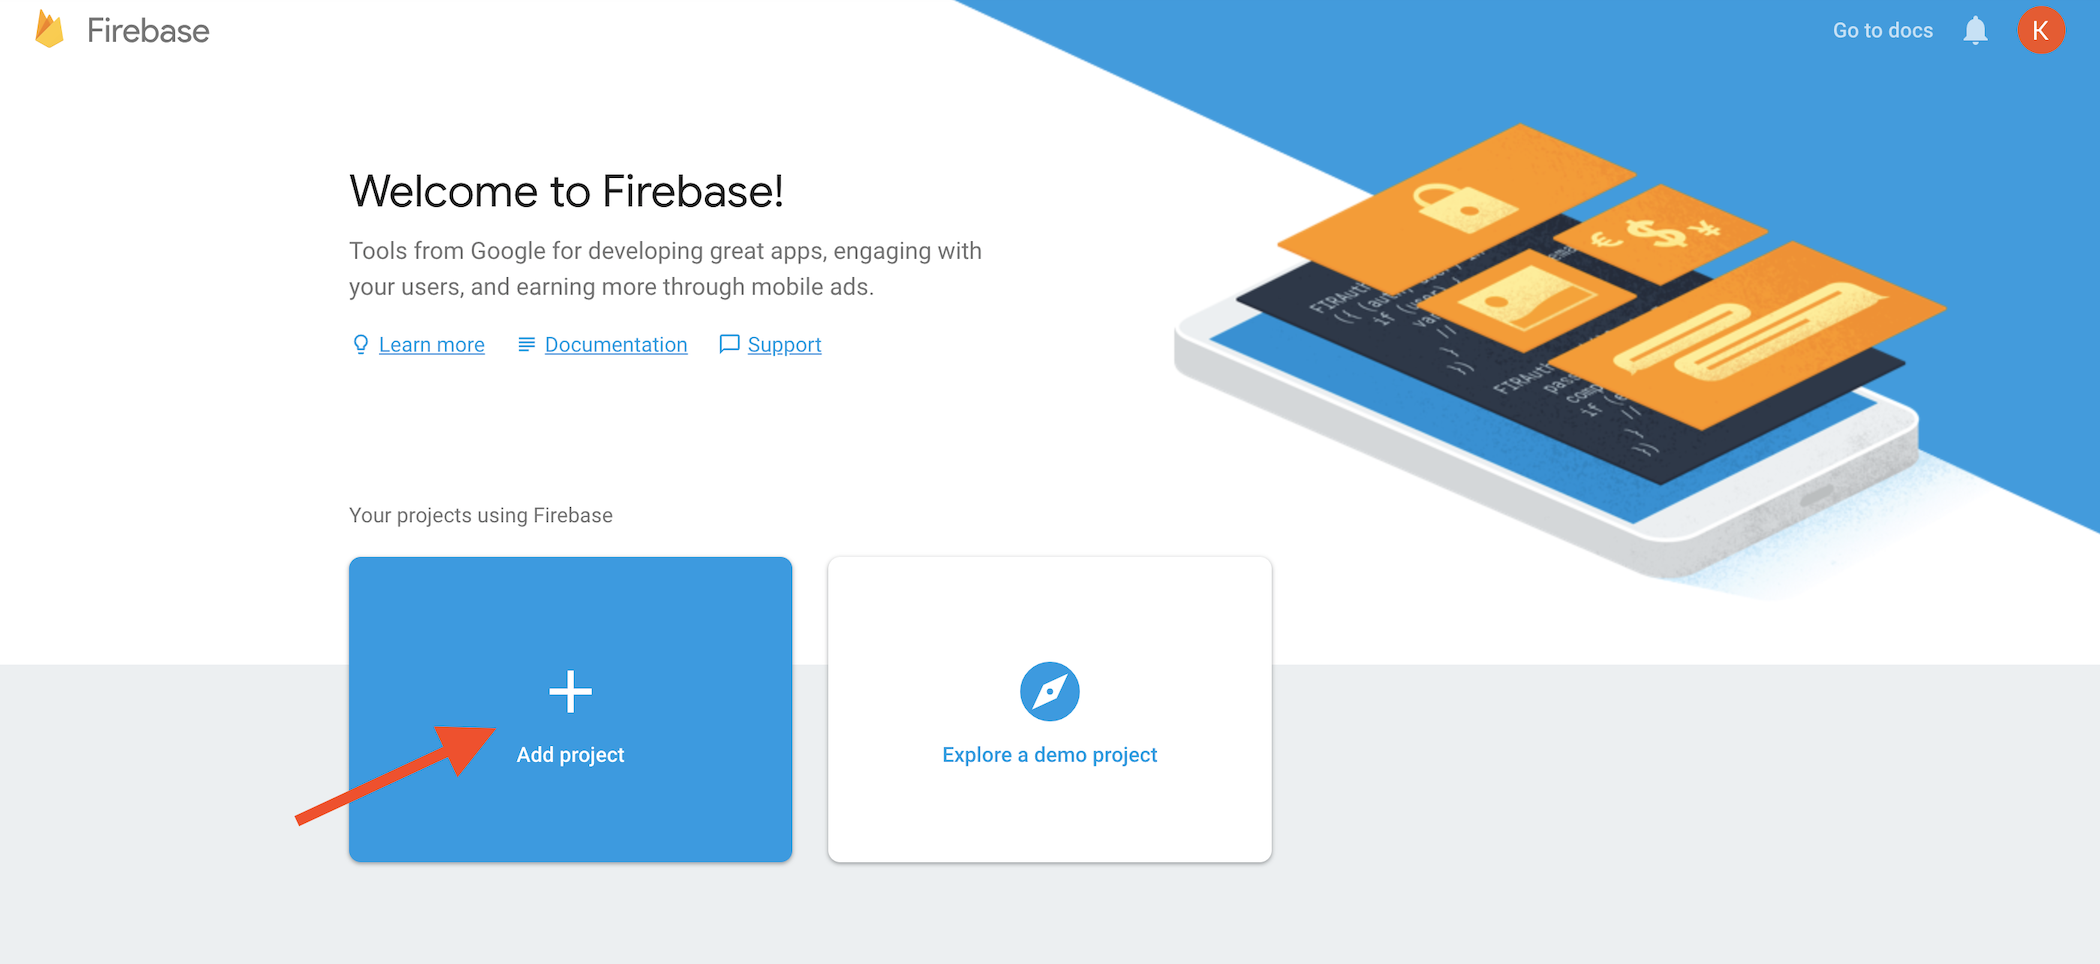
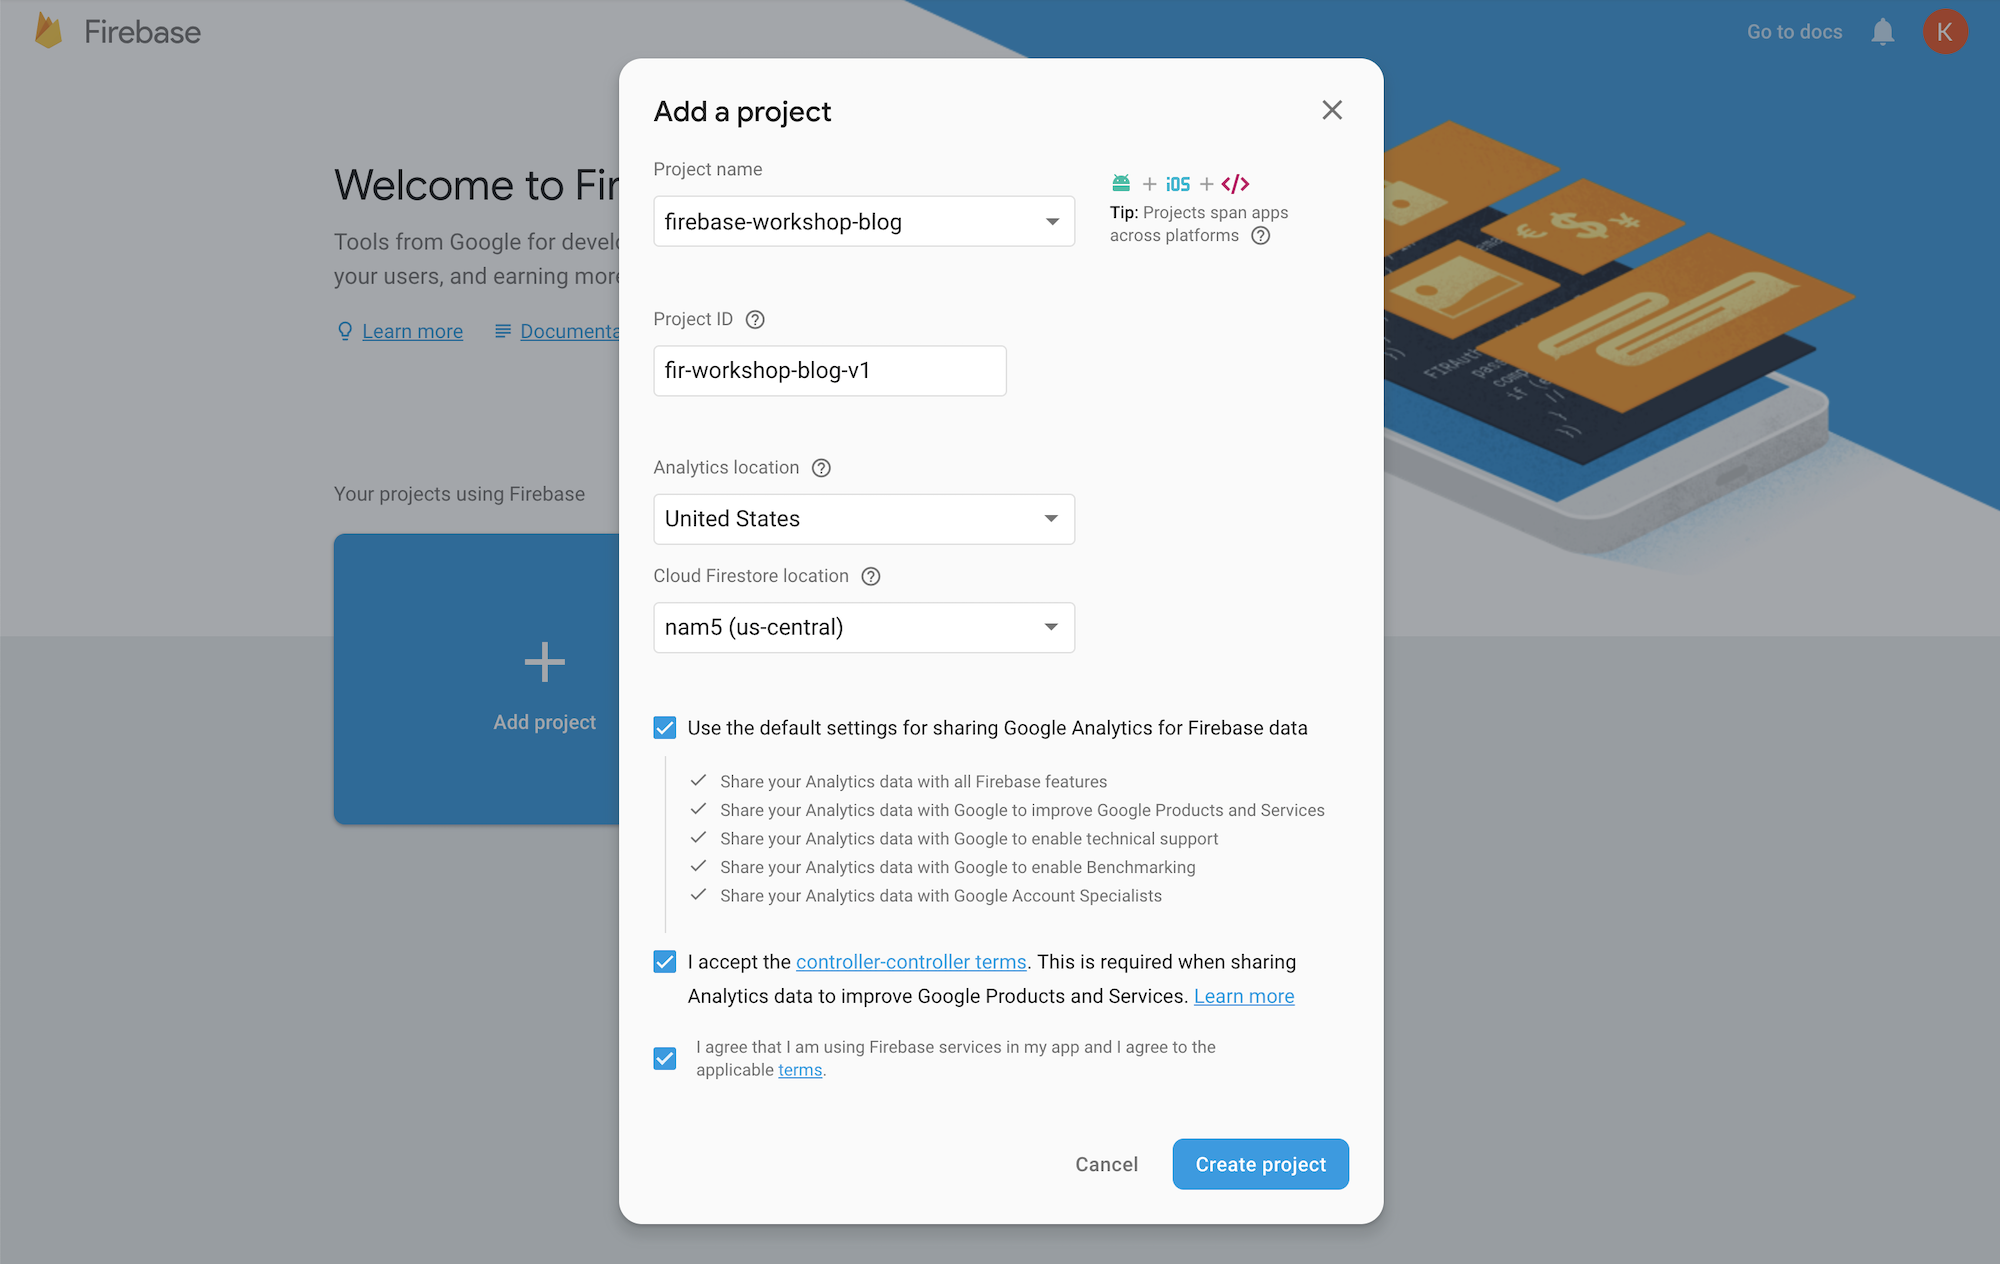
Once in the Firebase console, click “Add Project.” Go ahead and name your project however you want. As a note, if the project name is already taken, Firebase will automatically add some numbers to the end of the name to make it unique (easy way to see if your name is already being used). I have been calling our app Brewerbase, but I would love to hear what names you come up with!
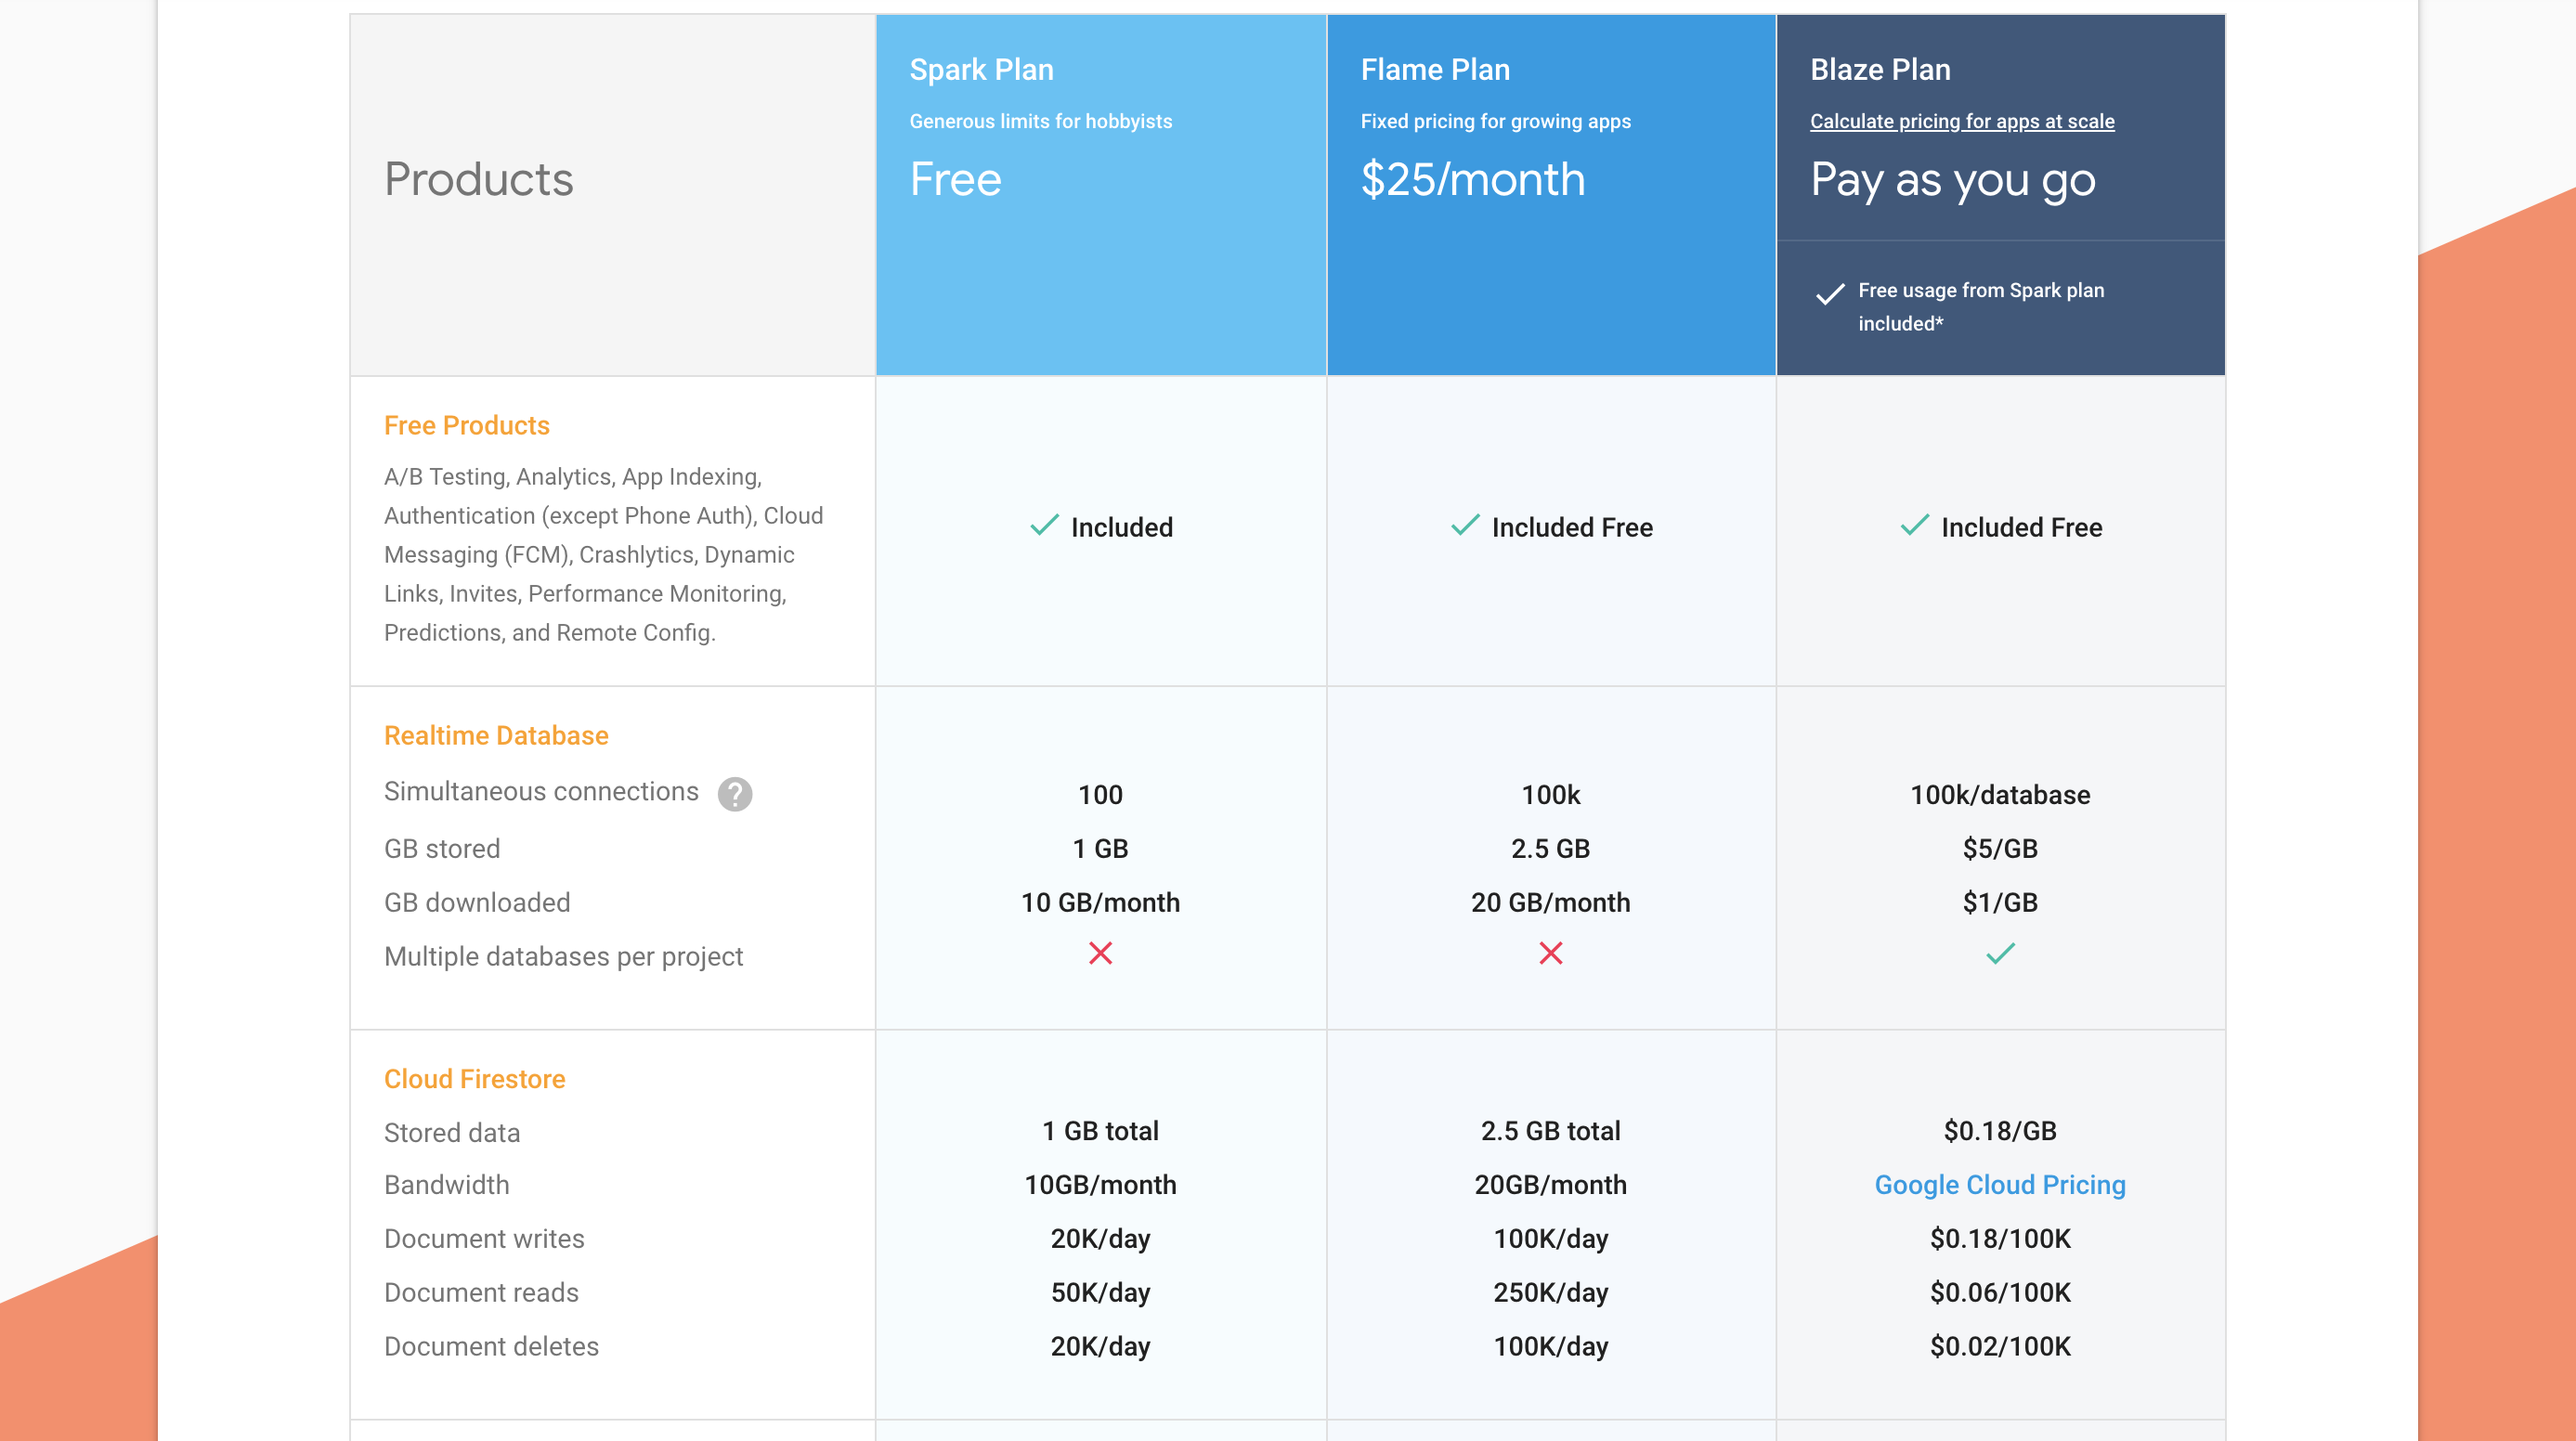
You now have a complete cloud-based Software as a Service (SaaS) platform to run your app without the need of a credit card. However, at the bottom left side of the Firebase project console screen you can see your selected billing plan. By default, this is the Spark Plan which gives us more than enough resources for our small app at NO COST.
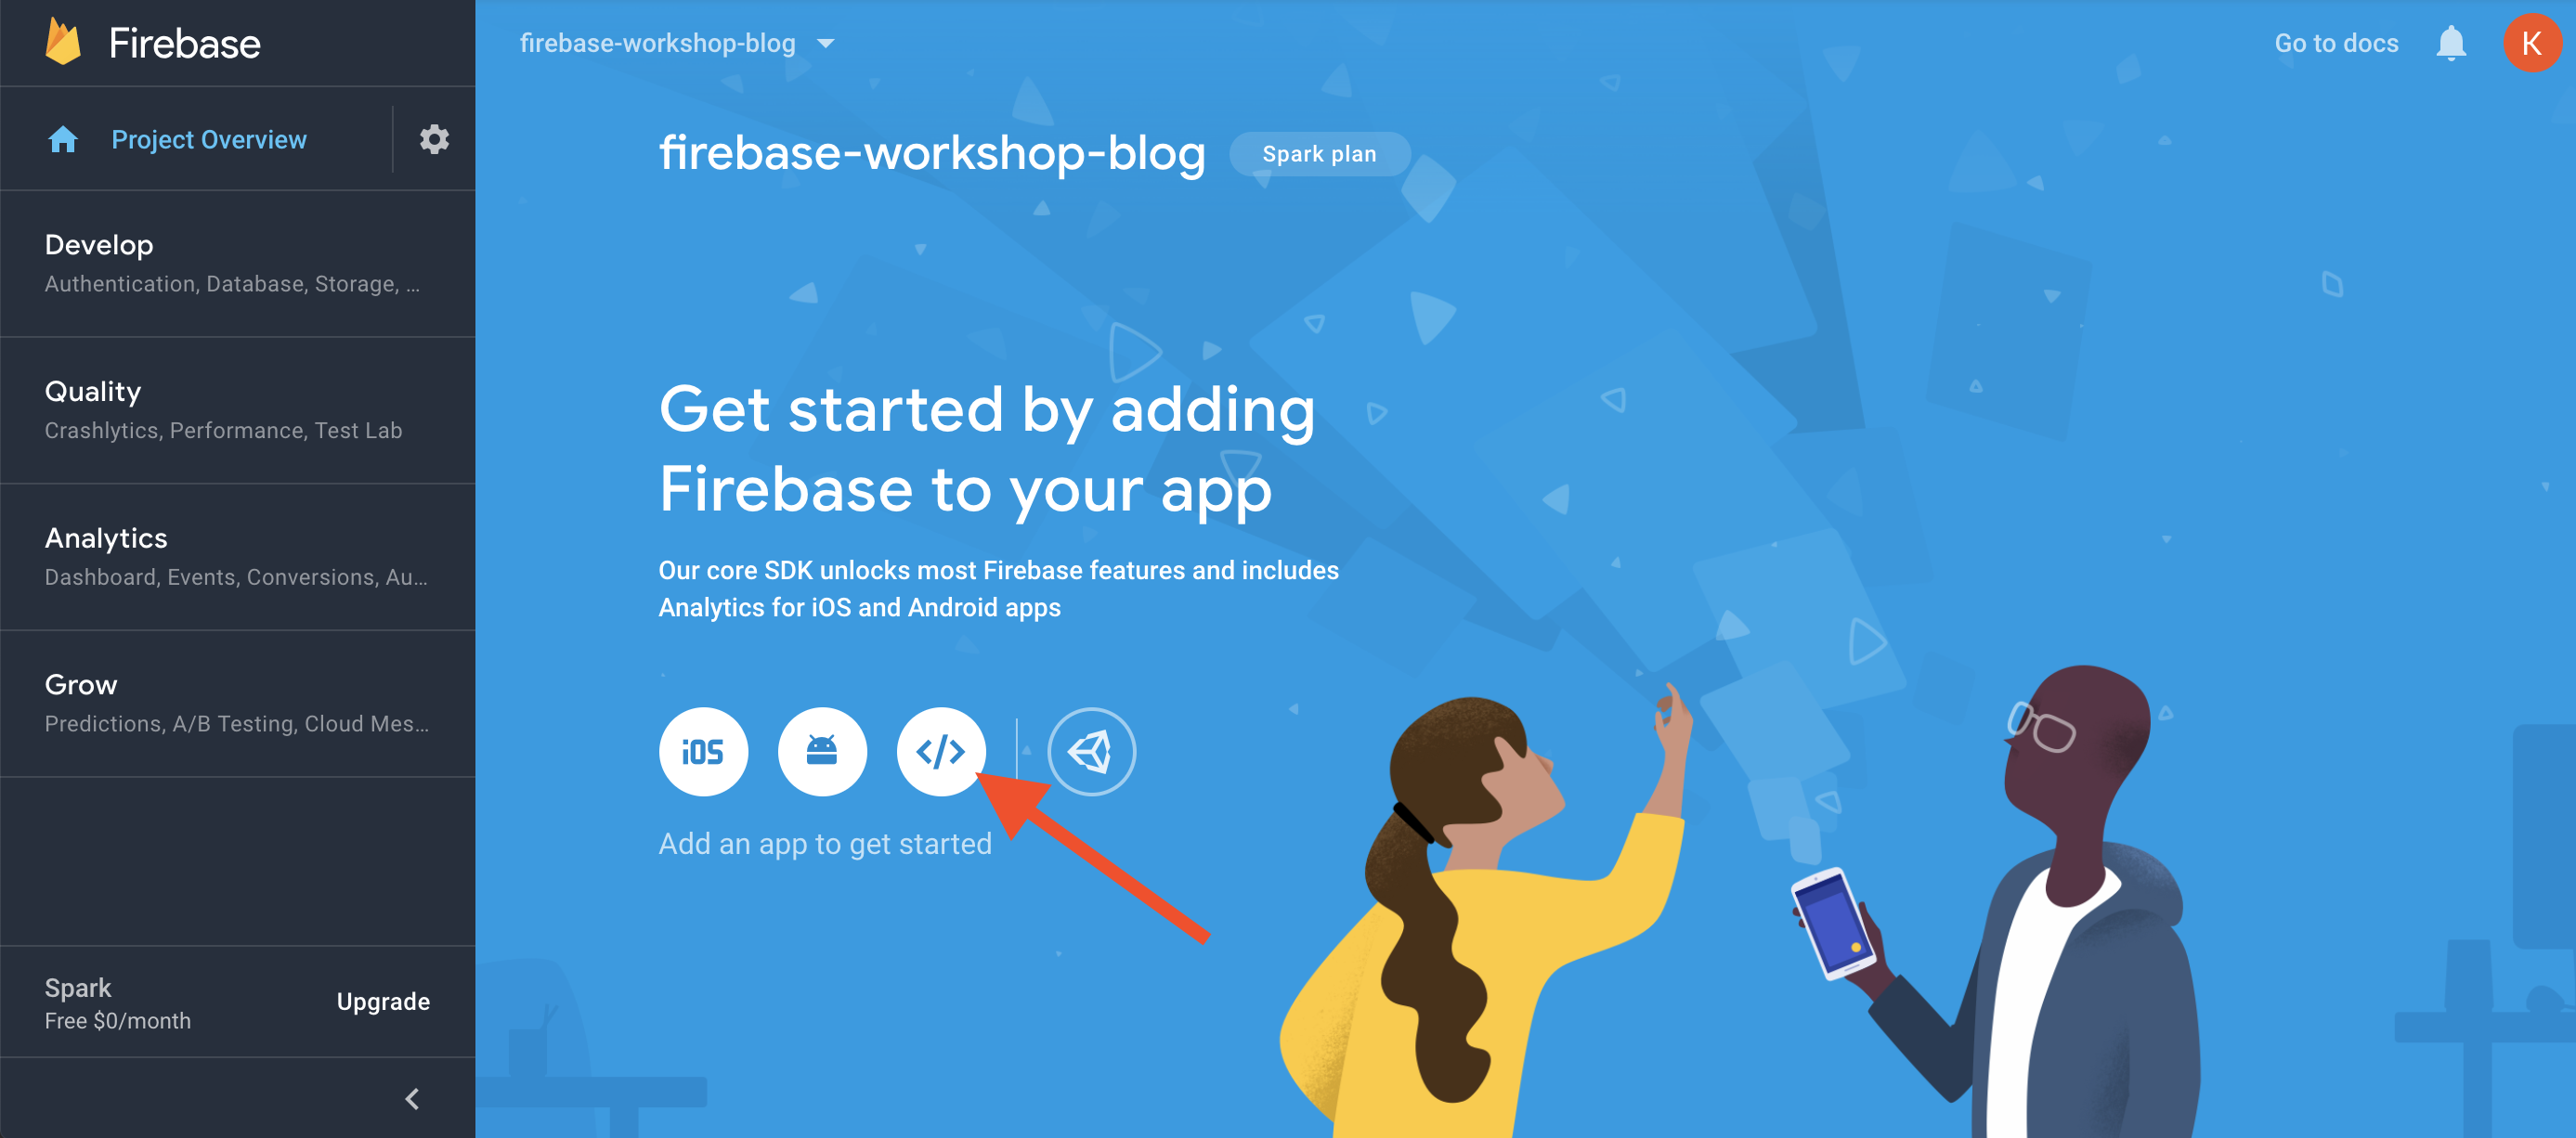
Now, click “Add Firebase” to your web app and copy the key-value pairs from the config object in the code snippet that pops up. These are your API key, project ID and endpoints for your cloud services, including database, authentication, storage and cloud messaging.
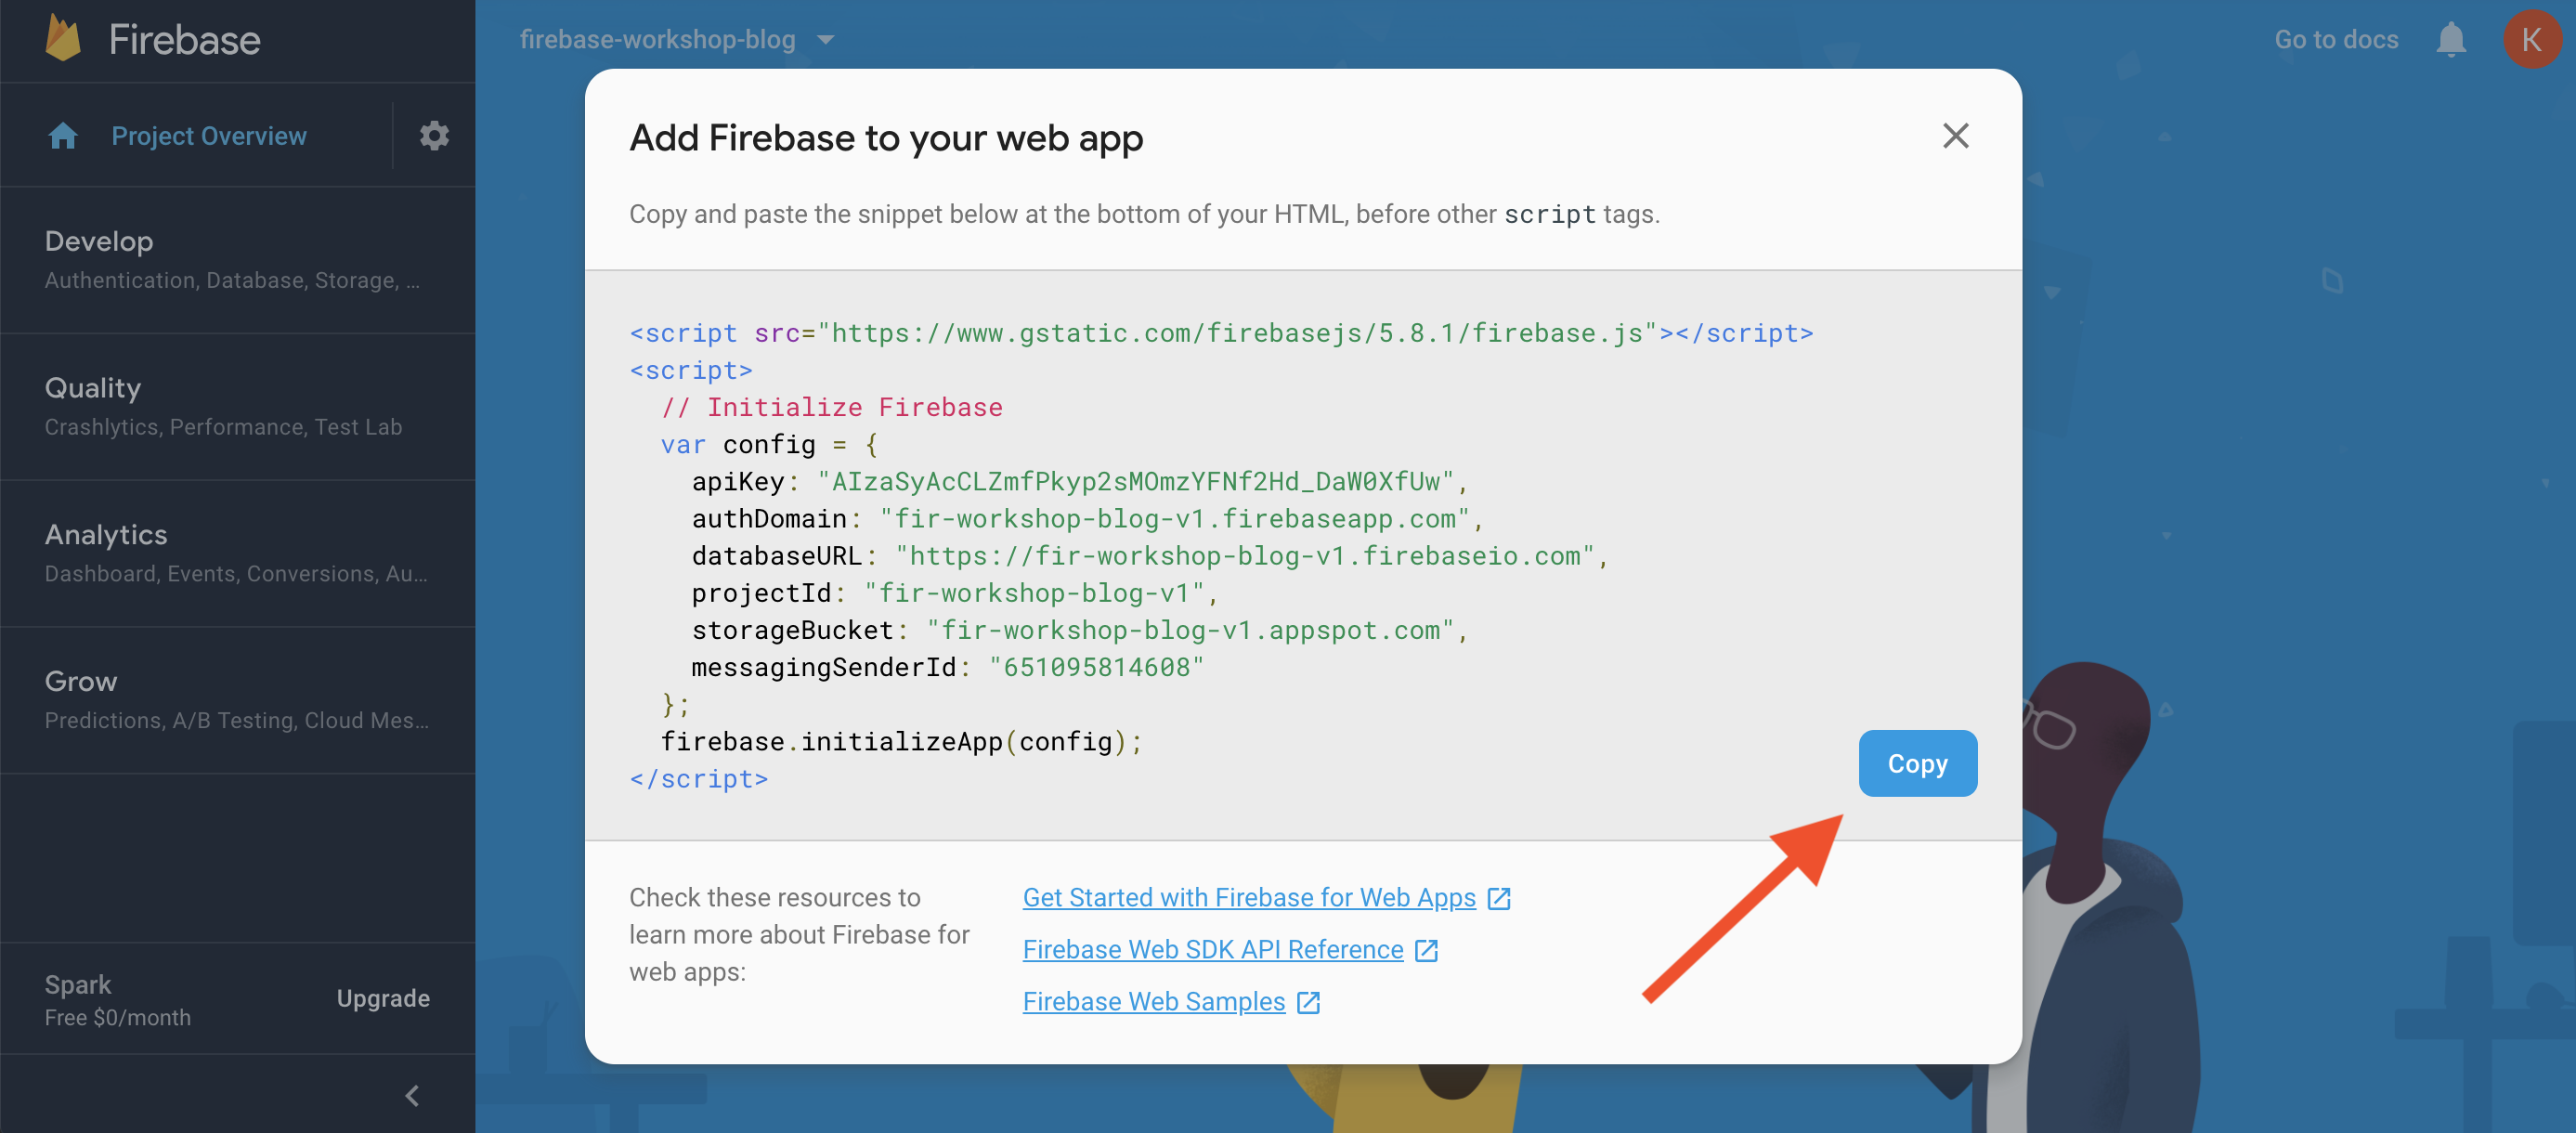
In the application code, open src/config/firebase.config.ts. Paste the key-value pairs into the firebaseConfigDev object (see example below).
/**
* Put Firebase app configuration here
*/
export const firebaseConfigDev = {
apiKey: ‘XXXXXXXXXXXXXXXXXXXXXXXXXXXXXXXXX’,
authDomain: ‘kla-firebase-workshop.firebaseapp.com’,
databaseURL: ‘https://kla-firebase-workshop.firebaseio.com’,
projectId: ‘kla-firebase-workshop’,
storageBucket: ‘kla-firebase-workshop.appspot.com’,
messagingSenderId: ‘XXXXXXXXXXX’
};
It is good practice not to commit your API keys, so in your terminal run the following:
git update-index –assume-unchanged src/config/firebase.config.ts
This will tell Git to not track changes to your config file.
Next, open up src/app/app.module.ts. In this file, we need to import the firebase SDK and initialize the firebase app using the configuration we copied into src/config/firebase.config.ts. Note that we are importing our firebase configuration as part of our environment settings on line 14. Paste the following code after line 14.
This will pass your API key and other information to the SDK, which will manage your connection to Firebase in the background allowing you to focus on the important things like data model, UI/UX, and business logic.
Your app is now connected to the Firebase project. Pretty easy right? In the next post we’ll dive head first into setting up user authentication so stay tuned!
Other recent posts:

Kunz, Leigh and Associates (KL&A) Announces the Retirement of KL&A Co-Founder John Leigh
OKEMOS, MI, April 11, 2023 – Kunz, Leigh and Associates (KL&A) announces the recent retirement of KL&A Co-Founder John Leigh as of March 31, 2023. Mr. Leigh began his career as a developer working on large mainframe systems before moving…

Team Building in a Remote Environment
Blog Barista: Dana Graham | June 15th, 2022 | Culture | Brew time: 5 min
Let me start by saying I don’t care for the term “work family.” I have a family I love, and they have absolutely nothing to do with my career. I want my work life to be its own entity. I like boundaries (and the George Costanza Worlds Theory). Certainly, I want to enjoy and trust my coworkers, and I want to feel supported and cared for…
0 Comments