Blog Barista: Greg Antrim | March 6, 2019 | Internet of Things | Brew time: 12 min
Welcome to Part 2 of the Command Your Arduino from Anywhere. In case you missed it, we covered port forwarding in Part 1. While that method was easy to implement, it had a few limitations. Today’s post offers an alternative method that overcomes many of those limitations. In this post, I will walk you through creating a secured tunnel into your network via ngrok and using a server to route requests to devices on your local network.
Hardware and Assumptions
I’m already assuming that you already have your Arduino(s) wired up and connected to your local router. While the steps in this post should work with any setup, it has only been tested with the hardware specified below, and the setup outlined in my previous post. It also assumes that you are using a Raspberry Pi as your middleman server on the same network as your Arduino(s). Again, the commands in this post should apply to most Linux based servers but has only been tested on the hardware listed here.
- 1 or more Arduino Uno boards
- 1 or more standalone ESP8266 Module
- A Raspberry Pi 3 B+ running Raspbian Stretch
Advantages
This method allows you to send requests to a customized and easy to remember URL. That URL is guaranteed not to change regardless of your external IP. Even if you move to a different location, your URL will remain the same which makes it ideal if you are building an app or using an external integration like IFTT.
This method also allows you to control multiple Arduinos with a single web request. You will be able to implement more advanced routing logic that utilizes a JSON request body or URL parameters.
This biggest advantage to this method though is security. Ngrok allows you to use HTTP Basic authentication so you can password protect your tunnel. This prevents hackers from simply scanning for open ports making it much more difficult for unwanted users to gain access to your local network.
Disadvantages
While this method solves a lot of issues present in the port forwarding approach, it is not without its disadvantages. The first disadvantage is cost. Ngrok doesn’t cost much, but it’s not free. At $60 a year, and with the amount of work it saves you, I’d argue that it’s a pretty good value but that may be a little steep depending on your budget and use case.
The second disadvantage is complexity. While nothing in this setup is particularly advanced, it will take more time and testing than simply using port forwarding. It also requires adding another device to what may already be a complex network. If what you are trying to do is relatively simple it may not be worth your time to set up a server just to forward simple requests.
High Level Overview
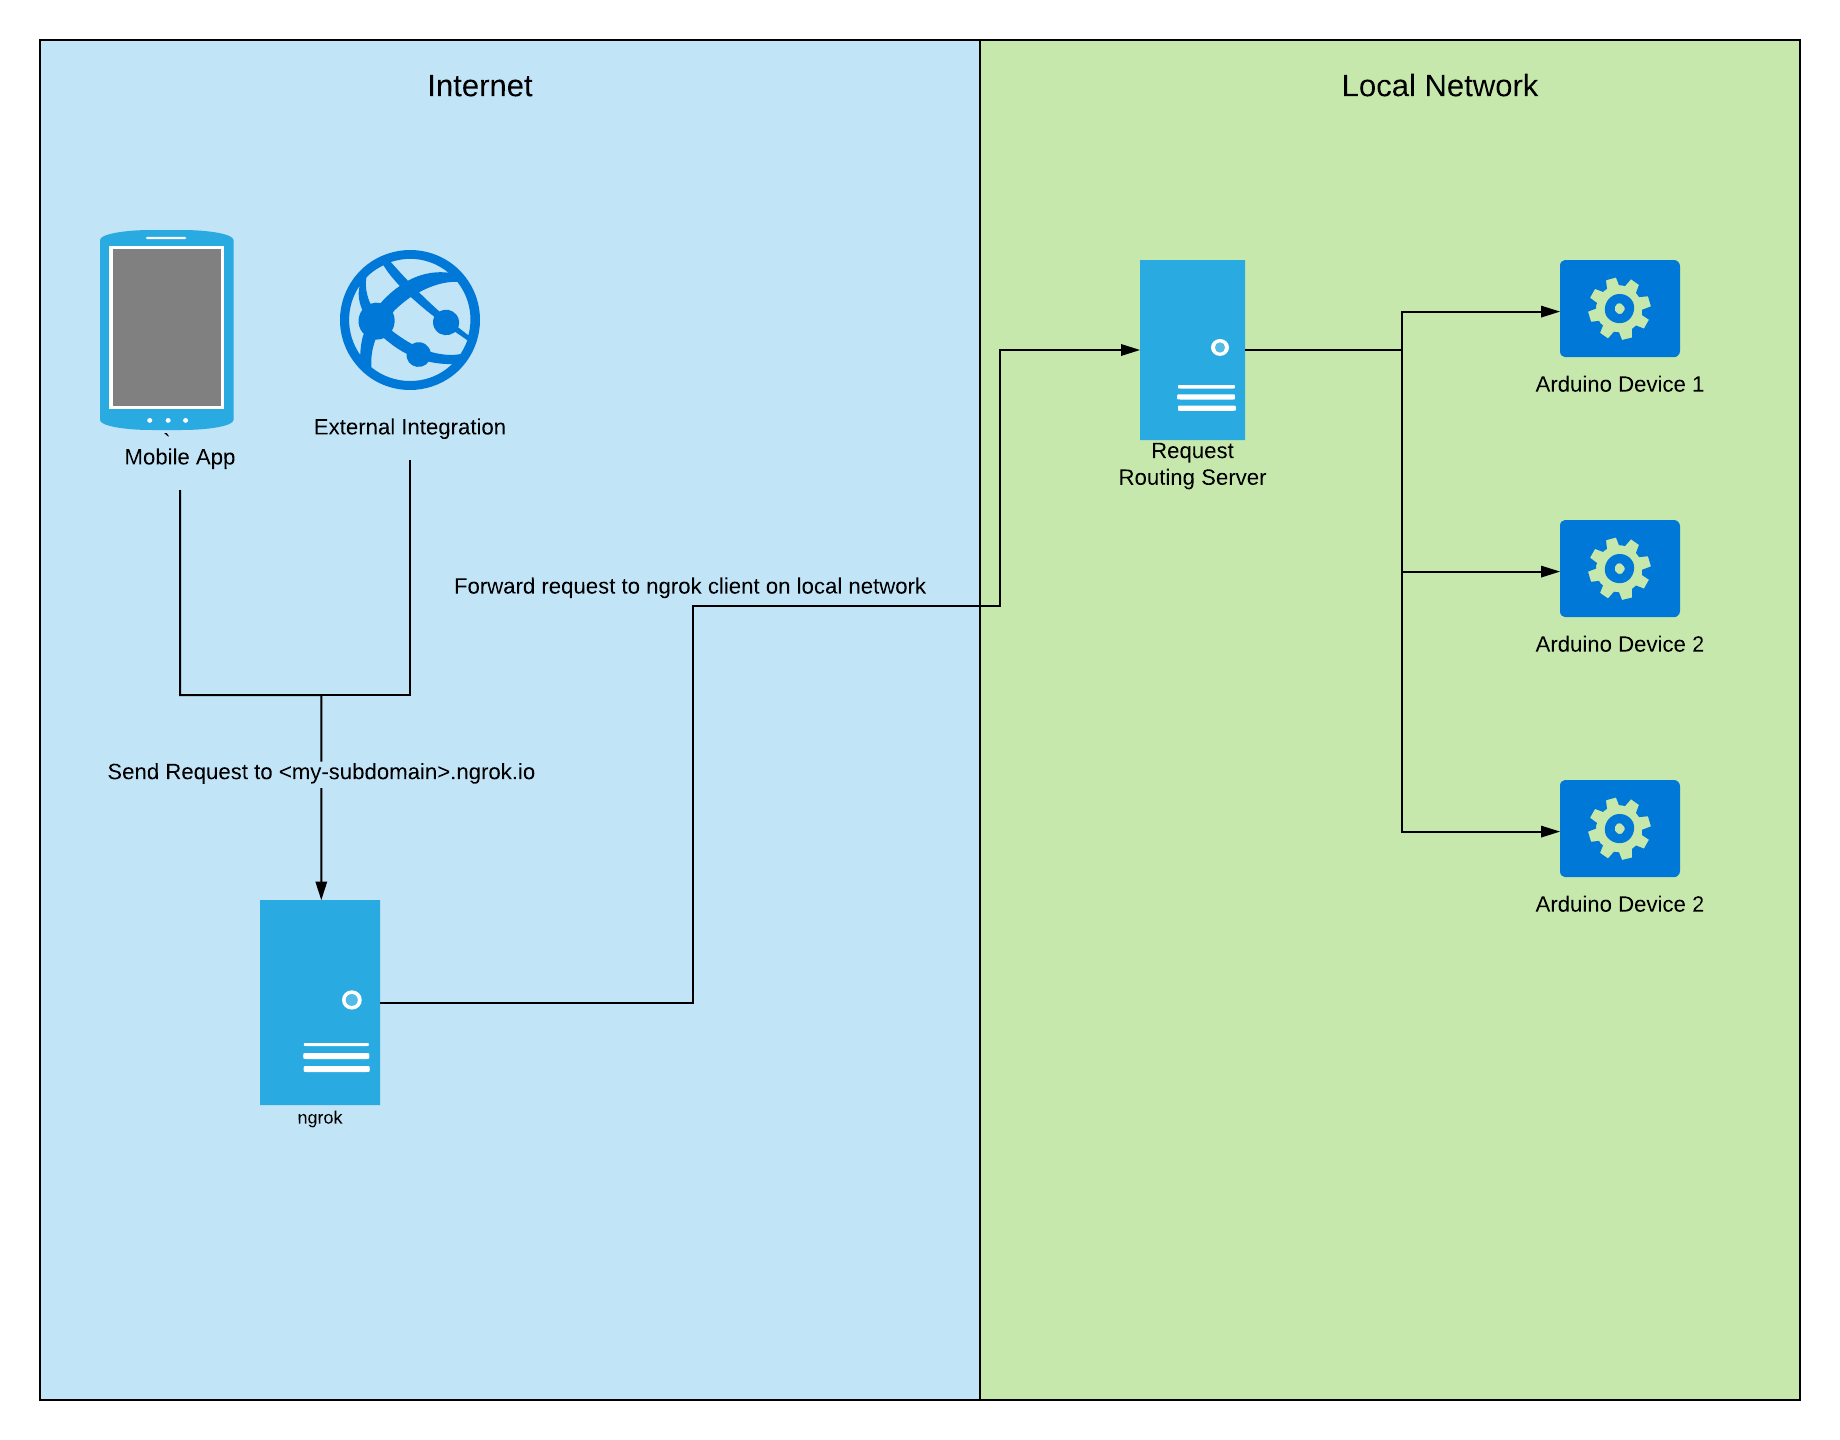
Before we dive into the implementation of this method, I think it’s important to understand how each piece is connected. We will be using ngrok to create a tunnel to a server on our local network. That tunnel will be accessible as an ngrok.io subdomain, and requests to that tunnel will be routed to Arduino devices on our local network based on some logic that we define. For you visual learners out there, this flow chart may make more sense.
Preparation
Make sure that you have the following information ready:
The local IP address of your Arduino(s). If you followed my previous post this information was printed in the Serial Monitor after uploading your sketch. For reference, in the steps below, my Main Arduino’s IP address is 192.168.10.136 and my second Arduino’s IP Address is 192.168.10.137.
Set Up Your Ngrok Account
Ngrok is a tool that “exposes local servers behind NATs and firewalls to the public internet over secure tunnels.” If you are unfamiliar with the tool, or just curious, I’d recommend you check out their “How it Works” page. In order to use ngrok, we will need to create an account and perform some setup.
1. Navigate to the Ngrok Sign-up Page and create an account
2. Log in to your new account
3. Go to the Billing page and click the upgrade button

4. Choose your subscription. For our purposes the basic plan will do, but if you are going to want more than one subdomain or any of the additional features feel free to select a different plan

5. Enter your payment info and submit the page
6. Navigate to the Reserved Domains page
7. In the name field enter your desired subdomain name. For the purposes of this post, my subdomain is my-raspberry-pi. You can also enter a description, but it’s not required. Click the reserve button when you are finished.
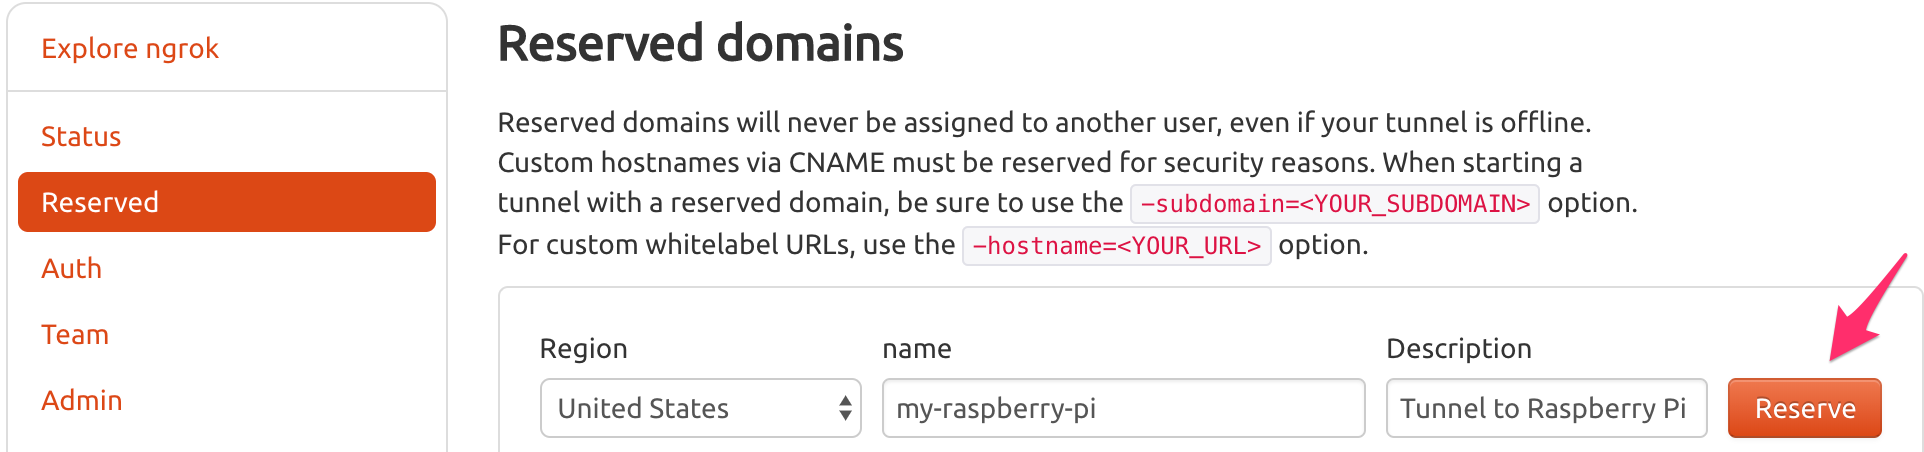
8. Make a note of your address, you will need it in the upcoming steps.
Set up the Ngrok Client on Your Server
We have reserved our ngrok subdomain, but it isn’t currently doing anything. In order to create the tunnel, we need to install and configure the ngrok client on our server. To do this, we need to run some commands on our Raspberry Pi.
Note: All of the following commands should be run in the home directory of the default “pi” user unless otherwise specified.
1. Download and unzip the ARM version of ngrok
Command: curl https://bin.equinox.io/c/4VmDzA7iaHb/ngrok-stable-linux-arm.zip –output ngrok.zip && unzip ngrok.zip
2. Move ngrok to /usr/local/bin so it is available as a terminal command
Command: sudo cp ngrok /usr/local/bin
3. Configure ngrok with your personal auth token
a. Navigate to the ngrok auth page
b. Copy your token

c. Run the following command on your Raspberry Pi, replacing <YOUR_NGROK_AUTH_TOKEN> with your actual token
Command: ngrok authtoken <YOUR_NGROK_AUTH_TOKEN>
This command saves your auth token locally and only needs to be run once.
4. Edit the default ngrok configuration File
a. Open the configuration file in nano
Command: nano .ngrok2/ngrok.yml
b. Paste the following at the end of the file, making sure to replace <YOUR_HTTP_BASIC_USERNAME> with whatever username you want, and < YOUR_HTTP_BASIC_PW> with your chosen password. Those credentials will be used when making requests via your ngrok URL. Save the file (ctrl +x) when you are finished.
This configuration allows us to start our tunnel by name rather than entering all those parameters every time.
5. Create a systemd service to automatically run and restart our ngrok tunnel
Command: nano pigrok.service
Paste in the following and save the file (ctrl +x):
6. Copy the service to the system folder
Command: sudo cp pigrok.service /etc/systemd/system
7. Enable the service
Command: sudo systemctl enable pigrok
8. Refresh list of services
Command: sudo systemctl daemon-reload
9. Start the service
Command: sudo systemctl start pigrok
10. Verify that your tunnel is online
Navigate to the ngrok status page. You should see your tunnel listed there.

11. Verify that you can connect through your tunnel
a. Click on one of the tunnel links on the status page
b. When prompted enter your chosen username and password that you set in your ngrok.yml config file
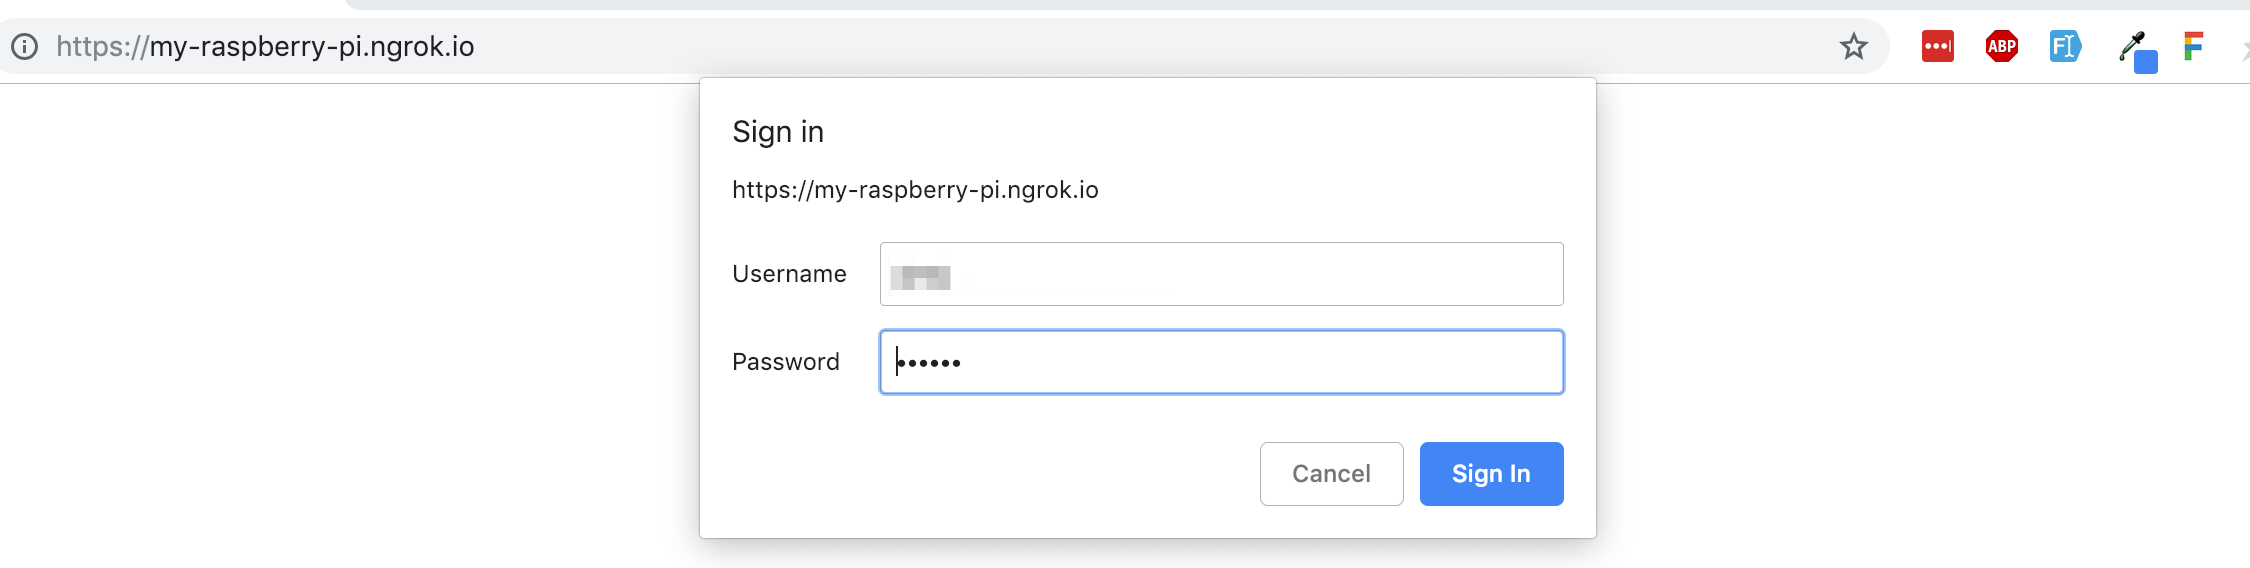
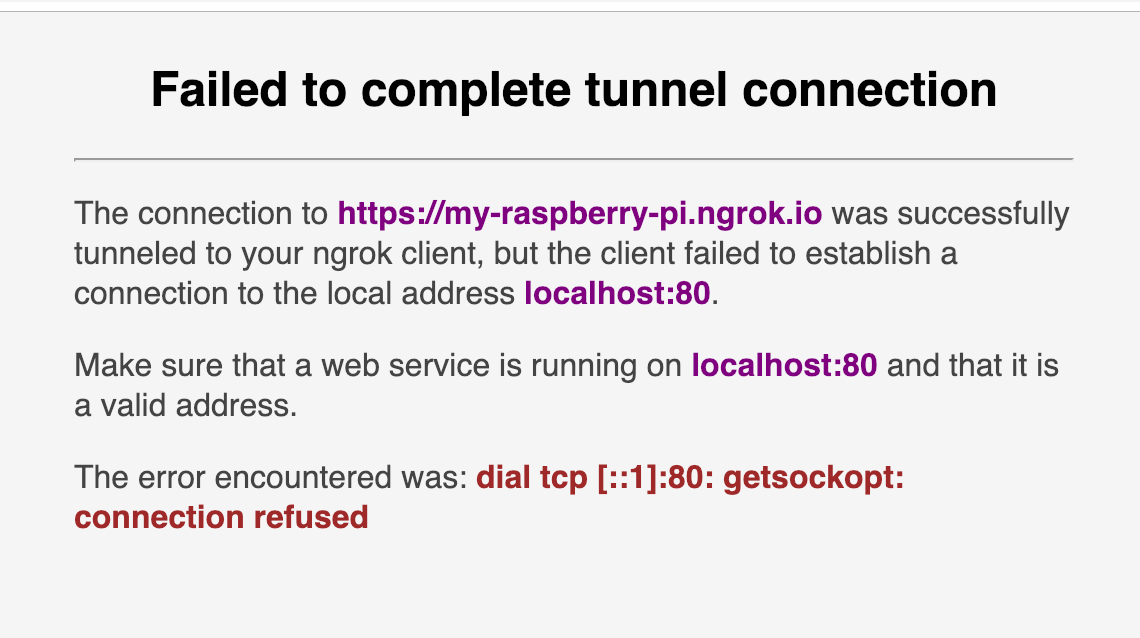
c. Once you log in you will see something that looks like an error page (see image below). If you read the entire message you can see that our tunnel is working, but our Raspberry Pi isn’t serving any content or routing requests yet. This is expected since we haven’t set up our server yet.
Here are all of the commands together:
Routing Requests with NodeJS and Express
With our tunnel established it is now time to start routing requests from our Raspberry Pi to our Arduino. In order to accomplish this, we will be creating a new NodeJS app that runs an Express server. It’s not the most bleeding edge stack but it gets us up and running quickly and is relatively easy to understand. I’m going to assume that you at least have Node and NPM installed on your Raspberry Pi. If you need help getting Node installed, I’d recommend this guide.
Clone the App and Install Dependencies
To save you some time, I’ve created a git repository containing the finished Express App so all you have to do is clone that repository.
Note: All of the following commands should be run in the home directory of the default “pi” user unless otherwise specified.
1. Clone the repository
Command: git clone https://github.com/gantrim/arduino-request-router.git
2. Change to project directory and install node modules
Command: cd arduino-request-router && npm install

Understanding the Code
For the most part, this app is pretty much a boilerplate Express app. There is really only one file we care about and that is routes/index.js. This is where we will define what routes are available and how external requests should be routed to devices on our internal network. Let’s take a look.
Lines 5-8: The Default Route
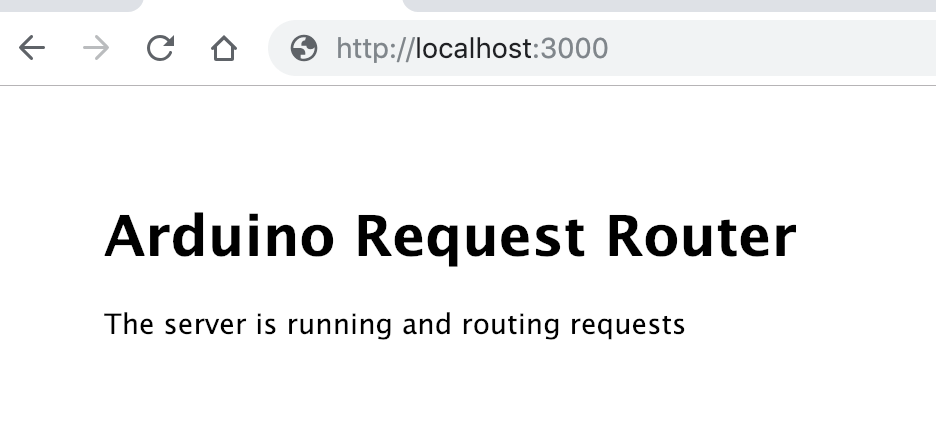
All this route does is serve up the home page. It’s not strictly necessary for our purposes but it is useful to check if your app is running and that your tunnel is routing traffic correctly. You can see this route in action by typing your ngrok URL directly into your browser.
Lines 10-27: Forward Request Directly to Arduino
The next route receives a POST request and then forwards that request to an Arduino on our local network. Line by line, here is what is happening:
- Line 11: Define a POST route at the endpoint /forward-directly-to-arduino
- Lines 13-14: Construct a URL based on the IP address of the Arduino. Make sure to change the IP to match the IP of your Arduino on your local network.
- Line 15: Copy the JSON data from the incoming request to a variable so we can use it in the outgoing request
- Lines 17-22: Define the request options for the outgoing request that will be sent to the Arduino. We will be sending a POST request to the arduinoUrl. The body of that request will be the JSON from the incoming request body.
- Line 24: Send the request to the Arduino using the request-promise module and wait for that request to complete
- Line 26: Reply to the original caller with an HTTP status code of 200 signaling that the request completed successfully.
Lines 29-67: Advanced Routing Logic
This route receives a POST request containing JSON and a request parameter. Based on the value of that request parameter the request is forwarded to one of two Arduinos or both Arduinos at once. Line by line, here is what is happening:
- Line 30: Define a POST route at the endpoint /complex-request/:device. Notice the colon in front of device. This indicates that device is a request parameter; a variable portion of the request URL.
- Line 36: This is where we parse the actual value of that request parameter.
- Lines 46-64: Using the value of the device request parameter, we determine which Arduino the request gets forwarded to.
Installing PM2 and Running the App
In order to get our app to run on startup and to automatically restart should it crash, we will be using an NPM Module called PM2. PM2 is a production process manager for NodeJS applications. I have included a PM2 config file (ecosystem.config.js) in the git repository for the Express App so all we have to do is point PM2 to that config file.
Note: All of the following commands should be run in the home directory of the default “pi” user unless otherwise specified.
1. Install PM2 globally
Command: npm install -g pm2
2. Switch to the directory containing our Express app
Command: cd arduino-request-router
3. Run our app via the PM2 config file ecosystem.config.js
Command: pm2 start ecosystem.config.js –env production
4. Generate the command to start pm2 automatically
Command: pm2 startup
Copy the last line of output from this command.

5. Run the command that you copied in the previous step
6. Save the currently running process so it will be run on startup
Command: pm2 save
The express server is now running and ready to receive requests. For convenience, here are all of the commands together:
Base64 Encode Your Ngrok Username and Password
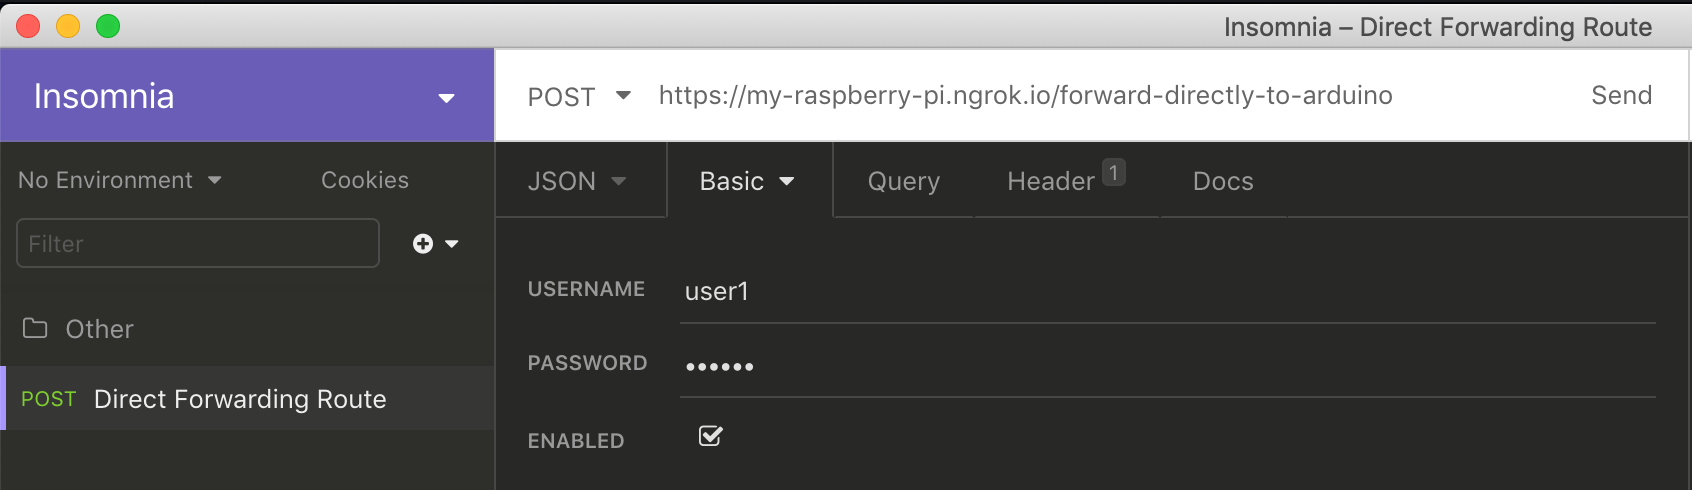
In order to send REST requests through our Ngrok Tunnel we will need to include an HTTP Basic authorization header. In order to construct that header, we first need to Base 64 encode the username and password that we used to secure our ngrok tunnel. Some REST clients will handle this automatically, but in case yours doesn’t, here is how to get your base64 encoded username and password.
1. Visit Base64Encode.org
2. In the “Encode to Base64 format” textarea, enter: <YOUR_HTTP_BASIC_USERNAME>:<YOUR_HTTP_BASIC_PW>
So if your username is user1 and your password is password123 you would enter: user1:password123
3. Click “Encode” and copy the resulting value. Going forward I will refer to that value as <BASE64_ENCODED_CREDENTIALS>
Testing it Out
Our secure tunnel is reserved, the ngrok client is running as a service on our Raspberry Pi, and our Express app is running and ready to route requests to our Arduino on our internal network. Now it’s time to test everything out!
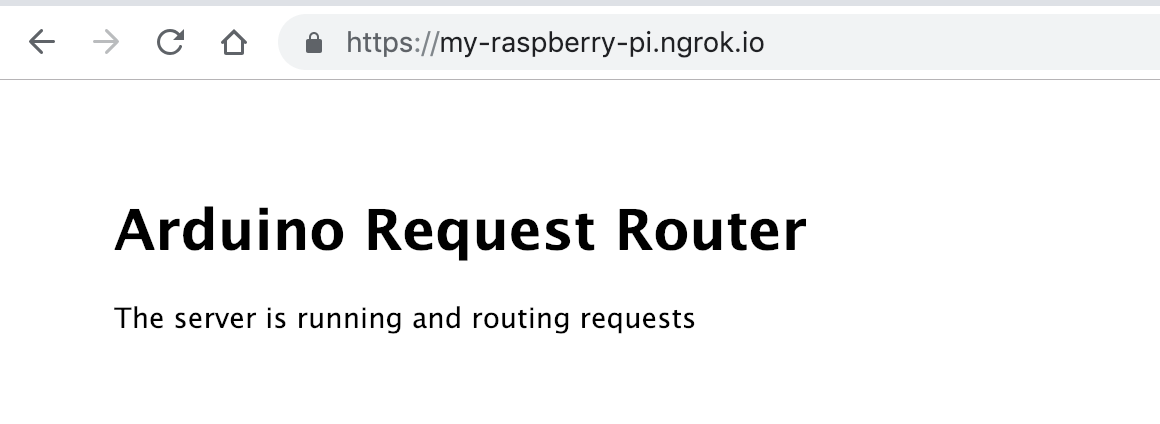
Verify that Express App Is Accessible via Ngrok URL
Navigate to your Ngrok URL in your browser and enter your username and password when prompted. If everything is set up correctly, you will see the following page.
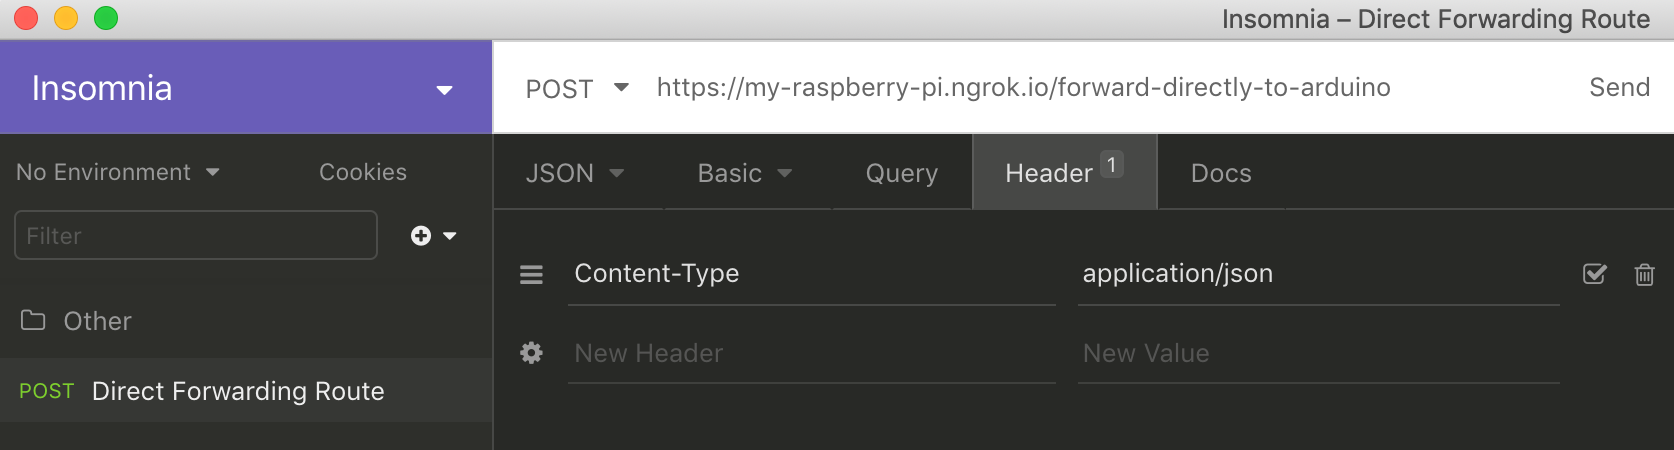
Test the Direct Forwarding Route
To test the second route we defined, we will need to use a REST client. Personally, I prefer Insomnia but other REST clients such as Postman or even curl will work.
In your preferred REST client, create a request with the following information:
URL: <YOUR_NGROK_URL>/forward-directly-to-arduino
Headers:
- Content-Type: application/json
- Authorization: Basic <BASE64_ENCODED_CREDENTIALS>
Request Body:
{
“action”:”off”
}
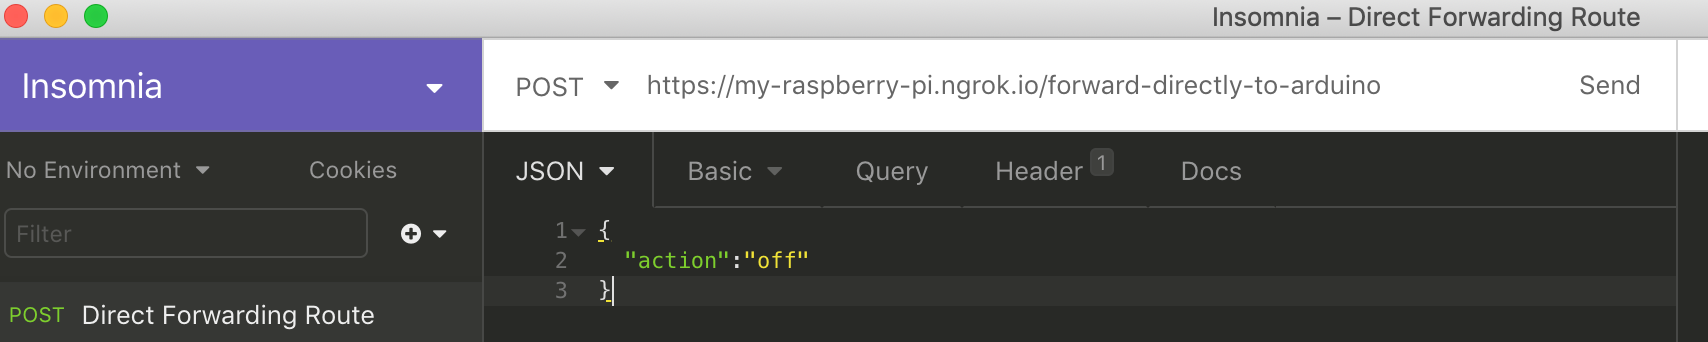
Go ahead and send the request. You should receive an HTTP 200 Success status and if you are monitoring the serial output of your Arduino you should see the following output.

Test the Advanced Route (Optional)
Testing the advanced route is completely optional since it requires you to have two Arduino devices on your local network. To test this route, we will be sending two requests, one to each device. The only difference between these two requests will be the request parameter at the end of the request URL.
Request 1
In your preferred REST client, create a request with the following information:
URL: <YOUR_NGROK_URL>/complex-request/1
Headers:
- Content-Type: application/json
- Authorization: Basic <BASE64_ENCODED_CREDENTIALS>
Request Body:
{
“action”:”off”
}
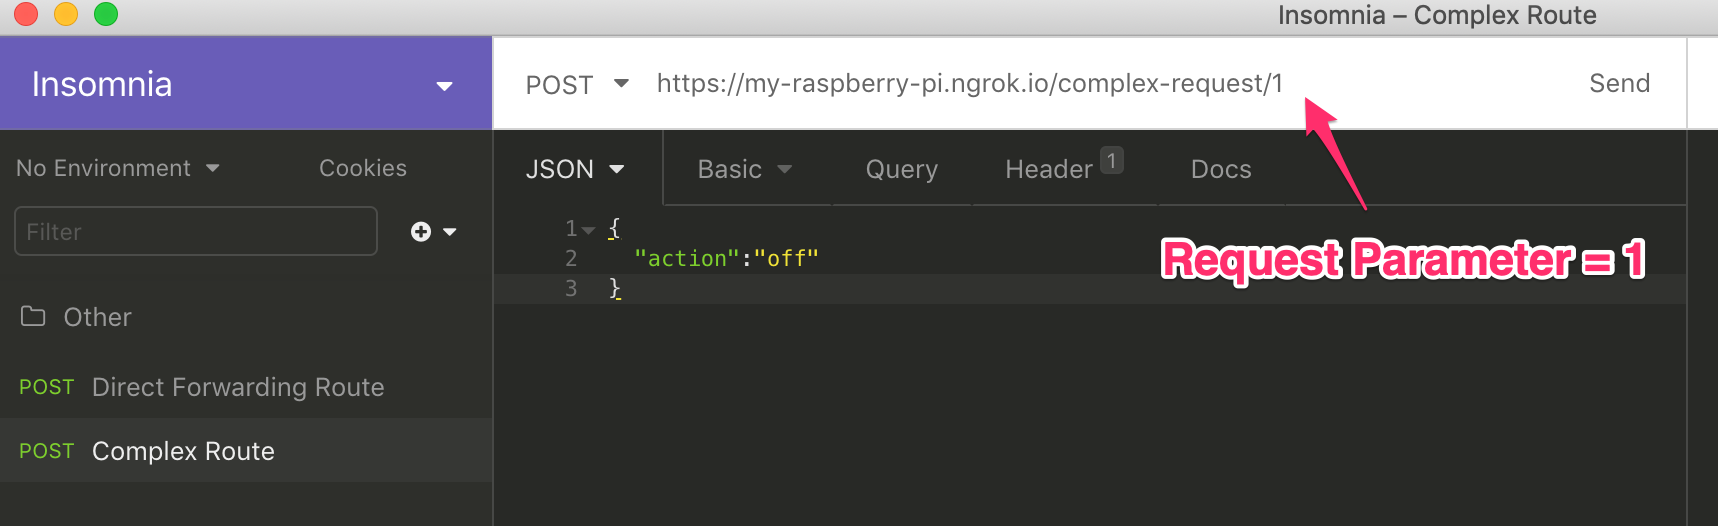
When you send this request, you should receive an HTTP 200 Success status. You should see the request logged In the serial monitor for Arduino 1. There should be no output in the serial monitor for Arduino 2.
Request 2
In your preferred REST client, create a request with the following information:
URL: <YOUR_NGROK_URL>/complex-request/2
Headers:
- Content-Type: application/json
- Authorization: Basic <BASE64_ENCODED_CREDENTIALS>
Request Body:
{
“action”:”off”
}
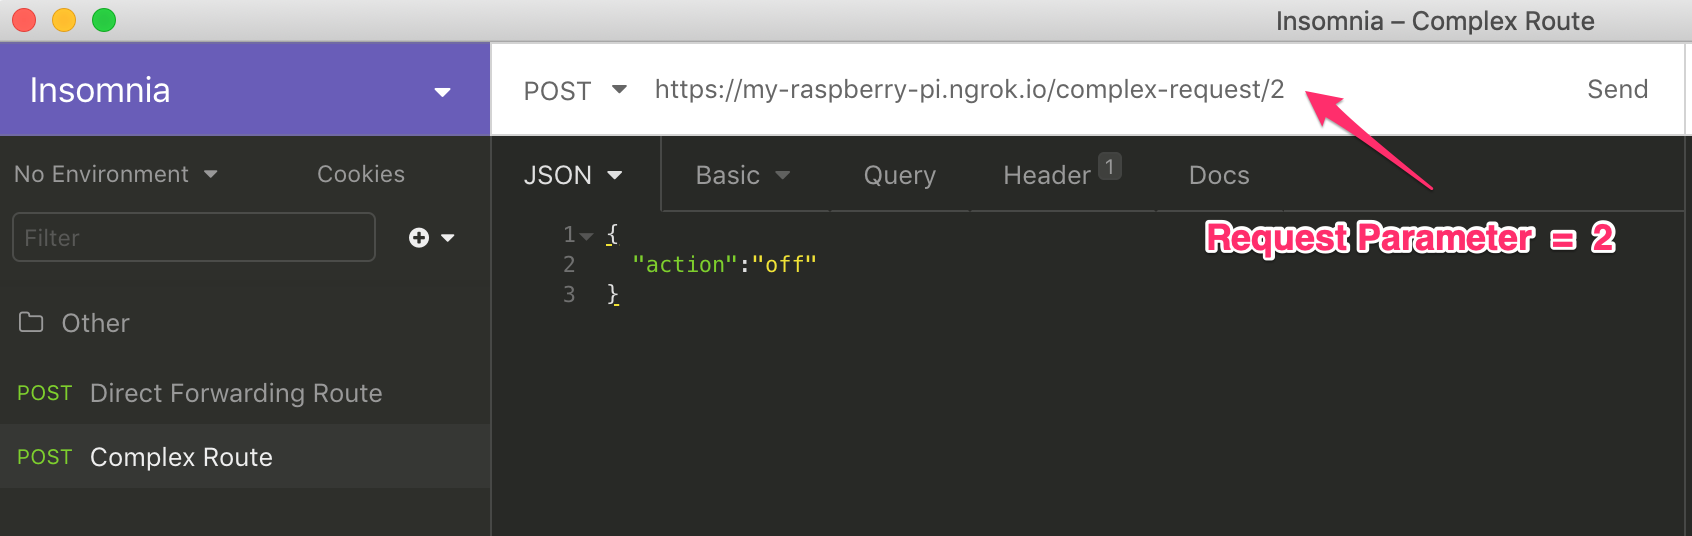
When you send this request, you should still receive an HTTP 200 Success status. This time however, you will see output in the serial monitor for Arduino 2 rather than Arduino 1.
Further Applications
Now that you have your subdomain and server set up, the possibilities are pretty limitless. While the code I’ve provided only covers a few basic cases, it should give you the groundwork that you need for more advanced applications. With a little bit more work you could:
- Control multiple devices with a single web request
- Create a mobile app to control your various devices
- Control your devices with your voice by integrating your setup with your Amazon Echo or Google Home device
- Integrate your setup with a multitude of services via IFTT
That’s it! If you found this post useful, please share and leave a comment. If you end up using this method, be sure to come back and share your project.
Other recent posts:

Kunz, Leigh and Associates (KL&A) Announces the Retirement of KL&A Co-Founder John Leigh
OKEMOS, MI, April 11, 2023 – Kunz, Leigh and Associates (KL&A) announces the recent retirement of KL&A Co-Founder John Leigh as of March 31, 2023. Mr. Leigh began his career as a developer working on large mainframe systems before moving…

Team Building in a Remote Environment
Blog Barista: Dana Graham | June 15th, 2022 | Culture | Brew time: 5 min
Let me start by saying I don’t care for the term “work family.” I have a family I love, and they have absolutely nothing to do with my career. I want my work life to be its own entity. I like boundaries (and the George Costanza Worlds Theory). Certainly, I want to enjoy and trust my coworkers, and I want to feel supported and cared for…
0 Comments