Blog Barista: Michael O’Keefe | Feb 5, 2019 | Web Development | Brew time: 7 min
Welcome to Part 2 of the Firebase Series! Get ready for some fun authentication setup. Firebase is a cost-effective platform provided by Google to allow for rapid development. It has many features that can scale well, and it makes setting up user authentication through different methods much easier.
Brief Review
In Part 1, we set up our development environment, a new Firebase project and connected our starter app to the project we created. In this part, we will be focusing on setting up authentication using email/password, Google Oauth2 and anonymous IP login.
If you are just joining us, go ahead and clone this repository and checkout the authentication branch. You will have to follow Part 1 to get your environment set up and connect to Firebase using your credentials, but the code will be at the same place where we left off in Part 1. If you have already completed the previous parts there is no need to checkout any other branch.
Enabling Authentication Methods in Firebase Console
Before we start implementing authentication in our code we must first tell Firebase which authentication methods we would like to support by following these steps.
1. Select your project from the Firebase console
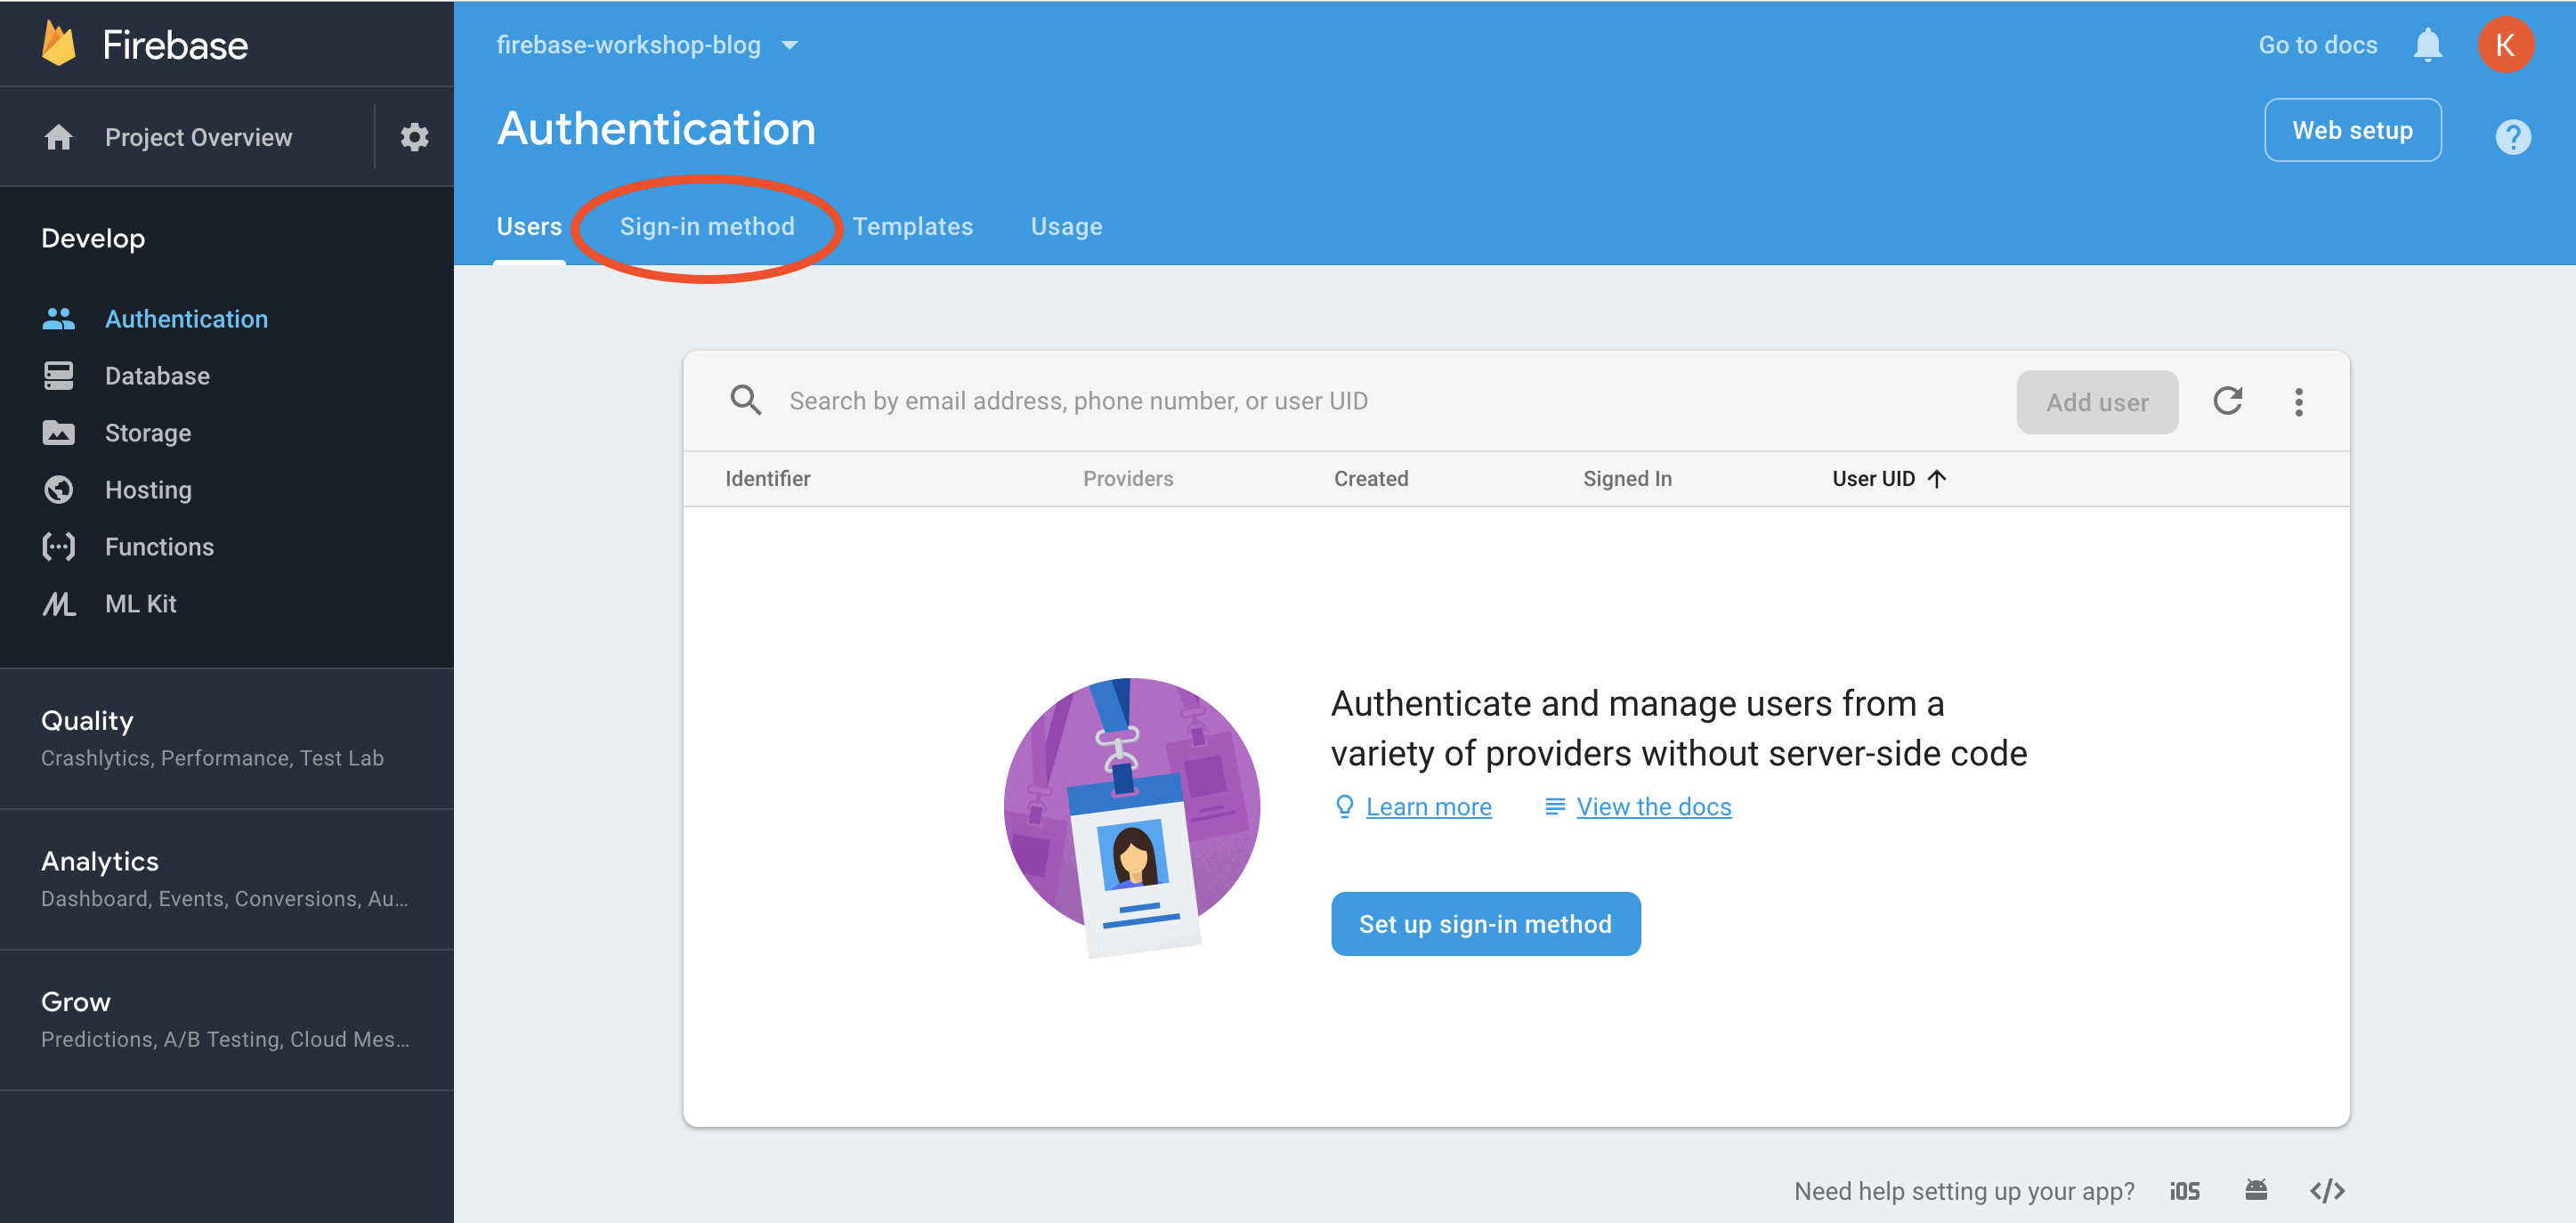
2. Select Develop, then Authentication from the menu on the left side of the screen.
3. Select the Sign-in method tab at the top of the page
4. Select Email/Password, click the enable toggle switch, and then click Save
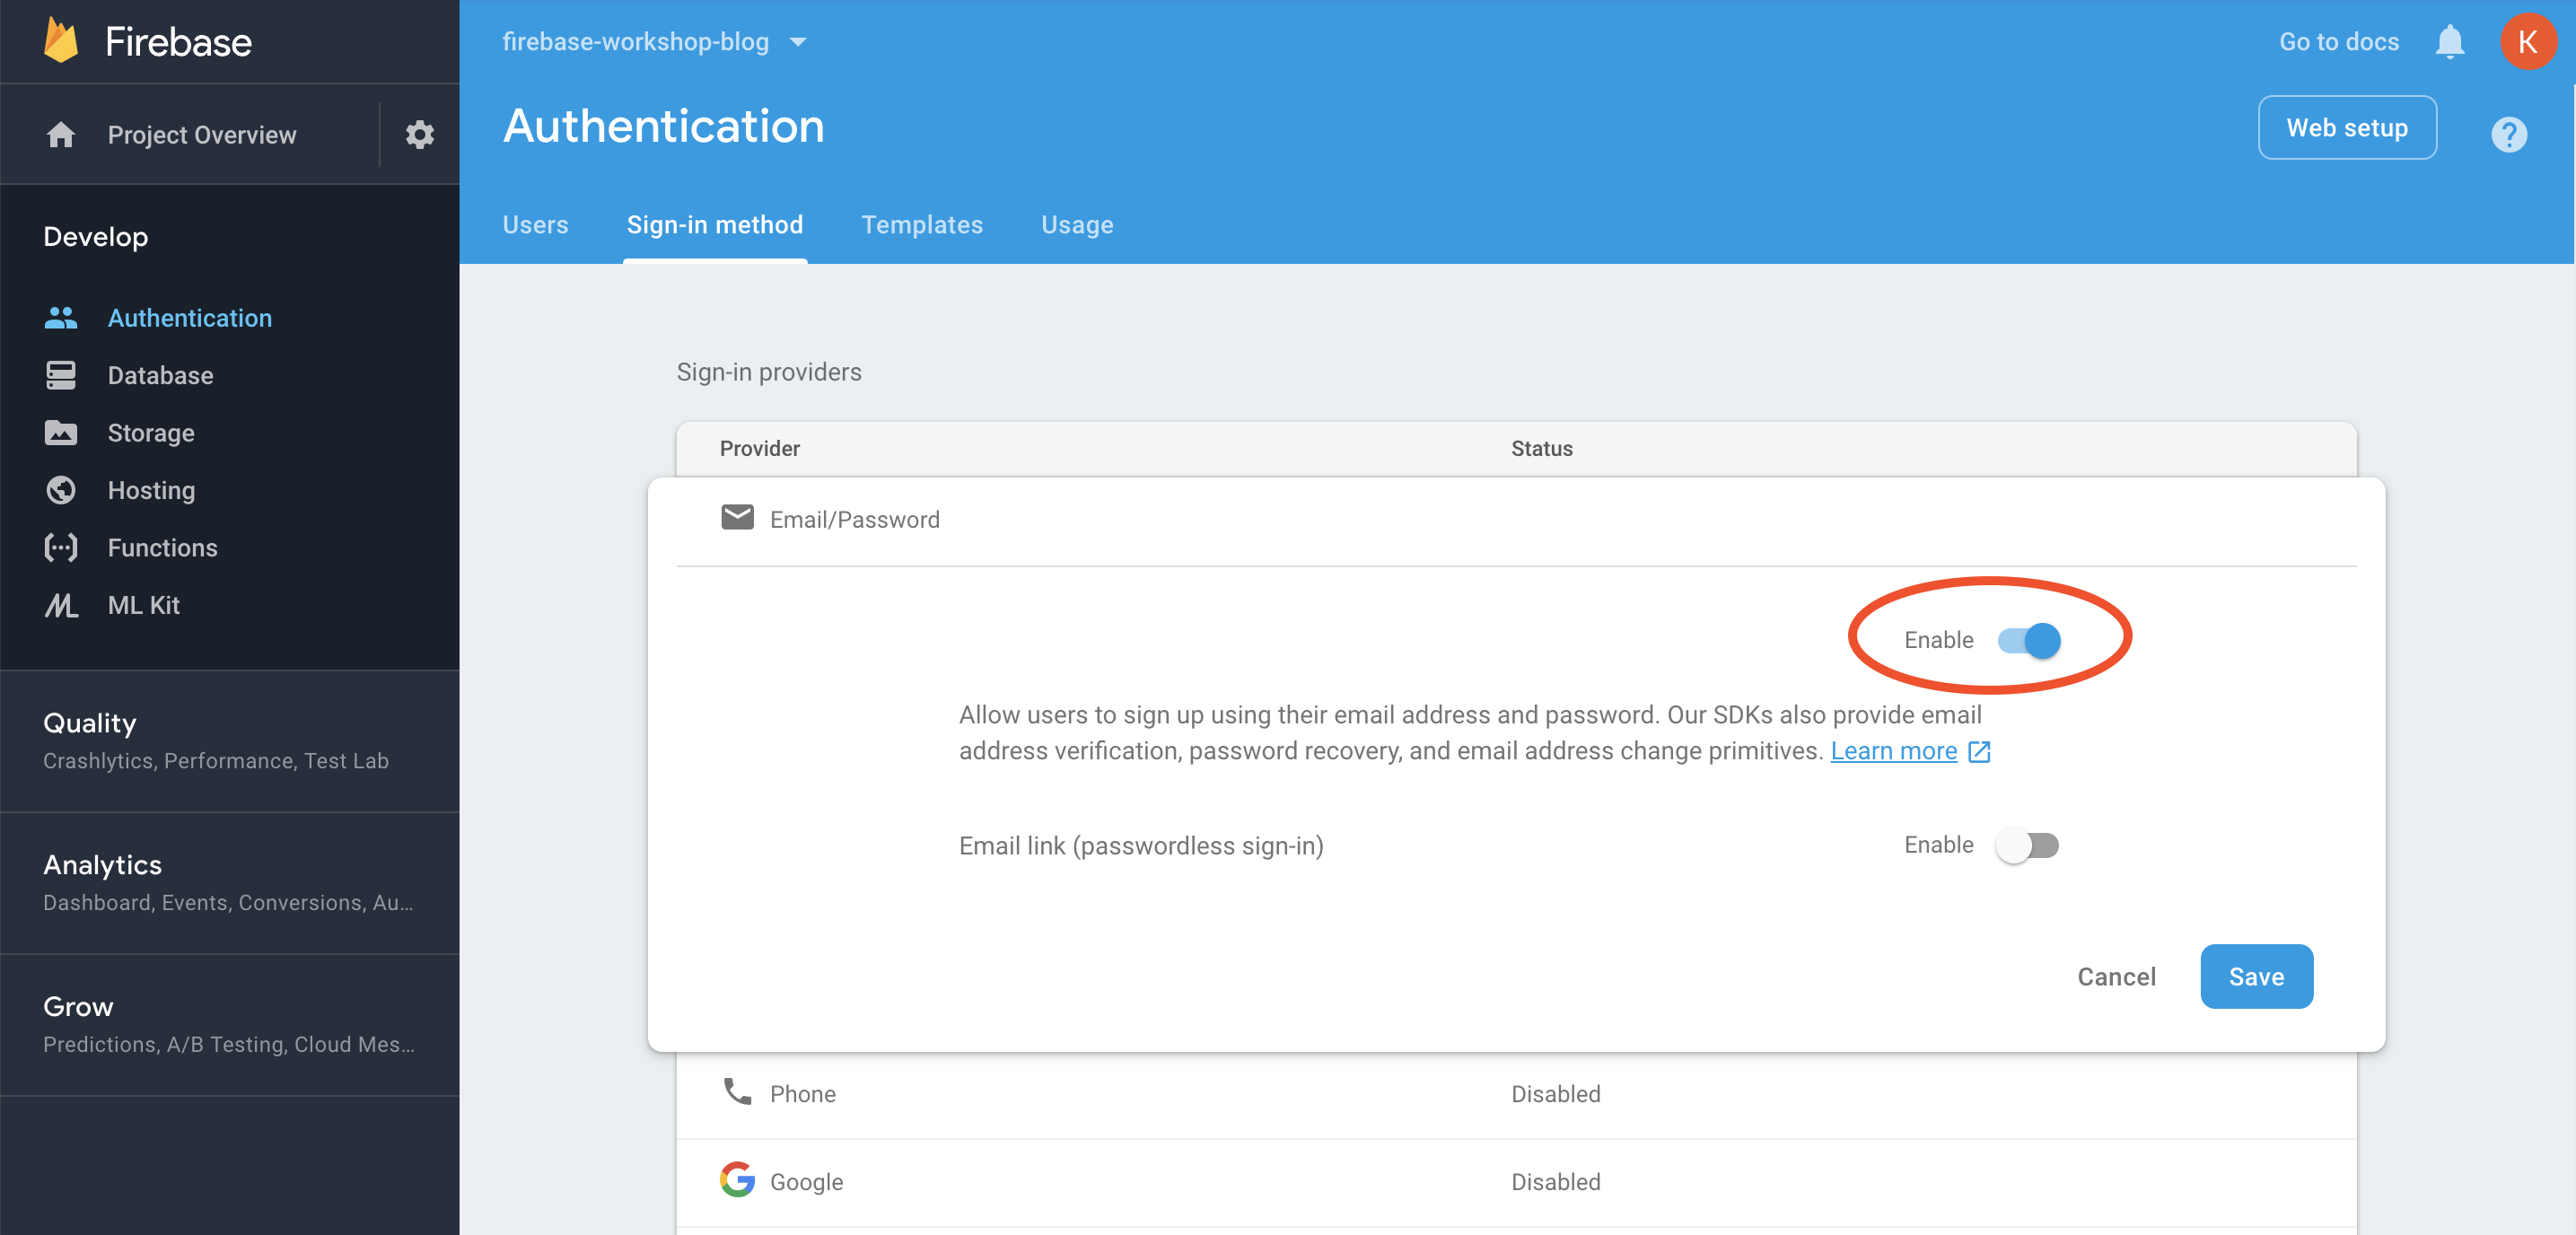
5. Select Google and click the enable toggle switch
6. Enter a name in the Project public-facing-name text box or leave the default
7. Select an email address from the project support email dropdown
8. Click Save
9. Select Anonymous, click the enable toggle switch, and then click Save
Now it’s time to code!
Adding Authentication to Our Code
Open up src/app/auth/auth.component.ts. There are a number of empty methods in here that have already been wired up to the UI.
Email and Password Authentication
Create User with Email and Password
The first method is createUserWithEmailAndPassword. We already have imported the firebase library, so to access authentication we use firebase.auth(). The object given back to us has a function createUserWithEmailAndPassword that accepts an email and password as parameters. The email and password that the user inputs are bound to the template of the component and accessed as this.email and this.password. Almost all functions in the Firebase JavaScript SDK return a promise, so we will listen to what the promise resolves, and catch any error that may come through. You can do whatever you want with the results, I will simply log out the return values.
If a valid email and password are given, and the email is not already being used, the user will be created successfully. The promise will resolve a firebase user object with all the non-private information associated with that user. We will use some of that information later, but you can check out Firebase user documentation for a detailed reference.
Another consequence of this function’s success is that our application will be given a token that the Firebase app we set up in Part 1 will manage for us. From then on, as long as the token is valid and our browser cache is not cleared, every request to Firebase made through the SDK will carry this token which will be used to validate our actions. We will dive deeper into this later when dealing with Firestore in Part 3, but for now all you need to know is that it is completely managed for you behind the scenes.
Sign In with Email and Password
Next we are going to implement the signInWithEmailAndPassword function. It will work exactly the same way as createUserWithEmailAndPassword just using a different function! This one will only be successful if the given email/password combo match an existing active user for your project. If you get stuck you can check out the password authentication documentation or you can cheat and look at the master branch ;).
Google Authentication
The next method signInWithGoogle is already implemented for you, it calls another method to create a Google authentication provider which is passed into the signInWithPopup method. These will both need to be implemented.
The first method creates a new GoogleAuthProvider object. We can also set some custom parameters on the provider to influence the authentication flow. In this example, I will tell the provider to prompt the user to select an account if they have multiple Google accounts. You can check in the GoogleAuthProvider documentation for more information.
Next, we will generically pass a given provider to the firebase.auth() signInWithPopup function which will send our user through the login flow of the given provider with a popup. When the flow has completed, the popup will close, and we will be given the result on success which will contain the user and other provider specific credentials that can be used to access other APIs offered by that provider (for example Google maps or the Twitter and Facebook APIs etc.). Again, the Firebase app will manage our authentication in the background, so this is all we have to do! For more information, including how to sign in with a redirect instead of a popup, check out the Google sign in documentation.
Anonymous Authentication
Signing In Anonymously
Last but not least, we will set up the ability for the user to sign in anonymously. This will track the user via their IP address. This can be very useful for allowing the user to continue as guest, while still allowing you to associate data with their account. This is done in exactly the same manner as the email and password sign in process, except that the firebase.auth().signInAnonymously does not accept any parameters. Once authentication is finished we get a promise with the same information as the other methods. You can check out the Anonymous Authentication documentation for more information.
Converting Anonymous Users to Permanent Users
In some cases (hopefully all!) guest users like the service your app offers and want to become full-fledged users. In this case, we will want to link their account to some other form of authentication. Firebase supports linking any user account to any of the authentication providers, for our example we will support linking to email/password and Google.
In both cases, we are assuming that the user is already signed in via some provider. The first thing we do is create a provider (for Google) or a credential (with email and password). We then tell firebase.auth() to link the current user with the given provider/credential. As before, both functions will return a promise with the same information as if we signed in via these providers normally.
Other Authentication Functions
Before we wrap up coding in this file, we will finish up two functions that we will be using in multiple places of the app: the appropriately named signOut() and getCurrentUser() functions.
Displaying Authentication Info
Next, we will add some code to a couple files to improve our UX. Open up src/app/app.component.ts. In here we will listen to the Firebase authentication state for changes and set an isAuthenticated Boolean. Based on that Boolean, we will change our UI for authenticated vs non-authenticated users.
onAuthStateChanged is an observable function that accepts a callback. This callback will be called and passed the user object when the authentication state changes. If the user is null, that means the user has signed out.
In src/app/home/home.component.ts implement the same code as in the AppComponent. This time, in addition to setting this.isAuthenticated, we will also grab the user’s display name assuming the user is not null.
You should also copy the signOut function from AuthComponent into src/app/home/home.component.ts.
That’s it! The application now supports user authentication through three different methods, supports upgrading anonymous accounts and listens to the authentication state of the user. If you have ever written a custom authentication implementation, you can fully appreciate how easy and this was to set up. Not only do we have authentication workflow, but the authentication is managed on all of the requests to the backend for you with no extra code on your part. THANK YOU GOOGLE!
Next Time
Part 3 is coming very soon! In the next post in this series I will talk about NoSQL data modeling with Cloud Firestore, and then you can start setting up the meat of the application (or in this case malted barley and hops).
Other recent posts:

Kunz, Leigh and Associates (KL&A) Announces the Retirement of KL&A Co-Founder John Leigh
OKEMOS, MI, April 11, 2023 – Kunz, Leigh and Associates (KL&A) announces the recent retirement of KL&A Co-Founder John Leigh as of March 31, 2023. Mr. Leigh began his career as a developer working on large mainframe systems before moving…

Team Building in a Remote Environment
Blog Barista: Dana Graham | June 15th, 2022 | Culture | Brew time: 5 min
Let me start by saying I don’t care for the term “work family.” I have a family I love, and they have absolutely nothing to do with my career. I want my work life to be its own entity. I like boundaries (and the George Costanza Worlds Theory). Certainly, I want to enjoy and trust my coworkers, and I want to feel supported and cared for…
0 Comments