Blog Barista: Justin Majeske | Oct 23, 2018 | Web Development | Brew time: 5 min
This post assumes that you have an existing library that you’ve built for Angular 2/4/5 and that your library was created using the angular-quickstart-lib from Filipe Silva. At KL&A, we had several libraries that used the angular-quickstart-lib to build and share components among our applications. When Angular 6 came out and the CLI started to support libraries, we made the decision to standardize our builds with the CLI. Since our applications were already running CLI builds it made sense for our libraries to follow suit. The question then became “How do we accomplish this?”
At first, we thought the new ng update functionality might do the trick but that’s more for migrating application dependencies, not build structure. In the end we did find a way to migrate everything, but it took some trial and error. In this post we will cover the process to hopefully save you some time.
Process
At a high level the process is like so.
- Backup the 3rd Party Dependencies Listed in Your package.json
- Remove Unneeded Files and Folders
- Generate a New Angular CLI Project
- Generate a Library Using the Angular CLI
- Move Existing Assets to Your New Project
- Build and Test Your New Project
- Get Your Demo App Working Again
- Final Steps
Backup The 3rd Party Dependencies Listed in Your package.json
Since your new project will likely need the same dependencies it’s important to back up your package.json. You can make a copy of the file, manually copy and paste the contents into your favorite text editor or just view the file in git, but make sure that you have it handy somewhere.
Remove Unneeded Files and Folders
There are several files and folders that are not needed when migrating your library. Go ahead and delete the following:
- Node modules
- Dist
- Out-tsc
- Integration (see note below)
Note: We found that the integration folder was typically an exact copy of the demo folder. If that’s not the case in your project, then do not delete this folder yet. We will provide steps later in this guide for copying the differences into the demo app.
Generate a New Angular CLI Project
Now that things are cleaned up, we need to generate the CLI project on top of the existing code. Our project is called “ngx-kla-bootstrap-form-components” and already occupies a directory of that same name. Some of the other guides I read suggested some shenanigans with naming it one way and then renaming it but we’re going to take a more direct approach.
Perform the following steps in your terminal window (commands provided in GitHub gist below). Remember to change <YOUR_LIBRARY_NAME> to the actual name of your library.
1. Install the Angular CLI globally
Command: npm install @angular-cli -g
2. Change to the libraries root directory
Command: cd <YOUR_LIBRARY_NAME>
3. Create a new CLI project named <YOUR_LIBRARY_NAME>-lib
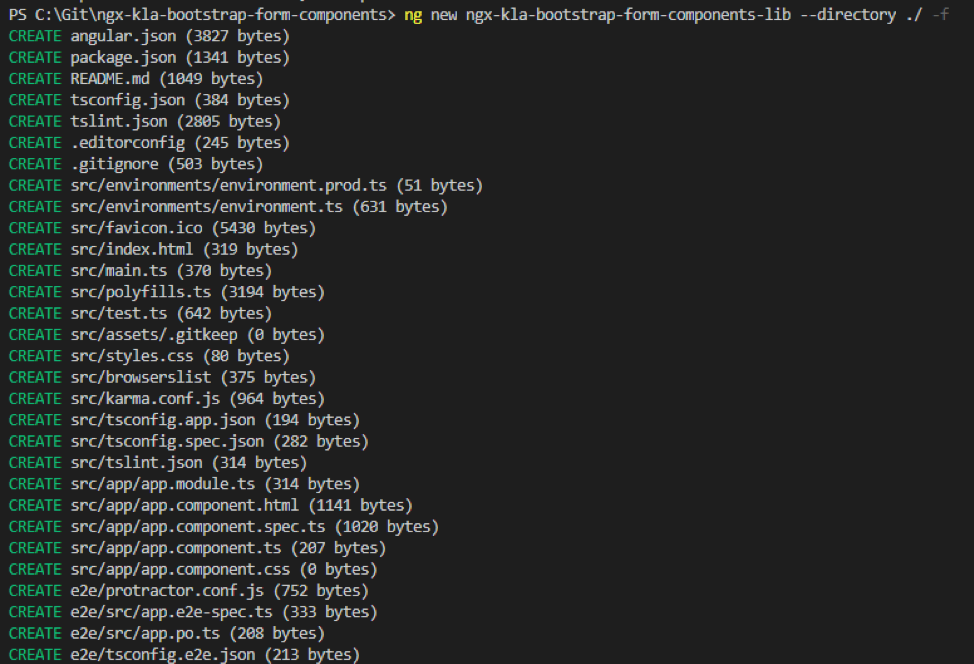
Command: ng new <YOUR_LIBRARY_NAME>-lib –directory ./
By using <YOUR_LIBRARY_NAME>-lib in command #3 we are able to keep our original library name which means no changes in git and no library name changes for our end users.

Looking at the output, this error make sense, we didn’t tell it to force overwrite those files, so we either need to delete these files, or use -f flag in the ng new command like so:
Command: ng new -f <YOUR_LIBRARY_NAME>-lib –directory ./
You should now see output similar to the following:
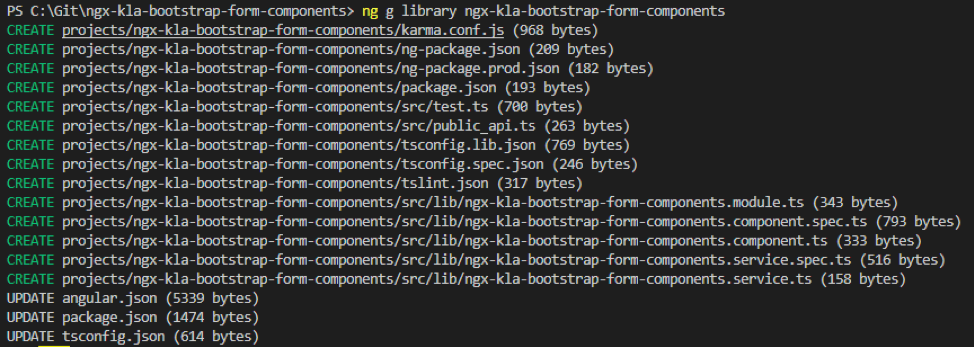
Generate a Library Using the Angular CLI
To generate a new library using the Angular CLI run the following command:
Move Existing Assets to Your New Project
You now have your new library in /projects/<YOUR_LIBRARY_NAME> but currently it’s just stubs. The next step is to remove those stubs by doing the following (commands in GitHub Gist below):
1. Delete everything in the folder /projects/<YOUR_LIBRARY_NAME>/src/lib
2. Copy your existing library into /projects/<YOUR_LIBRARY_NAME>/src/lib
3. Copy the contents of the old library’s src/lib/index.ts to the new projects/<YOUR_LIBRARY_NAME>/src/public_api.ts
4. Do a find/replace for /src with /lib inside public_api.ts
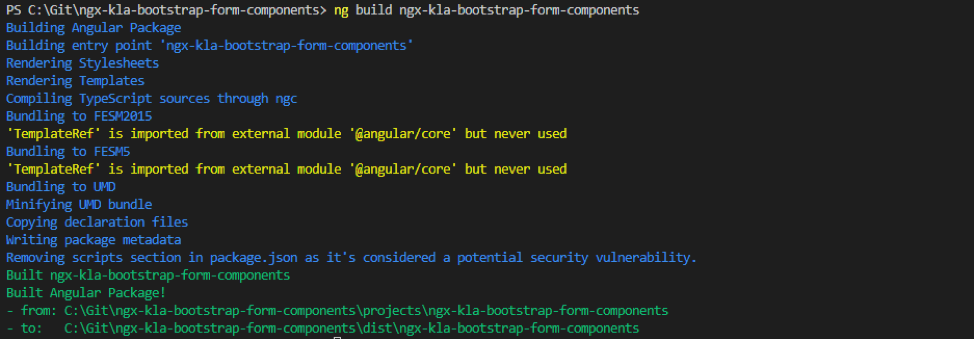
Build and Test Your New Project
You should now be able to build and test your new library.
To build your library, run the following command:
Build Errors

Build Again with Errors Fixed
Get Your Demo App Working Again
The new structure for libraries is just a standard Angular application with libraries in it. This means that your demo app becomes the main app in your project. In order to get your demo app up and running again you will need to do the following:
1. Copy /src/demo app into /src/app
2. Copy your site’s style sheet to /src/styles.css
3. Copy any static assets into the assets folder in your new project
4. Update the component selector in your /src/app/app-component.ts from demo-app to app-root OR update index.html to use your app-components selector. Either one will work, just make sure that they both match.
5. Delete /src/demo
6. Add any static assets that are needed for your demo to work to the .angular.json
7. Run ng serve
Your library should now compile and run within your demo app.
Final Steps
Now that our app is building and serving there are a few final things to take care of. First, we need to change the build command in our package.json to the following:
“build”: “ng build ngx-kla-bootstrap-form-controls –prod”,
This ensures when we run npm run build we’re going to get a production level build of the library. Now when we run ng build –prod on the main/demo app we can verify that a production build will work when we push the library to NPM.
Other recent posts:

Kunz, Leigh and Associates (KL&A) Announces the Retirement of KL&A Co-Founder John Leigh
OKEMOS, MI, April 11, 2023 – Kunz, Leigh and Associates (KL&A) announces the recent retirement of KL&A Co-Founder John Leigh as of March 31, 2023. Mr. Leigh began his career as a developer working on large mainframe systems before moving…

Team Building in a Remote Environment
Blog Barista: Dana Graham | June 15th, 2022 | Culture | Brew time: 5 min
Let me start by saying I don’t care for the term “work family.” I have a family I love, and they have absolutely nothing to do with my career. I want my work life to be its own entity. I like boundaries (and the George Costanza Worlds Theory). Certainly, I want to enjoy and trust my coworkers, and I want to feel supported and cared for…
0 Comments